
Pruning
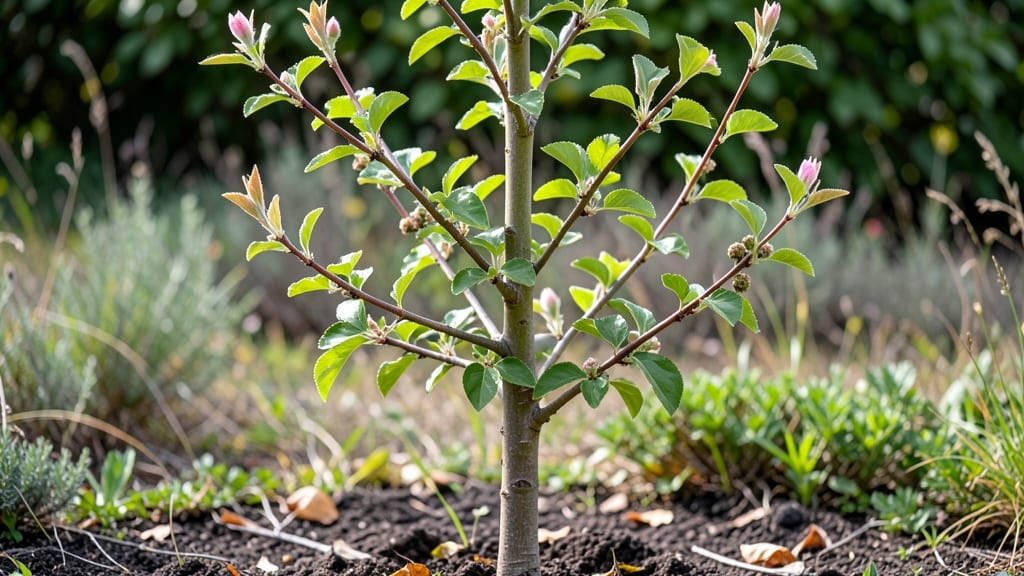
Encouraging apple tree new growth is how you turn a scraggly branch into a fruit-loaded powerhouse. ✂️ I learned the hard way that pruning isn't about hacking off dead wood—it's about directing energy where you want it, and the results are shocking.
Last summer, my neglected tree produced twice as many apples after just one season of targeted pruning.
The key is timing and technique: prune in late winter or early spring when the tree is still dormant, and always cut just outside the branch collar. This simple rule prevents damage that invites disease.
What you're really after is that bright green, fuzzy new growth that signals the tree is investing in fruit production, not just more branches.
You'll see the difference in just a few weeks—thicker stems, more leaves, and buds forming where you want them. The trade-off? Less immediate shade and a slightly less "full" look for a year, but that's the price of long-term fruit bounty.
My tree now has branches so sturdy they hold apples without sagging.
This works for any apple variety, from dwarf to standard, though smaller trees need gentler pruning. The same principles apply whether you're shaping a young tree or rejuvenating an old one. Here's how to do it right without overdoing it.
📚 In This Guide
- What you need
- Instructions
- Tips and common mistakes
- Wrapping up and next steps
What you need
- ● Pruning shears – Bypass pruners (5-8 inch blades) for clean cuts on small branches.
- ● Loppers – 18-24 inch handles for thicker branches (½–2 inches in diameter).
- ● Pruning saw – For branches over 2 inches thick (avoid bolt cutters—they crush wood).
- ● Rubbing alcohol (70% isopropyl) – 1 small bottle to sterilize tools between cuts (prevents disease spread).
- ○ Pruning sealant (optional) – Latex-based or tree wound dressing for large cuts (controversial but helpful for some growers).
- ● Gloves – Garden or leather gloves to protect hands from thorns and sap.
- ● Safety glasses – For debris protection when working overhead.
- ● Know your tree’s age & variety – Young trees (light pruning (20-30% of branches), while mature trees benefit from structured shaping.
- ● Best time to prune – Late winter or early spring (just before buds swell) for dormant season pruning. Avoid pruning in fall (increases disease risk).
- ● Weather check – Choose a dry, calm day (no rain forecast for 24 hours).
- ● Clear the workspace – Remove weeds, debris, and low-hanging branches within a 5-foot radius of the tree.
- ● ✨ Sharpen your tools – Dull blades tear wood, inviting disease. Hone shears with a file or sharpening stone before starting.
- ● 🌡️ Work in layers – For thick branches, make two cuts: the first 6–12 inches from the base, then the final cut just outside the branch collar.
- ● 🎯 Bag or recycle cuts – Remove pruned branches from the area to reduce disease risk and keep your garden tidy.
Step-by-Step guide to encouraging apple tree new growth
Here's how I transform weak, sparse branches into vigorous, fruit-bearing limbs—no fancy tools needed.
🌱 Step 1: Prune Last Year's Growth to Stimulate New Shoots
Start by removing last year's weak or crossing branches—these compete with new growth. Use clean, sharp pruners to make cuts just above a bud or outward-facing branch. I always cut at a 45-degree angle about ¼ inch above the bud to prevent water from pooling and rotting the wound. This encourages the tree to focus energy on fresh, healthy shoots.
Look for dead wood (gray/brown, no leaves) or branches growing inward—they'll never produce fruit and block sunlight. Remove these first. You'll see the tree's structure become more open, letting light reach the center where new growth will thrive. Aim to remove no more than 25% of the tree's canopy in one season to avoid shocking it.
☀️ Step 2: Thin Out Overcrowded Branches for Better Airflow
New growth needs good airflow to prevent disease, so thin branches that are too close together. Focus on the outer canopy where sunlight hits strongest. I remove one branch per cluster, keeping the strongest, most upright shoot. You'll know you're doing it right when you can see light filtering through the branches—this signals the tree to grow outward instead of inward.
Pay special attention to suckers (shoots growing from the base or trunk). These drain energy from the main branches. Snip them at the base with clean pruners. If you leave them, they'll steal nutrients meant for fruit production. After thinning, step back and admire how much more open the tree looks—this is your reward for setting up success.
💧 Step 3: Apply Fertilizer and Water Deeply to Spark Growth
After pruning, feed the tree with a balanced fruit-tree fertilizer (10-10-10 ratio works well). Spread it evenly under the drip line (the outer edge of the tree's branches) and water deeply to activate the nutrients. I use a soaker hose for 30 minutes to ensure moisture reaches the roots without wasting water. This step is critical—new growth needs phosphorus for root development and potassium for disease resistance.
Water the tree once a week for the first month after pruning, then adjust based on rainfall. The soil should be 2-3 inches deep and moist but not soggy. You'll know you're on track when you see new leaf buds swelling within 2-3 weeks. If the ground feels dry at 2 inches down, it's time to water again.
✂️ Step 4: Monitor and Prune New Growth as It Emerges
Once new shoots appear, watch for vigorous vertical growth (called "water sprouts"). These grow straight up and rarely produce fruit. Pinch them back when they're 6-8 inches tall to encourage branching. Use your fingers or small pruners to make the cut just above a leaf node. This redirecting of energy leads to more horizontal branches, which bear fruit better.
Also, remove any shoots growing from the trunk (epicormic buds) as they appear. These are the tree's way of trying to grow a new trunk, but they weaken the main structure. You'll see the tree's energy shift to the outer branches within weeks, resulting in stronger limbs ready for fruit production. Regular checks every 2-3 weeks keep the tree healthy and productive.
Tips & tricks for encouraging apple tree growth
Transforming weak branches into fruit-bearing powerhouses takes a few key insights—here's how I make it work every time.
Pruning Precision: In Step 1, when making those 45-degree cuts above the bud, I use a small piece of masking tape as a guide to mark the exact spot. This ensures consistency—every cut should be about ¼ inch above the bud, not closer. I've ruined too many pruning sessions by eyeballing it, so trust me on this: precision prevents the tree from wasting energy on uneven wounds. The goal is clean cuts that heal quickly so the tree can focus on new growth.
Seasonal Timing Secret: I always prune in late winter or early spring, just before buds swell but before leaves appear. This timing lets the tree heal before the growing season kicks in. If you're in a warmer climate, aim for late winter when the tree is still dormant. The key is to prune when the tree is asleep but about to wake up—this gives it maximum energy to produce new shoots.
Watering Wisdom: That 30-minute soaker hose session in Step 3 is non-negotiable for me. I set a timer and let it run continuously—this ensures water penetrates deeply without runoff. After pruning, the tree's root system needs extra moisture to support new growth. I also water in the morning so any excess moisture evaporates during the day, preventing fungal issues. The soil should stay consistently moist at 2-3 inches deep, not soggy.
Monitoring Made Easy: For Step 4, I mark my calendar with reminders every 2-3 weeks to check for water sprouts. I use a small notepad to record which branches are producing new growth and which need attention. This system helps me stay consistent without feeling overwhelmed. When you see those first tiny leaves appearing, you'll know your efforts are paying off—those are the signs of strong, healthy new branches ready to bear fruit.
Pro Tips for Apple Tree New Growth
- Transforming weak branches into fruit-bearing powerhouses takes a few key insights—here's how I make it work every time.
- Pruning Precision: In Step 1, when making those 45-degree cuts above the bud, I use a small piece of masking tape as a guide to mark the exact spot.
- Seasonal Timing Secret: I always prune in late winter or early spring, just before buds swell but before leaves appear.
Frequently asked questions
Got questions about nurturing your apple tree’s new growth? You’re not alone! Here are answers to the most common ones—so you can prune with confidence and watch your tree thrive.
When is the best time to prune for new growth?
Prune dormant trees in late winter or early spring (before buds swell) to encourage strong new growth. For established trees, light pruning can happen in summer after harvest to shape branches. Avoid heavy pruning in fall—it stresses trees and invites disease.
How much can I cut back without harming the tree?
Never remove more than 25% of the tree’s canopy in one season. For young trees, aim for 15-20% to avoid shock. Focus on dead, crossing, or overcrowded branches first—this keeps energy flowing to healthy new growth.
What if my pruned branches aren’t growing back?
Check for three common culprits:
- Disease/fungus: Discolored cuts or ooze? Clean tools with rubbing alcohol and apply pruning sealant.
- Over-pruning: If you cut too aggressively, the tree may prioritize recovery over growth. Scale back next time.
- Poor timing: Pruning too late in spring (after blooms) can stunt new shoots.
Fertilize lightly with balanced 10-10-10 if growth is slow.
Can I prune apple trees without shears?
Yes! For small branches (½-inch thick), use:
- Hand saws (for thicker limbs)
- Bypass pruners (clean cuts for healing)
- Even a sharp knife (sanitized!) in a pinch.
Pro tip: Avoid tearing bark—always cut at a 45° angle just outside the branch collar.
Why does my new growth look weak or leggy?
Leggy or sparse new growth often signals:
- Too much shade: Thin the canopy to improve sunlight exposure.
- Over-fertilizing nitrogen: Switch to a low-nitrogen, high-phosphorus fertilizer (e.g., 5-10-10) to boost root strength.
- Pests: Check for aphids or mites sucking sap. Spray with neem oil if needed.
Train branches with spreaders or stakes to encourage sturdy growth.
Wrapping up and next steps
Nurturing your apple tree’s new growth is the key to a thriving orchard—stronger branches, healthier fruit, and bountiful harvests! By pruning strategically, you’re not just shaping the tree; you’re investing in its long-term vitality. Now’s your chance to roll up those sleeves and give your tree the care it deserves!
Ready to take action? Start by observing your tree weekly—watch for those fresh, vibrant shoots and prune with confidence. Need a refresher? Review our pruning guide or join a local gardening group for hands-on tips. Your future harvest (and happy tree!) will thank you! 🌱🍏