
Container Gardens
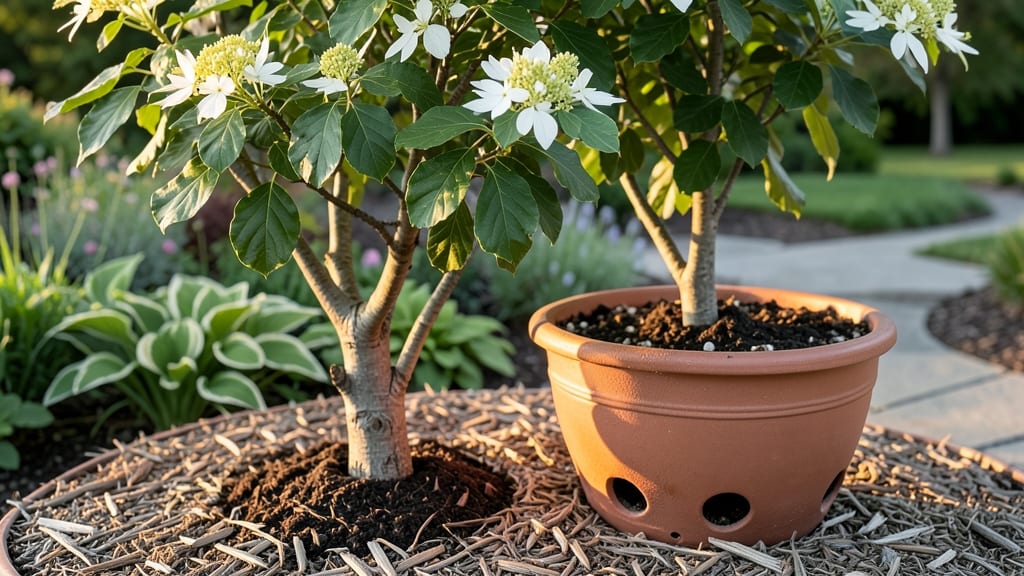
A dogwood tree in a container brings springtime beauty to patios, balconies, and small yards—without needing a full landscape. 🌿 I’ve grown mine for five years now, and the key is choosing the right dwarf variety (like ‘Taylor’ or ‘Compact Vision’) and giving it the proper care from day one.
The right setup makes all the difference: a 15- to 20-gallon container with drainage holes, well-draining soil, and a spot with 4-6 hours of morning sun. Overwatering is the #1 killer—let the top 2 inches dry out between waterings, and reduce in winter when growth slows.
You’ll love how these trees reward patience with stunning blooms in spring, glossy foliage all summer, and even red berries in fall. Prune lightly after flowering to shape, and fertilize lightly in spring—no heavy feeding needed. Perfect for urban spaces, small yards, or even as a striking houseplant.
With the right care, your container dogwood will thrive for decades, bringing year-round grace to any spot.
📚 In This Guide
- What you need
- Instructions
- Tips and common mistakes
- Wrapping up and next steps
What you need
- ● Container: A large, well-draining pot (at least 18-24 inches in diameter and depth) with drainage holes. Opt for fabric grow bags or ceramic/terracotta pots for aesthetic appeal.
- ● Dwarf Dogwood Tree: Choose a cultivar like ‘Cornus florida ‘Rubra’ or ‘Cherokee Brave’ (hardy to zones 5-9). Ensure it’s container-grown or a bare-root sapling (3-5 gallons in size).
- ● Potting Mix: A high-quality, well-draining blend (e.g., 50% peat moss, 30% perlite, 20% compost) or a pre-mixed acid-loving plant soil (pH 5.5-6.5).
- ● Mulch: 3-4 inches of pine bark fines or shredded bark to retain moisture and regulate temperature.
- ● Slow-Release Fertilizer: A balanced, organic fertilizer (e.g., 10-10-10 or 5-5-5) designed for acid-loving plants.
- ● Pruning Tools: Bypass pruners (sterilized with rubbing alcohol) and sharp shears for shaping.
- ● Watering Can or Hose: With a gentle spray nozzle for even hydration.
- ● Self-Watering System: A wicking mat or reservoir tray to reduce manual watering.
- ● Container Saucer: A tray or cache pot to catch runoff and protect surfaces.
- ● Epsom Salt: For magnesium boosts (1 tbsp per gallon of water, monthly during growing season).
- ● Decorative Stones or Moss: To enhance aesthetics and retain moisture.
- ● Winter Protection: Burlap wrap or frost cloth for colder climates (zones 5-6).
Step-by-step guide to growing a dwarf dogwood in containers
Here's how to keep your dwarf dogwood thriving in pots for years of elegant blooms and seasonal interest.
🪴 Step 1: Select the Right Container and Drainage
Choose a container at least 18-24 inches wide and deep—dogwoods need room for root expansion. I prefer glazed ceramic or high-quality plastic pots because they retain moisture better than terra cotta in colder months. The container must have drainage holes; if yours doesn't, drill 3-4 ½-inch holes in the bottom to prevent root rot.
Line the bottom with 2-3 inches of gravel or broken pottery to create an air pocket. This prevents water from pooling while still allowing excess moisture to escape. The gravel layer also mimics the tree's natural preference for well-drained soil. Place the pot on a saucer or tray to catch any drainage.
🌱 Step 2: Prepare the Soil Mix for Optimal Growth
Use a blend of 50% high-quality potting soil, 30% compost, and 20% perlite or coarse sand to create a loose, well-aerated mix. Dogwoods thrive in slightly acidic soil with a pH between 5.0 and 6.5. If your soil tests higher, mix in 1 cup of peat moss per gallon of mix to lower the pH naturally.
Fill the container to 2 inches below the rim, leaving room for the root ball and mulch. Tap the pot gently to settle the soil without compacting it. The mix should feel like a damp sponge—light enough for roots to penetrate but still able to hold moisture. Avoid garden soil; it compacts in containers and suffocates roots.
☀️ Step 3: Plant and Position for Seasonal Success
Remove the dwarf dogwood from its nursery pot and loosen the roots gently if they're circling. Position the tree in the center of the container so it has equal space to grow outward. The top of the root ball should sit 1 inch below the container's rim to allow for watering and mulch. Backfill with your prepared soil mix, pressing lightly to eliminate air pockets.
Place the container in a location that receives full sun to partial shade—at least 4-6 hours of morning sun and afternoon shade during hot summers. Dogwoods appreciate dappled light, so a spot under a large tree or on a shaded patio works well. In winter, move the pot to a sheltered area if temperatures drop below 10°F.
💧 Step 4: Water and Mulch for Container-Specific Needs
Water deeply until moisture runs out the drainage holes, then wait until the top 2 inches of soil feel dry before watering again. Containers dry out faster than ground soil, so check moisture daily during the first month and every 2-3 days afterward. Avoid letting the soil stay soggy; dogwoods hate wet feet but also won't tolerate drought.
Spread a 2-inch layer of organic mulch (like bark chips or shredded leaves) over the soil surface, keeping it 2 inches away from the trunk. Mulch retains moisture, regulates soil temperature, and prevents weeds. Refresh the mulch layer every 3-4 months or as it breaks down. In winter, add an extra 1-2 inches of mulch to insulate roots from freezing temperatures.
✂️ Step 5: Prune and Fertilize for Long-Term Health
Prune your dogwood in late winter or early spring before new growth begins. Remove any dead, damaged, or crossing branches using clean, sharp pruners. Cut just above a bud or branch junction to encourage healthy regrowth. Avoid heavy pruning—dogwoods respond best to light shaping. You'll know you've pruned correctly when the tree retains its natural, graceful form.
Fertilize in early spring with a balanced, slow-release fertilizer (like 10-10-10) mixed at half-strength. Apply the fertilizer around the drip line of the tree, keeping it 3 inches away from the trunk. Water thoroughly after fertilizing to help nutrients penetrate the soil. Avoid fertilizing in fall or winter, as new growth can be damaged by late-season cold snaps.
Tips & tricks for perfect dwarf dogwood container care
These pro insights will help you avoid common pitfalls and maximize your dwarf dogwood's potential in containers.
Container Size Matters: While the instructions call for 18-24 inches, I've found that larger containers (up to 28 inches) give roots more room to establish before needing repotting. The extra space also helps maintain moisture levels during hot summer months. Just ensure the new container still has proper drainage—this is non-negotiable for container-grown dogwoods.
Soil pH Precision: Testing your soil pH is worth the investment—dogwoods are particular about their slightly acidic environment (5.0-6.5). If your mix tests above 6.5, add the recommended 1 cup of peat moss per gallon, but mix it thoroughly. I've seen pH levels drop by 0.5-1.0 points with this adjustment, making a noticeable difference in foliage health. For quick testing, use a simple liquid pH test kit available at garden centers.
Seasonal Positioning Strategy: The instructions mention moving your dogwood to sheltered areas when temperatures drop below 10°F, but here's what nobody tells you—rotate the pot 180 degrees every few weeks during growing season. This prevents one-sided growth toward the light source, keeping your tree's shape balanced and symmetrical. In winter, place the pot against a south-facing wall where it can absorb reflected sunlight without direct wind exposure.
Watering Wisdom: The 2-inch soil dryness check is spot-on, but I've learned to water in the morning rather than evening. This gives the soil time to dry slightly during the day, reducing risk of fungal issues. For containers, I also recommend using a moisture meter—these $10 tools take the guesswork out of watering and prevent both over- and under-watering. Dogwoods in containers are particularly sensitive to inconsistent moisture levels.
Pro Tips for Dogwood Tree In Container
- These pro insights will help you avoid common pitfalls and maximize your dwarf dogwood's potential in containers.
- Container Size Matters: While the instructions call for 18-24 inches, I've found that larger containers (up to 28 inches) give roots more room to establish before needing repotting.
- Soil pH Precision: Testing your soil pH is worth the investment—dogwoods are particular about their slightly acidic environment (5.0-6.5).
Frequently asked questions
Got questions about growing a dogwood tree in a container? You’re not alone! Here are answers to the most common concerns—from pruning to overwintering—so you can keep your dwarf dogwood thriving year-round.
Can a dogwood tree really thrive in a container long-term?
A dwarf variety (like ‘Taylor’ or ‘ Ivory Halo’) can thrive in containers for years if given the right care—proper drainage, regular watering, and occasional root pruning. Just avoid overcrowding; upgrade to a larger pot (15–20 gallons) every 2–3 years to accommodate growth. With the right mix of well-draining soil and balanced fertilizer, your dogwood will reward you with stunning blooms and foliage for decades!
How do I protect my potted dogwood from winter damage?
Container-grown dogwoods are more vulnerable to cold snaps. Move pots to a sheltered spot (like a garage or against a south-facing wall) before temps drop below 20°F (-7°C). Wrap the pot in bubble wrap or use a tree blanket to insulate roots. Water thoroughly before winter and avoid fertilizing until spring—hydrated roots handle frost better!
Why isn’t my dogwood blooming this year?
Dogwoods need full sun to partial shade (6+ hours of light) and consistent moisture to bloom. Check these first:
- Light: If placed in deep shade, move it closer to a sunny spot.
- Water: Containers dry out fast—water when the top 1–2 inches of soil feel dry.
- Age: Young trees (under 3 years) may skip blooming while establishing roots.
- Fertilizer: Use a low-nitrogen, high-phosphorus formula in early spring to encourage flowers.
Can I grow a dogwood in a container without a saucer?
While saucers help catch runoff and reduce evaporation, they’re not mandatory. If skipping one, opt for a pot with self-watering features or place it on a tray of pebbles to wick up moisture. Just monitor soil moisture closely—container-grown dogwoods dry out 3x faster than in-ground plants. Pro tip: Group pots together to create a microclimate that retains humidity!
What’s the best soil mix for a potted dogwood?
Dogwoods hate soggy roots but need nutrients to thrive. Mix 50% high-quality potting soil with 30% perlite or pumice (for drainage) and 20% compost or peat moss (for moisture retention). Avoid garden soil—it compacts and suffocates roots. For extra insurance, add a handful of orchid bark to improve aeration. Fluff the mix before planting to avoid compaction!
My dogwood leaves are yellowing—what’s wrong?
Yellow leaves usually signal overwatering or nutrient deficiency. Check these fixes:
- Drainage: Ensure the pot has holes and the soil isn’t staying soggy for >2 days.
- Fertilizer: Feed with a balanced liquid fertilizer (10-10-10) every 4–6 weeks in growing season.
- Pests: Inspect for aphids or spider mites on undersides of leaves.
- pH: Test soil pH—dogwoods prefer 5.5–6.5; amend with sulfur if too alkaline.
Wrapping up and next steps
Growing a dogwood tree in a container is a rewarding way to bring nature’s elegance to your patio, balcony, or garden. With the right dwarf variety, proper care, and a little patience, you’ll enjoy stunning blooms and lush foliage year after year.
Whether you’re a seasoned gardener or just starting out, this guide has given you the tools to succeed—so roll up your sleeves and get planting!
🌱 Next step: Pick your favorite dwarf dogwood variety, gather your supplies, and start nurturing your miniature masterpiece today! Your future self (and your garden) will thank you. 😊