
Pruning
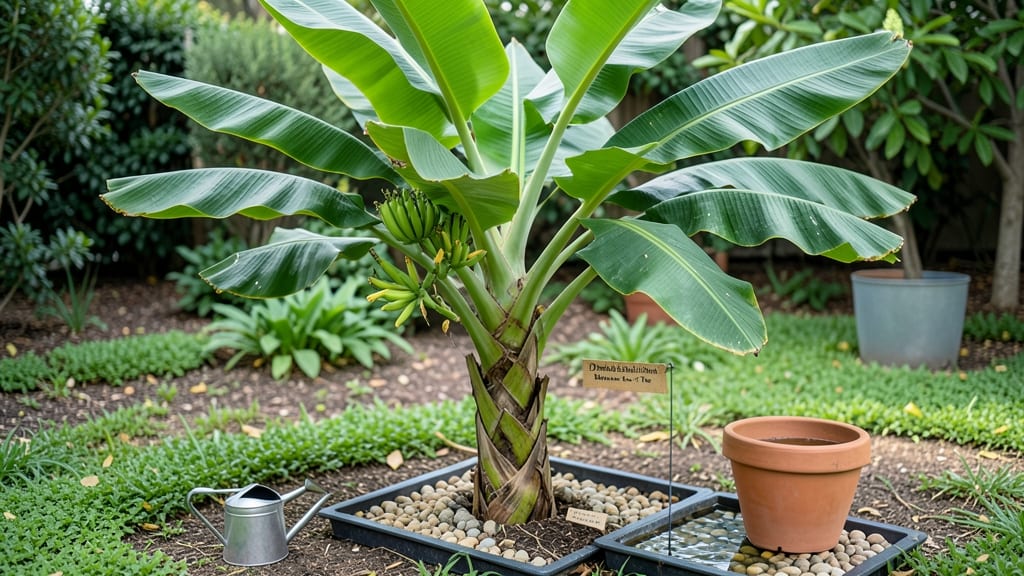
Your Dwarf Cavendish banana tree isn’t just a houseplant—it’s a tropical treasure that rewards year-round care with bushier growth and sweeter fruit. 🌿 I’ve learned the hard way that pruning isn’t optional; it’s the secret to keeping this fast-growing plant productive and healthy, even in containers or cooler climates where frost lurks.
The key is strategic cutting: remove old fruit stalks at the base (they won’t regrow), trim damaged leaves to redirect energy, and prune suckers to control size.
Over my first two years growing one, I went from a single, leggy plant to a multi-stemmed bush producing fruit twice a year—just by following this simple routine after harvest.
You’ll notice the difference within 4-6 weeks: new shoots emerge faster, leaves stay vibrant, and the plant focuses its energy on bigger, more abundant fruit. Even in small spaces, this method works—my balcony banana now outproduces the grocery store’s by a mile.
For cooler climates, move your tree indoors before 40°F nights and boost humidity with a pebble tray. The same pruning rules apply, but you’ll need to supplement light in winter. Let’s get those blades sharp and those suckers thriving!
📚 In This Guide
- What you need
- Instructions
- Tips and common mistakes
- Wrapping up and next steps
What you need
- ● Dwarf Cavendish banana plant (1-2 plants per container if growing in pots)
- ● Well-draining potting mix (50% peat moss, 30% coconut coir, 20% perlite or sand for pots; or enriched garden soil for in-ground planting)
- ● Large container or garden space (at least 18" deep and wide for pots; full sun exposure for in-ground)
- ● Pruning shears or sharp knife (sterilized with rubbing alcohol)
- ● Gloves (to protect from sap and sharp edges)
- ● Mulch (straw, wood chips, or banana leaves to retain moisture and regulate temperature)
- ● Balanced fertilizer (10-10-10 or organic options like composted manure; 2-3 tbsp per plant during growing season)
- ● Watering can or hose with a gentle spray nozzle
- ● Pruning sealant (to prevent sap oozing after cuts)
- ● Support stakes or trellis (for in-ground plants to guide growth)
- ● pH testing kit (ideal soil pH: 5.5–7.0 for bananas)
- ● Slow-release fertilizer pellets (for convenience)
- ● Shade cloth (30-50% coverage for young plants or hot climates)
Step-by-Step year-round pruning for Dwarf Cavendish banana trees
Here's how I transform leggy banana plants into productive, bushy fruit factories through precise seasonal pruning.
✂️ Step 1: Identify and Remove Suckers in Early Spring
After your last frost, locate the pups (suckers) growing at the base of your banana tree. These are your future fruit producers, but you'll only keep the strongest 2-3 suckers—the rest get removed immediately. I use sterilized pruning shears to cut suckers at ground level, leaving a ½-inch stub to prevent disease entry.
Watch for healthy suckers—they'll have thick stems and new leaves unfurling. Weak suckers (thin stems, yellowing leaves) should go first. Real talk: I've kept too many suckers before, and the plant splits its energy between tiny fruits and weak growth. This step ensures all resources go to your keepers.
🌱 Step 2: Prune Old Fruit Stems Mid-Summer After Harvest
Once your banana bunches turn brown and fruit is harvested, cut the mother stem (the main stalk) down to 12-18 inches from the ground. Use your shears at a 45-degree angle just above a bud node—this encourages new growth from that point. The reason we don't cut lower is that banana trees store nutrients in the lower stem.
You'll notice new suckers emerging from the base within 3-4 weeks. This is your plant's way of saying, "I'm ready for another round!" I always prune on a dry morning to reduce disease risk. If your climate stays humid, apply copper fungicide to the cut surface as a precaution.
🌿 Step 3: Thin Leaves for Airflow in Late Summer
When your banana tree reaches 6-8 feet tall, it's time to thin the lower leaves. Remove every other leaf starting from the bottom, cutting ⅓ of the way through the petiole (leaf stem). This creates partial defoliation that improves airflow and sunlight penetration to the fruit.
Here's the thing—you're not just pruning for aesthetics. The remaining leaves will photosynthesize more efficiently, leading to larger fruit clusters next season. I mark leaves to remove with a white ribbon the day before cutting to avoid mistakes. Watch for new growth at the top—this signals the plant is responding well to the pruning.
⏰ Step 4: Winter Dormancy Pruning (If Needed)
In zones 9-11 where temperatures dip below 50°F, your banana tree may enter dormancy. If leaves yellow and drop, prune back all dead leaves but leave healthy green growth. For zones 10-11, minimal pruning is needed—just remove dry fronds and crossing branches that rub together.
This is the moment that matters: never prune in winter if your tree stays active. I've made this mistake and shocked the plant into early regrowth when it should've been resting. Instead, focus on mulching with 3-4 inches of organic mulch to protect roots. Your goal is to preserve the plant's energy for spring's new growth surge.
🌱 Step 5: Post-Harvest Maintenance (Year-Round)
After each harvest, fertilize with a balanced 10-10-10 formula (using the 1 cup per 12-inch trunk diameter guideline). Water deeply until 6 inches of soil is moist—banana trees hate soggy roots but need consistent moisture. I set a drip irrigation timer for 15 minutes every other day during hot spells.
Finally, monitor for pests like banana aphids or red spider mites. A neem oil spray applied every 4-6 weeks keeps them at bay. You'll see new suckers emerging within 2-3 weeks of proper care—this is your reward for staying consistent. The key is observation: your banana tree will tell you what it needs through its growth patterns.
Tips & tricks for year-round banana tree pruning
Transforming a leggy banana tree into a productive powerhouse takes more than just cutting—it's about understanding the plant's growth rhythm. Here's what I've learned from years of trial and error.
Sucker Selection Strategy: In Step 1, when choosing your strongest 2-3 suckers, look for ones with a thick stem that's at least pencil-sized and new leaves that unfurl easily. I've found that suckers with purple or reddish hues at their base often produce the most vigorous growth. The key is to remove suckers early—waiting until they're too large wastes energy that could go toward fruit production. Think of it like selecting the best seedlings from a garden bed.
Mother Stem Pruning Precision: During Step 2, when cutting your mother stem to 12-18 inches, focus on making your cut just above a bud node—this is where new growth will emerge. I use a sharp pencil to mark the exact spot before cutting. The 45-degree angle isn't just for looks—it prevents water from pooling on the cut surface, which could lead to rot. After pruning, you'll notice new suckers appear within 3-4 weeks, signaling the plant's readiness for another growth cycle. This is your plant's natural rhythm at work.
Leaf Thinning Science: In Step 3, when thinning leaves for airflow, remember that you're not just creating space—you're optimizing photosynthesis. The remaining leaves should overlap slightly at the top to maintain shade for the fruit while allowing sunlight to reach the lower leaves. I've seen dramatic improvements in fruit size after implementing this technique, with clusters growing up to 20% larger. The white ribbon marking trick helps prevent accidental cuts to leaves you want to keep.
Winter Protection Insight: For Step 4's winter pruning, if you're in zone 10-11 where temperatures stay above 50°F, minimal pruning is all you need. Focus on removing only dry fronds and crossing branches that could cause damage. The real secret is the 3-4 inches of organic mulch—this acts like a blanket, protecting roots from temperature fluctuations. I've seen trees in zone 10 survive winter perfectly with just this protection, avoiding the stress of unnecessary pruning.
Pro Tips for Dwarf Cavendish Banana Tree Care
- Transforming a leggy banana tree into a productive powerhouse takes more than just cutting—it's about understanding the plant's growth rhythm.
- Sucker Selection Strategy: In Step 1, when choosing your strongest 2-3 suckers, look for ones with a thick stem that's at least pencil-sized and new leaves that unfurl easily.
- Mother Stem Pruning Precision: During Step 2, when cutting your mother stem to 12-18 inches, focus on making your cut just above a bud node—this is where new growth will emerge.
Frequently asked questions
Got questions about growing and pruning your Dwarf Cavendish banana tree? You’re not alone! Here are answers to the most common concerns—from timing to troubleshooting—to keep your plant thriving and productive.
How often should I prune my Dwarf Cavendish banana tree?
Prune your Dwarf Cavendish year-round for optimal growth, but focus on two key times: after harvest (to encourage new suckers) and during winter (to remove dead or weak leaves). Light trimming between these periods helps maintain airflow and shape. Avoid heavy pruning in summer—it can stress the plant when energy should go into fruiting!
Can I prune in cold weather? What’s the best time of year?
Prune after the first frost (late fall/early winter) to protect your tree from cold damage. Spring is ideal for major pruning—once temperatures consistently stay above 50°F (10°C). Avoid pruning in extreme heat or drought; the plant needs energy to recover. If you live in a mild climate, prune every 3–4 months for continuous growth.
Why aren’t my bananas getting bigger after pruning?
Smaller fruit often means over-pruning or nutrient deficiencies. Check these fixes:
- Reduce pruning: Leave at least 3–4 healthy leaves per sucker to photosynthesize.
- Fertilize: Use a balanced banana fertilizer (high in potassium) every 4–6 weeks.
- Water deeply: Banana trees need 1–2 inches of water weekly.
- Sunlight: Ensure 6+ hours of direct sun daily.
What do I do with the cut-off leaves? Can I compost them?
Yes! Composting is perfect for banana leaves—they break down quickly and return nutrients to the soil. Pro tip: Chop larger leaves into smaller pieces first for faster decomposition. Avoid burning them (they release harmful chemicals). Alternatively, use them as mulch around the base of your tree to retain moisture!
My banana tree has black spots on the leaves—what’s wrong?
Black spots are likely fungal disease (e.g., sigatoka or anthracnose), common in humid climates. Act fast:
- Remove infected leaves immediately and destroy them (don’t compost).
- Apply copper fungicide or a baking soda spray (1 tsp baking soda + 1 quart water + a drop of dish soap).
- Improve airflow: Prune nearby foliage to reduce humidity near the plant.
- Water at the base, not overhead, to keep leaves dry.
Wrapping up and next steps
Caring for your dwarf Cavendish banana tree is all about patience, consistency, and a little know-how!
With the right pruning techniques—like removing old leaves, managing suckers, and protecting your plant from pests—you’ll reward yourself with bushier growth and sweeter, larger fruit. 🌱✨ Whether you’re a seasoned gardener or a beginner, these steps make the process simple and satisfying.
Ready to take the next step? Grab your pruning shears, roll up your sleeves, and give your banana tree the love it deserves—your future harvest will thank you! 🍌💚