
Pruning
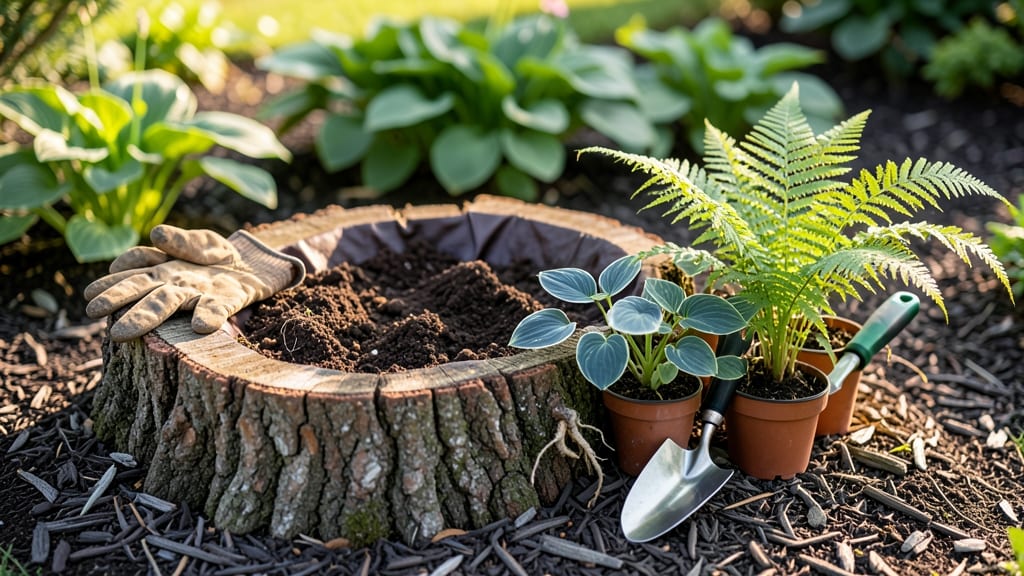
Transforming that old tree stump into a lush mini garden feels like magic—no digging, no mess, just instant vertical charm. 🌿 I’ve turned three stumps into thriving planters, and the best part? It takes less than an hour with supplies you likely already have.
The secret lies in the liner: a simple waterproof bag or heavy-duty plastic keeps soil contained while letting roots breathe. Fill it with moisture-retaining mix (equal parts potting soil and compost), then top with decorative rocks or mulch for a polished look.
Perfect for small gardens or urban spaces where every inch counts. By summer, your stump will burst with ferns, succulents, or even tiny herbs—no extra watering needed once established. The contrast of rough bark and vibrant greenery creates a focal point that rivals store-bought planters.
Works for any stump size, from 6-inch diameter to full-sized logs. Just match plant size to the stump’s width—smaller stumps hold annuals, larger ones support perennials or shrubs.
📚 In This Guide
- What you need
- Instructions
- Tips and common mistakes
- Wrapping up and next steps
What you need
- ● Tree stump: A freshly cut, clean stump (preferably from a non-toxic tree like maple, oak, or fruit trees). Ensure it’s completely dry (at least 6 months old) to avoid rot.
- ● Drill with hole saw attachment: A 1.5–2-inch hole saw (or a spade bit) for drainage—2–3 holes should do the trick!
- ● Screwdriver or hammer: For securing drainage plugs (if using) or nailing down liners.
- ● Landscape fabric or plastic liner: A waterproof liner (12–18 inches deep) to prevent soil leakage. Cut to fit snugly inside the stump.
- ● Potting soil or garden mix: 1–2 bags (1–2 cubic feet) of well-draining soil, depending on stump size.
- ● Mulch or decorative stones: 1–2 bags (for aesthetic appeal and moisture retention). Pine bark or gravel works great!
- ○ Paint or sealant (optional but fun!):strong> Non-toxic, outdoor-grade paint or wood sealant (e.g., AFM Safecoat) for a pop of color.
- ● Safety gear: Gloves, goggles, and a dust mask (especially if drilling into hardwood).
- ● Decorative accents: Mosaic tiles, LED string lights, or a miniature fence for a whimsical touch.
- ● Watering system: A self-watering reservoir (DIY with a plastic bottle) or a drip irrigation kit.
- ● Stump cap or lid: A fitted wooden or metal lid to cover the top for a polished look (great for succulents!).
- ● Plant markers: Chalkboard labels or upcycled bottle caps to name your greenery.
Step-by-Step guide to creating a tree stump planter
Transform that leftover stump into a charming, functional garden feature—here's how I turn it into a thriving mini-ecosystem every time.
🪴 Step 1: Clean and Prepare the Stump
Start by removing any loose bark or debris from the stump using a pruning saw or chisel. I like to work when the stump is dry so the wood doesn't slip—wear gloves to protect your hands from splinters. Scrape out any remaining wood pulp or old roots from the center cavity using a spoon or small trowel. This creates space for your soil and plants later.
For a deeper planter, use a drill with a wood bit to create drainage holes along the sides of the stump, about 1 inch in diameter and 2-3 inches deep. Space them 4-6 inches apart around the circumference. These holes prevent waterlogging while still allowing roots to access moisture. If your stump has a natural hollow center, skip this step—just make sure the bottom has at least one drainage hole.
💧 Step 2: Line and Fill with Soil Mix
Line the inside of the stump with a landscape fabric to prevent soil from washing out through the drainage holes. Cut the fabric to size and tuck the edges neatly into the cavity. This also helps block weeds from growing up through the stump's base. For a 4-inch-deep stump, you'll need about 2-3 gallons of well-draining potting mix—I blend 60% potting soil, 30% perlite, and 10% compost for optimal drainage and fertility.
Fill the stump with your soil mix, pressing it down gently in layers to eliminate air pockets. Leave about ½ inch of space at the top to prevent soil from spilling out when watering. For extra stability, you can secure the fabric lining with small nails or staples—just avoid piercing the drainage holes. This ensures your soil stays put while still allowing excess water to escape.
☀️ Step 3: Plant and Maintain Your Stump Garden
Choose plants that thrive in shallow, well-draining conditions—sedum, ferns, moss, or small ornamental grasses work beautifully. For a 4-inch-deep stump, select plants with shallow root systems and compact growth habits. Press the plants gently into the soil, spacing them 2-3 inches apart to allow room for growth. Water thoroughly after planting to help the roots settle.
Place your stump planter in a location that receives partial shade to full sun, depending on your plant choices. Ferns and moss prefer dappled shade, while sedum and ornamental grasses tolerate full sun. Water whenever the top ½ inch of soil feels dry—stump planters dry out quickly, so check daily during hot weather. Mulch the surface with orchid bark or fine gravel to retain moisture and suppress weeds.
✂️ Step 4: Seasonal Care for Long-Term Success
In spring, refresh the soil with a 1-inch layer of compost to replenish nutrients. Trim back any overgrown plants to maintain a neat appearance and encourage bushier growth. If your stump shows signs of drying out—like cracks forming—apply a waterproof sealant to the exterior to preserve its structure and extend its lifespan.
During winter, reduce watering but keep the soil slightly moist unless your plants are dormant. If you live in a cold climate, move the stump to a sheltered location or cover it with burlap to protect it from freezing temperatures. With proper care, your tree stump planter will remain a charming garden feature for years, providing a unique spot for small plants and adding rustic charm to your landscape.
Tips & tricks for perfect tree stump planters
Here's what nobody tells you about turning a simple stump into a stunning garden feature—these tricks make all the difference.
Preparation is Key: When cleaning your stump in Step 1, don't rush the scraping process. Use a spoon or small trowel to remove all wood pulp from the cavity—this creates vital space for your soil mix. I've found that stumps with deeper cavities (from larger trees) can hold up to 5-6 gallons of soil mix when properly cleaned out. This extra capacity lets you grow larger plants like small succulents or even tiny shrubs.
Drainage Strategy: The 1-inch diameter drainage holes in Step 1 are non-negotiable for healthy roots. If your stump has a natural hollow center, make sure the bottom has at least one hole—this prevents waterlogging that can rot plant roots. Pro tip: Place a small piece of landscape fabric over the drainage hole before adding soil to prevent it from washing out while still allowing water to escape.
Soil Mix Secrets: Your 60% potting soil, 30% perlite, 10% compost blend in Step 2 is perfect, but here's the upgrade: Add 1 cup of worm castings to the mix for extra nutrients. This boosts plant growth without altering the drainage properties. When pressing down the soil in layers, use the back of a spoon to gently compact it—this eliminates air pockets that could lead to uneven moisture distribution.
Plant Selection Wisdom: In Step 3, sedum and ferns are great starters, but consider adding air plants (tillandsias) for a modern twist—they don't need soil at all! For a woodland feel, mix in moss sheets that you can press into the soil around your other plants. Just remember: The shallower your stump, the more you'll need to focus on plants with compact root systems.
Pro Tips for Make Tree Stump Planter
- Here's what nobody tells you about turning a simple stump into a stunning garden feature—these tricks make all the difference.
- Preparation is Key: When cleaning your stump in Step 1, don't rush the scraping process.
- Drainage Strategy: The 1-inch diameter drainage holes in Step 1 are non-negotiable for healthy roots.
Frequently asked questions
Got questions about turning that old tree stump into a thriving planter?
You’re not alone! Here are answers to the most common queries—because even DIY projects need a little troubleshooting love.
Can I use any tree stump, or are some better than others?
Most hardwood stumps (oak, maple, or fruit trees) work great—they’re sturdy and rot-resistant. Softwoods like pine may decay faster. Avoid stumps with active fungus (like conks) or chemical treatments, as these can harm plants. If unsure, let the stump dry out for a few months before planting.
How long does it take for a tree stump planter to become usable?
Patience is key! If you’re hollowing out the stump, it’s ready immediately. But if you’re letting it decompose naturally (for a "living" planter), wait 6–12 months—this gives roots room to grow and the stump to soften. For faster results, mix in compost or mulch to speed up breakdown.
What if my stump planter gets too wet or dry?
Overwatering? Ensure the stump has drainage holes (if hollowed) or line it with landscape fabric. For dryness, mulch the top 2–3 inches deep to retain moisture. Grouping the planter with other plants creates a microclimate that helps regulate humidity. Pro tip: Add a saucer underneath to catch excess water!
Can I grow vegetables or herbs in a tree stump planter?
Shallow-rooted plants like herbs (basil, thyme), lettuce, or strawberries thrive here. Deeper-rooted veggies (like carrots) may struggle unless the stump is very large. Use lightweight, well-draining soil mixes and fertilize regularly. Just avoid heavy feeders like tomatoes—they need more space!
What if my stump planter starts smelling bad?
Smells usually mean rotting organic matter or stagnant water. Refresh the soil, add a layer of fresh mulch, and improve airflow by trimming overgrown plants. If the stump itself is decomposing too fast, consider lining it with plastic (with drainage holes) to slow decay. A sprinkle of baking soda can also neutralize odors!
Are there eco-friendly alternatives if I don’t want to use a stump?
No stump? No problem! Try:
- Cinder blocks (stacked with drainage holes)
- Old tires (painted and lined with landscape fabric)
- Gutters or troughs (repurposed with drainage)
- Hanging baskets (for herbs or flowers)
Wrapping up and next steps
Transforming a leftover tree stump into a vibrant planter is a rewarding way to breathe new life into your garden—and it’s easier than you think! 🌱 With just a few tools, some creativity, and the right plants, you’ve got a stunning, functional centerpiece that’s both practical and beautiful.
Now that you’ve mastered the steps, why not take it a step further? Experiment with different textures, colors, or even add solar-powered lights to make your planter truly one-of-a-kind!
Grab your gloves and get inspired—your garden’s next masterpiece is waiting! 🌿✨