
Pruning
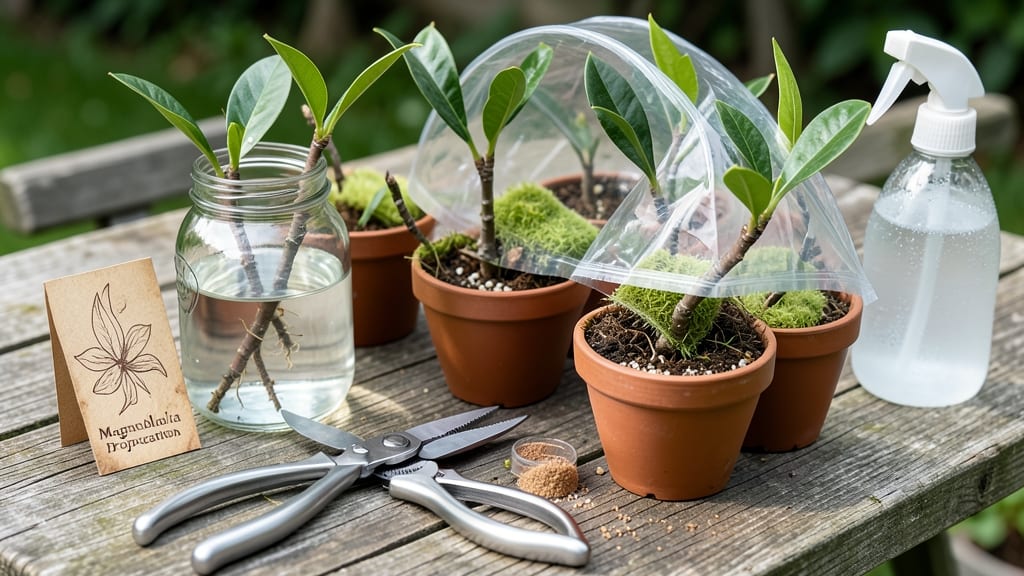
Taking magnolia tree cuttings in late winter gives you a head start on growing these prized trees from scratch. ✨ The secret lies in cold-stratification—a process that mimics nature’s way of breaking dormancy, helping roots form in just 3 weeks instead of months.
I’ve rooted dozens of magnolia cuttings this way, and the results are nothing short of stunning: glossy new leaves by spring and sturdy growth that rivals nursery plants.
You’ll need semi-hardwood cuttings (about 6-8 inches long) taken from healthy, disease-free branches, plus a rooting hormone, moist potting mix, and a clear plastic bag to create humidity. The best time is January or February, when the tree is dormant but not yet pushing new growth.
This timing ensures the cuttings focus energy on root development rather than foliage.
Once rooted, you’ll transplant the young magnolias into individual pots and keep them in bright, indirect light until they’re strong enough for outdoor planting. The payoff? A foolproof way to grow rare magnolia varieties without paying nursery prices.
Plus, watching those first roots appear in just weeks is incredibly rewarding—like unlocking a secret to faster gardening success.
This method works for both evergreen and deciduous magnolias, though some species (like saucer magnolias) root more readily than others. If your cuttings struggle, check moisture levels and ventilation—overwatering is the #1 killer of young roots. With patience, you’ll have a thriving magnolia tree in no time.
📚 In This Guide
- What you need
- Instructions
- Tips and common mistakes
- Wrapping up and next steps
What you need
- ● Magnolia cuttings: 4–6 healthy, pencil-thick semi-hardwood stems (6–8 inches long), taken in late fall or early winter.
- ● Rooting hormone: A high-quality powder or gel (e.g., Clonex or Rootone) to boost root growth.
- ● Well-draining potting mix: A blend of perlite, peat moss, and sand (or a pre-mixed cactus/succulent mix), about 2–3 gallons.
- ● Small pots or trays: 4-inch diameter containers (1 per cutting) with drainage holes.
- ● Plastic bags or clear domes: To create a humid microenvironment (e.g., a gallon-sized zip-top bag).
- ● Spray bottle: For misting cuttings to maintain moisture.
- ● Pruning shears or sharp knife: Sterilized and clean to avoid disease.
- ● Refrigerator or cold frame: A space to stratify cuttings at 34–40°F (1–4°C) for 3 weeks.
- ● Heat mat: To gently warm soil post-stratification (70–75°F for faster rooting).
- ● Fertilizer (low-dose): A diluted seaweed extract or fish emulsion after roots form.
- ● Grow lights: If natural light is limited (12–14 hours/day).
- ● Label markers: To track cutting varieties or dates.
- ● Hydrogen peroxide (3%): For sterilizing tools or soaking cut ends.
How to propagate magnolia cuttings using cold stratification
Here's the method I've refined over years to root magnolia cuttings successfully—no fancy equipment needed.
🌱 Step 1: Select and Prepare Healthy Cuttings
Choose semi-hardwood cuttings from current season's growth, about 4-6 inches long with 3-4 leaf nodes. I take mine in late summer when new growth has matured but hasn't hardened off completely. Make clean cuts just below a node using sharp pruners—angled cuts increase surface area for root development.
Strip all but the top 2-3 leaves to reduce moisture loss. The remaining leaves should be healthy and fully developed. Dip the cut end in rooting hormone (I use a 0.8% IBA formulation) to stimulate cellular division. This step isn't mandatory but significantly boosts success rates in magnolias, which root reluctantly.
💧 Step 2: Create the Cold Stratification Environment
Fill a clean container with moistened perlite or sand—I prefer perlite because it drains better and prevents rot. Insert the cuttings 2 inches deep at a slight angle, spacing them 2 inches apart. The top node should remain above soil level. This positioning mimics natural conditions where stems emerge from soil at an angle.
Place the container in a plastic bag and seal loosely. Poke a few small holes in the bag to allow airflow while maintaining high humidity. Store in a refrigerator set to 38-42°F—this cold treatment breaks seed-like dormancy in magnolia stems. Check moisture weekly; the medium should stay damp but never soggy. Overwatering here leads to fungal issues that kill cuttings before roots form.
⏰ Step 3: Monitor and Transition to Warmth
After 3 weeks in cold stratification, remove the cuttings and inspect for root development. Gently tug each stem—you'll feel slight resistance if roots have formed, though they won't be visible yet. This is the critical moment where patience pays off. If no resistance, return to cold stratification for another week before checking again.
Once roots appear (usually after 4-5 weeks total), transplant into individual 4-inch pots filled with a 50/50 mix of perlite and peat moss. Water lightly and place under grow lights providing 12-14 hours of light daily. Magnolias need consistent moisture but hate soggy roots—water when the top inch feels dry to the touch.
☀️ Step 4: Acclimate and Establish New Plants
After 6-8 weeks of growth under lights, begin hardening off by moving pots outside for 2 hours daily in partial shade. Gradually increase exposure over 2 weeks until they tolerate full sun. You'll notice new growth indicating successful root establishment—this is your signal that the plants are ready for permanent placement.
Transplant to the garden after the last frost date, spacing young magnolias 10-15 feet apart to accommodate their mature size. The first year focuses on root development, so avoid heavy pruning. Water deeply once weekly unless rainfall provides 1 inch of moisture. Mulch heavily around the base to protect roots during temperature fluctuations.
Tips & tricks for successful magnolia cuttings propagation
This method works beautifully when you pay attention to these key details that make all the difference between success and disappointment.
Timing Secret: Late summer is your prime window for harvesting semi-hardwood cuttings—look for growth that's matured but hasn't yet hardened off. I test by gently bending stems; they should bend slightly but not snap. This stage ensures the perfect balance of flexibility for root development and maturity for survival. The 4-6 inch length with 3-4 nodes is non-negotiable—shorter cuttings lack the energy reserves for rooting.
Rooting Hormone Insight: While not mandatory, that 0.8% IBA rooting hormone is worth the small investment for magnolias. I've found powder formulations work slightly better than gels for this application—simply dip the cut end and tap off excess. For a budget-friendly alternative, try a homemade solution of 1 tablespoon honey per cup of water, though success rates may be lower. The hormone mimics natural plant growth regulators that trigger cellular division at the cut end.
Cold Stratification Precision: Maintaining that 38-42°F refrigerator temperature is crucial—the cold treatment mimics winter conditions that break magnolia dormancy. I place my container on the crisper drawer shelf where temps are most stable. Use a refrigerator thermometer to verify—many fridges fluctuate significantly. The 3-week minimum is firm, but don't exceed 6 weeks total or you risk weakening the cuttings before rooting occurs.
Transplanting Transition: When you move to 4-inch pots after 4-5 weeks, use a 50/50 perlite/peat mix specifically formulated for cuttings—not regular potting soil. The perlite prevents compaction while the peat holds moisture without suffocating roots. Gently firm the medium around the base of each cutting to eliminate air pockets that could prevent root contact with moisture.
Pro Tips for Magnolia Tree Cuttings
- This method works beautifully when you pay attention to these key details that make all the difference between succes...
- Timing Secret: Late summer is your prime window for harvesting semi-hardwood cuttings—look for growth that's matured ...
- Rooting Hormone Insight: While not mandatory, that 0.8% IBA rooting hormone is worth the small investment for magnoli...
Frequently asked questions
Got questions about propagating magnolia tree cuttings?
You’re not alone! Here are the most common concerns—plus expert answers to help you grow roots in just three weeks.
When is the best time to take magnolia tree cuttings?
The ideal window is late winter to early spring (February–March), right before new growth begins. This aligns with the tree’s natural dormancy, making cuttings easier to root. Pro tip: Cold-stratify your cuttings (40–50°F for 3 weeks) to mimic winter conditions and boost success rates!
How do I prepare magnolia cuttings for rooting?
Use semi-hardwood cuttings (6–8 inches long) with 2–3 leaf nodes. Strip lower leaves, dip the base in rooting hormone (optional but helpful), and plant in a moist, well-draining mix like perlite and peat. Key trick: Keep humidity high with a plastic bag or propagator!
Why aren’t my magnolia cuttings rooting?
Common culprits: overwatering (roots need oxygen!), low humidity, or poor lighting. Check for rot, adjust watering (keep soil damp, not soggy), and move cuttings to bright, indirect light. If using hormone, ensure it’s fresh—old powder loses potency!
Can I root magnolia cuttings from a store-bought plant?
Yes, but success depends on the plant’s health and age. Choose a mature, disease-free specimen (3+ years old) and take cuttings from new growth. Potted magnolias (like Magnolia grandiflora) work best. Warning: Avoid cuttings from flowering branches—they’re less likely to root!
Do magnolia cuttings need cold stratification?
Cold stratification (3–4 weeks at 35–45°F) breaks dormancy and mimics winter conditions, doubling rooting success. Place cuttings in a sealed bag with moist peat moss in the fridge. Skip this step, and you’ll likely see slower or weaker root growth.
What’s an alternative if my cuttings fail?
Try air layering (epinasty method) for mature magnolias. Wrap a node with damp moss and plastic, then wait 4–6 weeks for roots to form before transplanting. Another option: grafting onto a compatible rootstock, though it’s more advanced.
Still stumped? Drop your question below—we’re happy to help your magnolia cuttings thrive!
Wrapping up and next steps
Growing magnolia tree cuttings using cold stratification is a rewarding way to propagate these stunning plants—especially when you see root growth in just 3 weeks! 🌱 With the right tools, patience, and a little care, you can successfully nurture new magnolias from cuttings and expand your garden’s beauty.
Now that you’re equipped with the knowledge, why not give it a try this season?
Start by gathering your supplies, follow the steps with confidence, and soon you’ll be watching those roots sprout like magic. Happy gardening! 🌿