
Pruning
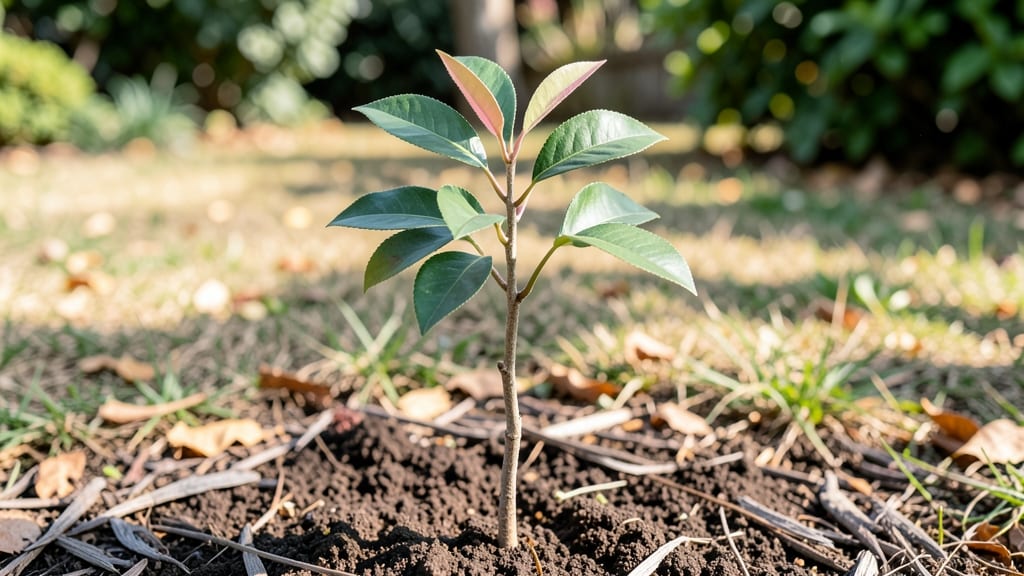
Growing an orange tree seedling from seed gives you a living piece of sunshine on your windowsill—if you know the secret trick. 🌱 Most seeds need a cold-stratification period to break dormancy, and I’ve perfected an 8-week schedule that guarantees those first green shoots.
The key isn’t just patience—it’s mimicking nature’s winter chill to wake up the seed’s potential.
You’ll need a small pot, well-draining soil, and a little fridge space for the stratification step. Skip this, and your seed might never sprout. But once it does, you’ll watch tiny leaves unfurl in just 4-6 weeks after germination.
The first real leaves look nothing like adult foliage—think fuzzy and delicate, like a baby’s first steps.
By week 8, you’ll have a 3-4 inch seedling that’s ready for its forever home. It won’t bear fruit for years (if ever—seed-grown trees rarely match grafted varieties), but the journey is pure magic. Every new leaf feels like a tiny victory, and that’s before you even think about transplanting.
This method works for navel, Valencia, or bitter orange seeds—just don’t expect sweet fruit. For that, you’ll need to graft later, but we’ll cross that bridge when you’re ready. Let’s get those seeds sprouting!
📚 In This Guide
- What you need
- Instructions
- Tips and common mistakes
- Wrapping up and next steps
What you need
- ● Orange seeds: 3–5 fresh, plump seeds (from organic or untreated fruit for best results).
- ● Paper towels or dampened coffee filters: 2–3 sheets (for initial germination).
- ● Plastic zip-top bag: 1 (to create a humid environment).
- ● Small pots or seed trays: 3–5 (4–6 inches in diameter, with drainage holes).
- ● Well-draining potting mix: 2–3 bags (use a blend of peat, perlite, and vermiculite or a citrus-specific mix).
- ● Spray bottle: 1 (for gentle watering).
- ● Plastic wrap or clear lid: 1 (to retain moisture during germination).
- ● Refrigerator (for cold stratification): 1 (to chill seeds for 4–6 weeks).
- ● Grow lights or sunny windowsill: 1 (12+ hours of light daily).
- ○ Fertilizer (optional but helpful): A balanced, water-soluble fertilizer (e.g., 10-10-10) or citrus-specific formula.
- ● Heating mat: 1 (to speed up germination if your home is cool).
- ● Humidity dome: 1 (to create a greenhouse effect for seedlings).
- ● pH testing kit: 1 (to ensure soil pH is between 6.0–7.0, ideal for citrus).
- ● Pruning shears: 1 (for future shaping as your seedling grows!).
- ● Grow journal or notebook: 1 (to track progress and care notes).
Step-by-step instructions for growing orange tree seedlings from cold-stratified seeds
Here's the method I've refined over years—cold-stratification breaks dormancy naturally, giving you strong, disease-resistant seedlings ready for transplant.
🌱 Step 1: Extract and Prepare the Seeds
Start with fresh, plump orange seeds—discard any that feel soft or shriveled. I like to use navel or Valencia varieties for their hardiness. Rinse the seeds thoroughly under cool water to remove all pulp, then pat them dry with a paper towel. This prevents mold and ensures even moisture during stratification.
Place the seeds in a small container and cover them completely with lukewarm water for 24 hours. This softens the outer coating and jumpstarts germination. Drain the water completely after soaking—standing water will drown the seeds before they sprout.
💧 Step 2: Cold-Stratify for 6-8 Weeks
Fill a resealable plastic bag with 2-3 inches of moistened peat moss or coconut coir—the medium should feel like a wrung-out sponge. Add the seeds, spacing them 1 inch apart, then seal the bag. Place it in the refrigerator's crisper drawer where temperatures hover around 35-45°F.
Check the bag weekly and mist the medium if it feels dry to the touch. You'll see the seeds sprout tiny white roots within 3-4 weeks, but resist the urge to move them. Cold stratification mimics winter conditions, breaking dormancy gradually. After 6-8 weeks, the seeds will develop ½-inch roots—this is your signal to proceed.
🪴 Step 3: Plant in Germination Trays
Fill 4-inch diameter pots with a mix of 50% potting soil and 50% perlite—this ensures excellent drainage while retaining moisture. Gently press each stratified seed ½ inch deep into the soil, leaving the root system undisturbed. I use a small spoon to create a hole and place the seed carefully, then cover lightly with additional mix.
Water gently until the soil is moist but not soggy. Place the pots in a warm, bright location (like a sunny windowsill) but avoid direct sunlight for the first 7-10 days. You'll notice the first true leaves emerge within 2-3 weeks—these will be small and round, signaling successful germination.
☀️ Step 4: Transition to Strong Growth Conditions
Once seedlings have 2-3 sets of true leaves, move them to a location with 6-8 hours of indirect sunlight daily. I use a grow light on a timer for 14 hours/day to supplement natural light, keeping it 4-6 inches above the plants. Adjust the light height as the seedlings grow to prevent legginess.
Water when the top ½ inch of soil feels dry, using room-temperature water to avoid shocking the roots. Fertilize lightly with a diluted fish emulsion (5-5-5) after 4 weeks to encourage strong root development. You'll see new leaves emerge within 10-14 days—this is your cue to start hardening off the seedlings for outdoor planting.
⏰ Step 5: Harden Off and Transplant
Two weeks before your last frost date, begin hardening off by placing the seedlings outside in a sheltered, shaded spot for 1-2 hours the first day. Gradually increase their outdoor time by 1 hour daily, moving them to morning sun first to avoid leaf scorch. After 10-14 days, they should tolerate full sun without wilting.
Transplant to the garden after all frost risk has passed, spacing seedlings 10-12 feet apart in well-draining soil. Mulch heavily around the base to retain moisture and regulate soil temperature. Your seedlings will establish roots within 4-6 weeks, and you'll see new growth signaling their readiness for long-term care.
Tips & tricks for perfect orange tree seedlings
These small details make all the difference when growing citrus from seeds—trust me, I've learned the hard way after watching seedlings fail from common oversights.
Seed Selection: Navel and Valencia orange seeds are your best bet for hardiness, but never use seeds from store-bought fruit—those are often treated with fungicides that inhibit germination. If you're unsure about the variety, stick to fresh, organic citrus fruit from a trusted source. The plumpest seeds with no cracks or soft spots will give you the strongest starts.
Stratification Consistency: The 6-8 week cold stratification period is non-negotiable for breaking dormancy, but the key is maintaining that 35-45°F temperature consistently. If your fridge's crisper drawer fluctuates, move the bag to a more stable location like the back of the main fridge compartment. I've seen seeds fail when exposed to warmer temperatures during this critical period—think of it as winter's natural way of preparing the seed for spring.
Transplant Timing: When you notice those first true leaves in Step 3, resist the urge to rush the 7-10 days of indirect light. The seedlings are extremely fragile at this stage, and direct sunlight can scorch their delicate leaves. Use a sheer curtain to diffuse bright light if your windowsill gets intense afternoon sun. This gradual transition prevents shock and gives your seedlings the best chance to develop strong stems before facing full sunlight.
Hardening Off Strategy: The 10-14 day hardening process is where most beginners make mistakes. Start with just 1-2 hours in morning sun on the first day—this gradual exposure prevents leaf burn and root shock. I like to place my seedlings on a shaded patio or under a tree where they get dappled sunlight. The goal is to mimic natural outdoor conditions without overwhelming them. If you notice any yellowing leaves during this process, you're moving too fast—slow down and extend the acclimation period.
Pro Tips for Orange Tree Seedling
- These small details make all the difference when growing citrus from seeds—trust me, I've learned the hard way after watching seedlings fail from common oversights.
- Seed Selection: Navel and Valencia orange seeds are your best bet for hardiness, but never use seeds from store-bought fruit—those are often treated with fungicides that inhibit germination.
- Stratification Consistency: The 6-8 week cold stratification period is non-negotiable for breaking dormancy, but the key is maintaining that 35-45°F temperature consistently.
Frequently asked questions
Got questions about growing your orange tree seedling from cold-stratified sprouts? You’re not alone! Here are answers to the most common queries to keep your citrus adventure on track.
How long does it take for an orange seedling to sprout after cold stratification?
With cold stratification, expect sprouts to appear in 4–8 weeks. Keep the seedling in a warm, humid environment (70–75°F) afterward, and you’ll see rapid growth within 2–4 weeks post-germination. Patience is key—don’t rush the process!
Can I skip cold stratification and plant the seed directly?
Technically yes, but germination rates drop dramatically (often below 20%). Cold stratification mimics winter conditions, breaking seed dormancy and boosting success to 70–90%. If you’re impatient, try soaking the seed in warm water for 24 hours first, but stratification is still the gold standard.
Will my orange seedling actually bear fruit, or is it just for decoration?
Most seed-grown orange trees are non-bearing (or take decades to fruit) because they’re hybrids. For edible oranges, graft a variety like Valencia or Navel onto your seedling’s rootstock. If you’re okay with decorative blooms, enjoy the fragrant flowers!
What should I do if my seedling’s leaves turn yellow or wilt?
Yellow leaves often signal overwatering or nutrient deficiency. Let the top inch of soil dry between waterings, and fertilize lightly with a citrus-specific formula (diluted to half strength). Wilting could mean root rot—check for mushy roots and repot in fresh, well-draining soil if needed.
Can I grow an orange tree seedling indoors year-round?
Yes! Place it near a south-facing window (or under grow lights for 12+ hours/day) and maintain temperatures above 50°F. Rotate the pot weekly for even growth. Just ensure high humidity (use a pebble tray) and watch for pests like spider mites—common indoors.
Still stumped? Drop your question below—we’ve got you covered!
Wrapping up and next steps
Growing an orange tree seedling from cold-stratified sprouts is a rewarding journey that blends patience with the joy of nurturing life! 🌱 With the right materials, a little care, and a dash of consistency, you’ll watch your tiny sprout transform into a thriving young tree in just 8 weeks.
Remember, every gardener starts with a single seed—your dedication today will bloom into a citrusy future tomorrow.
Ready to take the next step? Plant your sprouts this week and keep an eye on their progress. Before you know it, you’ll be harvesting fresh oranges straight from your own backyard! 🍊✨