
Container Gardens
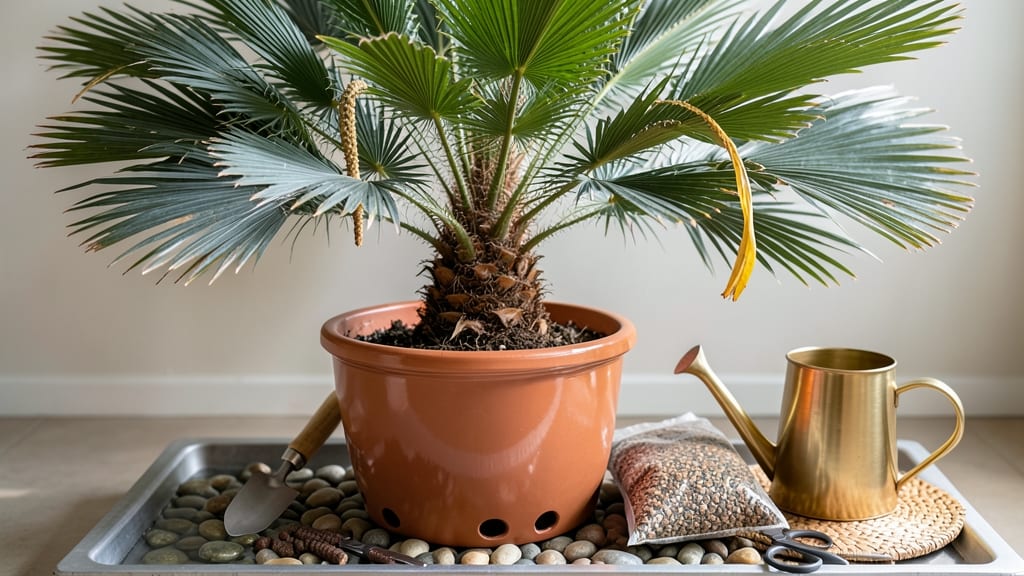
Caring for palm trees in pots turns your patio or balcony into a tropical escape—no backyard required. 🌴 I’ve kept potted palms thriving for years by mastering their three biggest needs: the right soil mix, consistent moisture, and bright, indirect light.
The key is mimicking their natural habitat in a container, which means well-draining soil, regular watering, and protection from harsh afternoon sun.
Start with a pot that’s 2-3 inches wider than the root ball and has drainage holes—palms hate soggy feet. Use a fast-draining potting mix (like a blend of peat, perlite, and sand) to prevent root rot, and fertilize lightly every 4-6 weeks during growing season with a balanced palm fertilizer.
Most palms need bright, indirect light—think filtered sun or a south-facing window—though some varieties tolerate partial shade.
You’ll know you’re doing it right when your palm grows new fronds every few months and the soil stays slightly moist but never waterlogged. Overwatering is the #1 killer, so stick your finger in the soil—if the top inch is dry, it’s time to water.
In winter, reduce watering by half and move indoor palms away from cold drafts.
When roots start circling the pot (usually every 2-3 years), it’s time to repot into a slightly larger container. Prune dead fronds as they appear, and watch for pests like spider mites—wipe leaves with neem oil if you spot them.
With these basics, your potted palm will stay lush and vibrant for years.
📚 In This Guide
- What you need
- Instructions
- Tips and common mistakes
- Wrapping up and next steps
What you need
- ● Container: A durable, well-draining pot (minimum 12-18 inches in diameter for dwarf varieties, larger for bigger palms). Opt for terracotta, fiberglass, or plastic with drainage holes. Pro tip: 💡 Use a saucer or cache pot to catch runoff!
- ● Potting Mix: A fast-draining blend like a cactus/succulent mix or a palm-specific soil (3 parts potting soil, 1 part perlite/sand, 1 part orchid bark). Avoid heavy garden soil!
- ● Palm Tree: Choose a dwarf variety (e.g., Pyramid Palm, Parlor Palm, or Areca Palm) or a young sapling. Pro tip: ✨ Buy from a reputable nursery to avoid pests or diseases!
- ● Drainage Layer: 1-2 inches of gravel, pebbles, or broken pottery at the bottom of the pot.
- ● Fertilizer: A balanced liquid fertilizer (10-10-10 or 20-20-20) or a slow-release palm fertilizer.
- ● Watering Can or Hose: With a gentle spray nozzle for even moisture.
- ○ Support Stake (Optional): For young or top-heavy palms, use a bamboo or plastic stake tied loosely with soft twine.
- ● Humidity Tray: A shallow tray with pebbles and water to boost humidity for tropical palms.
- ● Mulch: Orchid bark or coconut coir on top of soil to retain moisture.
- ● Grow Lights: If indoors, a full-spectrum LED grow light for 12-14 hours/day.
- ● Soil Moisture Meter: To check moisture levels without overwatering.
- ● Pruning Tools: Clean, sharp shears for trimming dead fronds (sterilize with rubbing alcohol!).
How to keep potted palms thriving year-round
Here’s the foolproof method I’ve used to keep my collection of potted palms lush and healthy—no greenhouse required.
🪴 Step 1: Select the Right Pot and Drainage
Palms need room to grow, so choose a container that’s at least 12-18 inches wide and 2-3 inches wider than the root ball of your palm. I always opt for unglazed terra cotta because it breathes and helps prevent root rot. If you’re using plastic, make sure it has multiple drainage holes—palms hate soggy feet.
Place a layer of gravel or broken pottery at the bottom of the pot before adding soil. This creates a drainage barrier that keeps water moving through the roots instead of pooling. If your pot has only one small hole, drill a few extra—palms need to dry out between waterings, and proper drainage is non-negotiable.
☀️ Step 2: Use the Right Soil Mix for Fast-Draining Roots
Palms despise heavy, compacted soil, so I blend 50% premium potting mix with 30% perlite and 20% coarse sand (or orchid bark if you want to go fancy). This mix mimics their natural, well-draining tropical habitat. Fill the pot up to 1 inch below the rim, leaving room for watering.
Gently loosen the soil with your fingers before planting to avoid compacting it. Press the root ball into the mix just enough to hold it steady—don’t pack it down. You’ll see the roots spread out naturally over time, filling the pot with their fibrous network. This ensures strong growth and prevents the pot from becoming root-bound too quickly.
💧 Step 3: Water Deeply but Infrequently
Palms in pots need deep waterings—soak the soil until water runs freely from the drainage holes, then let it dry out 2-3 inches down before watering again. I check moisture by sticking my finger into the soil: if it feels dry at that depth, it’s time to water. Overwatering is the #1 killer of potted palms, so resist the urge to water on a schedule.
In winter, when growth slows, reduce watering to every 3-4 weeks, letting the top 4-6 inches of soil dry completely between waterings. You’ll know you’re doing it right when the soil feels light and dry at the surface—palms are drought-tolerant once established, but they’ll let you know if they’re thirsty with crispy fronds.
✂️ Step 4: Prune and Fertilize for Year-Round Health
Remove yellow or brown fronds at the base with clean, sharp pruners—never pull them off, as this can damage the trunk. Cut back to the healthy green tissue just above the point where the frond meets the trunk. This keeps your palm looking tidy and redirects energy to new growth. I prune mine once a month during active growth (spring and summer).
Feed your palm every 4-6 weeks during growing season with a balanced, water-soluble fertilizer (like 20-20-20) diluted to half strength. In winter, cut back to once every 8-12 weeks or use a slow-release granular fertilizer. You’ll notice new fronds emerging within 4-6 weeks of consistent feeding—this is your sign the palm is thriving.
🪴 Step 5: Rotate and Adjust Light for Even Growth
Palms grow toward the light, so rotate the pot a quarter turn every 2-4 weeks. This prevents lopsided growth and ensures the trunk stays straight. If your palm starts leaning, it’s a clear signal it’s reaching for more light. Most palms need bright, indirect light—think 6-8 hours of filtered sunlight daily. A south- or west-facing window works best, but avoid harsh afternoon sun.
If your palm’s fronds start yellowing or browning at the tips, it’s getting too much direct sun. Move it back a few feet or use a sheer curtain to diffuse the light. You’ll know you’ve got the light right when the fronds are deep green and glossy, with no signs of scorching or stretching.
Tips & tricks for perfect potted palm care
Between us, these little details make all the difference between a struggling houseplant and a showstopping tropical centerpiece.
Drainage Layer Matters: Don't skip the gravel or broken pottery layer in Step 1—this isn't just about drainage, it's about preventing anaerobic conditions that lead to root rot. I've seen palms die from soggy bottoms even with drainage holes, so take the extra 5 minutes to create that barrier. Use 1-2 inches of gravel for pots larger than 18 inches, and always check for hidden drainage holes if repurposing containers.
Soil Mix Secret: The 50-30-20 mix in Step 2 might look simple, but here's what nobody tells you—pre-moisten your perlite and sand before mixing. This prevents clumping when you water later, ensuring even moisture distribution. I also add a handful of orchid bark (optional) to the mix for extra aeration, especially for larger palms that need more oxygen at the roots.
Winter Watering Hack: That 3-4 week winter watering schedule in Step 3 is a guideline, not a rule. Before watering, stick your finger 4-6 inches deep—if it feels damp, wait another week. I've had palms survive on just 2 waterings all winter when kept in cooler rooms, while others needed monthly waterings in warmer spaces. The key is always checking, never guessing.
Light Adjustment: The 6-8 hours of filtered light in Step 5 is ideal, but real talk—most homes can't provide that consistently. If your palm starts stretching toward the window (a sign of etiolation), it's getting too little light. Move it closer or supplement with a grow light for 12 hours daily. You'll know you've got it right when new fronds emerge with vibrant color instead of pale, weak growth.
Pro Tips for Palm Tree Care In Pots
- Between us, these little details make all the difference between a struggling houseplant and a showstopping tropical centerpiece.
- Drainage Layer Matters: Don't skip the gravel or broken pottery layer in Step 1—this isn't just about drainage, it's about preventing anaerobic conditions that lead to root rot.
- Soil Mix Secret: The 50-30-20 mix in Step 2 might look simple, but here's what nobody tells you—pre-moisten your perlite and sand before mixing.
Frequently asked questions
Got questions about keeping your palm tree happy in a pot?
You’re not alone! Here are answers to the most common concerns—so you can enjoy lush, tropical vibes without the yard space.
How often should I water a potted palm tree?
The key is consistency, not drowning it! Water when the top 1–2 inches of soil feel dry (usually every 1–2 weeks, depending on climate). Overwatering is the #1 killer—ensure pots have drainage holes and avoid soggy roots. Pro tip: Use your finger to check moisture levels!
Can potted palm trees survive winter?
Most tropical palms (like Kentia or Parlor) thrive indoors in winter but need protection from frost. Move pots indoors or to a sheltered spot when temps drop below 50°F (10°C). If outdoors, wrap the pot in burlap or use frost cloth. Hardier varieties (e.g., Pygmy Date Palm) tolerate cooler temps but still prefer shade.
Why is my potted palm turning yellow or brown?
Yellowing fronds often signal overwatering or poor drainage, while brown tips usually mean underwatering or low humidity. Check soil moisture, adjust watering, and mist leaves occasionally. Too much sun can also scorch leaves—place your palm in bright, indirect light.
How big should the pot be for a palm tree?
Start with a pot 2–3 inches larger in diameter than the root ball. Palms grow slowly, so upgrade pots every 2–3 years or when roots circle the drainage holes. Deep pots (12+ inches) work best for stability and drainage. Pro tip: Use lightweight pots to avoid tipping!
Are there palm tree alternatives for low-light spaces?
If your space lacks bright light, try low-light palms like the Areca Palm or Lady Palm. For non-palm options, consider Dracaena, Yuca, or Bird of Paradise—they mimic tropical vibes with less fuss!
Do potted palms need fertilizer?
Yes! Feed with a balanced liquid fertilizer (10-10-10 or 20-20-20) every 4–6 weeks in spring/summer. Reduce feeding in fall/winter. Slow-release granules are great for steady nutrition. Warning: Over-fertilizing burns roots—always water first!
Wrapping up and next steps
Caring for a palm tree in a pot is totally doable—you just need the right mix of sunlight, drainage, and love! 🌴 With the right container, soil, and a little patience, your tropical beauty can thrive even in small spaces.
Whether you're a beginner or a seasoned plant parent, these tips will help you keep your palm lush and happy for years.
Ready to give your palm the VIP treatment? Start by picking your favorite variety and follow the care steps you’ve learned. Before you know it, you’ll have a stunning, space-saving centerpiece that brings the tropics right to your doorstep! 🌺