
Pruning
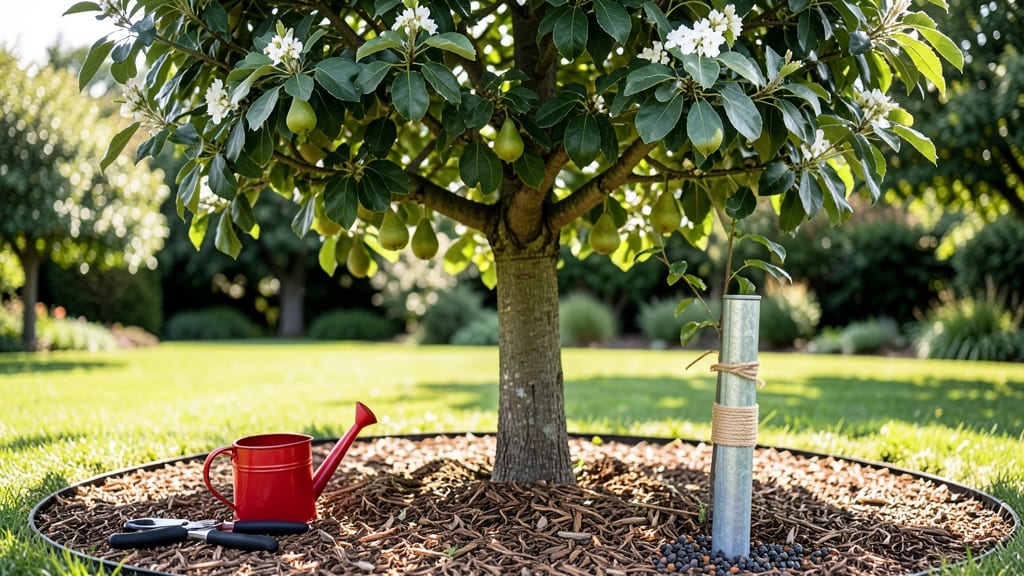
Your pear tree care and maintenance starts with seasonal pruning—the secret weapon for fruit production and long-term health. ✂️ After years of trial and error, I've learned that timing matters more than technique, and a few strategic cuts in winter can mean the difference between a sparse harvest and branches heavy with juicy pears.
First, gather your tools: sharp pruners, rubbing alcohol for sterilization, and a sturdy ladder if branches reach high. The real work happens in late winter or early spring, when the tree is dormant but about to burst with new growth.
Focus on removing dead wood, crossing branches, and thinning out crowded areas to let sunlight reach the center—this isn't just pruning, it's sculpting your tree's future.
By summer, you'll see the payoff: vibrant green leaves, sturdy branches, and—if you've done it right—next year's fruit buds already forming. The tree becomes more resistant to disease, produces larger pears, and even flowers more reliably.
It's not just about cutting branches; it's about giving your tree the best chance to thrive for decades.
Whether you're dealing with a young sapling or a mature tree that's been neglected, this approach works. The key is consistency—just 30 minutes of attention a few times a year keeps your pear tree productive, healthy, and a standout feature in your yard.
📚 In This Guide
- What you need
- Instructions
- Tips and common mistakes
- Wrapping up and next steps
What you need
- ● Pruning shears: Bypass pruners (sharp, 6–8 inch blades) for small branches.
- ● Loppers: 16–24 inch for medium branches (look for ratcheting or bypass styles).
- ● Pruning saw: Curved-tooth saw for thick branches (20–24 inch length).
- ● Gloves: Heavy-duty, cut-resistant (e.g., leather or synthetic blend).
- ● Disinfectant: 70% isopropyl alcohol or bleach solution (1 part bleach to 9 parts water) to sterilize tools between cuts.
- ○ Pruning sealant: Optional but helpful for large cuts (e.g., tree wound paint or beeswax-based sealant).
- ● Ladder: Sturdy, extendable ladder (16–20 ft) for tall trees—safety first!
- ● Work boots: Non-slip, ankle-supporting boots for stability.
- ● Watering can or hose: 2–5 gallon capacity with adjustable nozzle for post-pruning hydration.
- ● Mulch: Organic mulch (wood chips, straw, or shredded bark), 2–4 inches deep.
- ● Extension pole: For high branches (attach loppers or saw for reach).
- ● Tree ties: Soft, stretchable ties for supporting young or weak branches.
- ● Fertilizer: Balanced fruit tree fertilizer (10-10-10 or organic options like compost tea).
- ● Pest control: Horticultural oil or neem oil for organic pest management.
- ● Tree bag or sack: For collecting fallen fruit or debris.
- ● GPS or mapping tool: To mark drip lines or irrigation zones for precision.
Seasonal pear tree care: Step-by-Step maintenance for year-round health
Here's the straightforward approach I use to keep my pear trees productive and pest-free through every season.
⏰ Step 1: Winter Dormancy Care (Late Fall to Early Spring)
Once leaves fall and temperatures dip below 40°F, your pear tree enters dormancy. This is the time to focus on protection and preparation. I wrap the trunk of younger trees with tree guard wrap to prevent rodent damage and sun scald. For established trees, simply rake away fallen leaves and debris to reduce disease risk.
Winter pruning is critical—wait until late winter (just before buds swell) to remove dead, diseased, or crossing branches. Use clean, sharp pruners to make cuts just outside the branch collar. Avoid heavy pruning now; you'll do most of your shaping in late winter/early spring when the tree is actively growing again.
Water deeply once a month if winter is dry, keeping soil moist but not soggy. A 4-inch layer of mulch around the base (but not touching the trunk) helps retain moisture and insulate roots. This is also the perfect time to test soil pH—pears thrive in slightly acidic soil (6.0-6.5).
☀️ Step 2: Spring Growth Stimulation (Early to Mid-Spring)
When buds begin to swell (usually March-April depending on your climate), it's time to wake your tree up gently. Remove any remaining winter wraps and apply a balanced fertilizer (10-10-10) at half-strength when you see first green leaves emerge. This gives roots time to establish before new growth demands more nutrients.
Now's the time for structural pruning—shape the tree by opening the canopy to improve airflow and sunlight penetration. Remove suckers (shoots growing from the base) immediately, as they drain energy from fruit production. Thin out crowded branches to 6-8 inches apart to prevent disease and improve fruit quality.
Watch for pear leaf blight (black spots on leaves) or fire blight (blackened branches). At the first sign of trouble, prune infected branches 6 inches below the damage and sterilize your tools with rubbing alcohol. Preventative sprays of copper fungicide can help if your area has a history of these diseases.
✂️ Step 3: Summer Fruit and Foliage Management (Late Spring to Early Fall)
Once fruit sets (usually May-June), thin it to 6-8 inches apart to ensure larger, higher-quality pears. I use hand pruners to remove excess fruit—this prevents branches from breaking under weight and improves air circulation. Thin in stages if you have a heavy crop to avoid shocking the tree.
Water deeply once a week during dry spells, aiming for 1-1.5 inches of water per week. Pears are shallow-rooted, so drip irrigation or soaker hoses work best to deliver moisture directly to the root zone. Avoid overhead watering to prevent fungal diseases like powdery mildew.
Monitor for codling moths (common pear pests) by checking for small holes in fruit. Hang pheromone traps or apply organic sprays like neem oil as a preventative measure. Also watch for aphids on new growth—blast them off with a strong stream of water or use insecticidal soap for severe infestations.
🍐 Step 4: Fall Harvest and Preparation (Late Summer to Early Fall)
Pears ripen 2-3 weeks after apples in your area—watch for color change and slight softness when gently squeezed. Harvest when pears detach easily from the tree but are still firm. Store them at room temperature for a few days to finish ripening, then move to the fridge to extend shelf life.
After harvest, rake up all fallen fruit and leaves to reduce fire blight and brown rot spores. Apply a second round of fertilizer (lightly this time) to replenish nutrients used for fruit production. This is also the time to prune for next year's shape, removing any branches that crossed or rubbed during summer growth.
Consider applying a dormant oil spray in late fall to smother overwintering pests like scale insects and mites. This non-toxic treatment works while the tree is dormant and won't harm beneficial insects. Finally, add 2-3 inches of fresh mulch to protect roots through winter.
🌱 Step 5: Year-Round Monitoring and Adjustments
Check your tree monthly for signs of stress—wilting leaves, yellowing foliage, or unusual spots could indicate nutrient deficiencies, pests, or diseases. Adjust care as needed: for example, yellow leaves often mean iron deficiency, which can be corrected with chelated iron supplements.
Young trees (under 5 years old) need more frequent attention—water more often, fertilize annually, and protect from late frosts that can damage blossoms. Mature trees are more resilient but still benefit from regular pruning every 2-3 years to maintain shape and productivity.
Here's the thing—pear trees are low-maintenance once established, but these seasonal check-ins keep them thriving for decades. The key is consistency: prune at the right times, monitor for pests, and adjust watering based on weather. With this routine, you'll enjoy abundant harvests and a healthy tree year after year.
Tips & tricks for year-round pear tree thriving
These seasonal insights will help you avoid common pitfalls and maximize your pear tree's potential.
Timing for Winter Pruning: The late winter timing in Step 1 is crucial—wait until buds begin to swell but haven't opened yet. This window (typically February-March) ensures you're not pruning dormant wood too early or active growth too late. I've seen trees stressed when pruned during extreme cold snaps below 20°F, so check your local frost dates. For extra protection, apply tree guard wrap after pruning to seal any fresh cuts.
Structural Pruning Secrets: When shaping your tree in Step 2, focus on creating an open center that allows sunlight to reach all branches. I aim for a vase shape with main branches spaced 6-8 inches apart—this prevents crowded growth and improves fruit quality. Always make cuts just outside the branch collar (the swollen area where the branch meets the trunk) to promote faster healing. A good trick is to use a string or level to visualize your ideal branch spacing before making cuts.
Pest Prevention Strategy: The codling moth warning in Step 3 is worth emphasizing—these pests can devastate your harvest. I hang pheromone traps in early summer and rotate them monthly to maintain effectiveness. For organic growers, neem oil sprays work best when applied at dusk to avoid harming bees. Watch for aphids too—they love new growth, so I blast them off with water first before reaching for insecticidal soap if needed.
Harvesting Like a Pro: That 2-3 week gap after apples ripen is key—pears ripen from the inside out. I test ripeness by gently squeezing the pear near the stem; it should yield slightly with no give at the blossom end. For storage, I keep harvested pears at room temperature for 2-3 days to finish ripening, then refrigerate to extend shelf life. This two-step process prevents mealy texture while keeping pears fresh for weeks.
Pro Tips for Pear Tree Care And Maintenance
- These seasonal insights will help you avoid common pitfalls and maximize your pear tree's potential.
- Timing for Winter Pruning: The late winter timing in Step 1 is crucial—wait until buds begin to swell but haven't ope...
- Structural Pruning Secrets: When shaping your tree in Step 2, focus on creating an open center that allows sunlight t...
Frequently asked questions
Got questions about keeping your pear tree happy and productive?
Here are some of the most common concerns—plus straightforward answers to help you troubleshoot, time tasks, and avoid mistakes.
When is the best time to prune a pear tree?
The ideal time to prune a pear tree is late winter or early spring, just before buds swell but before new growth begins. This minimizes stress and disease risk. Avoid pruning in fall, as wounds may not heal before winter. For dwarf varieties, light pruning after harvest can also encourage better fruit production.
Why are my pear tree leaves turning yellow or curling?
Yellowing or curling leaves often signal pests (like aphids or mites) or disease (fire blight or bacterial spot). Check the undersides of leaves for tiny insects or sticky residue. Treat with neem oil or insecticidal soap for pests. For disease, prune infected branches 6 inches below the damage and sterilize tools with rubbing alcohol. Pro tip: Improve airflow by thinning dense branches.
How do I protect my pear tree from winter damage?
Pear trees are generally hardy, but young trees or tender varieties need extra care. Wrap the trunk with tree guard to prevent rodent damage and mulch heavily (3–4 inches) to insulate roots. Avoid heavy snow buildup on branches—gently brush it off. In Zone 5 or colder, consider wrapping the entire tree with burlap for added protection.
Can I grow pears from seed, or should I buy a grafted tree?
While you can grow pears from seed, the fruit won’t match the parent tree’s quality or flavor—and it may take 10+ years to bear fruit. For reliable results, choose a grafted tree, which combines a hardy rootstock with a desirable variety. Plus, grafted trees fruit much sooner (3–5 years) and are more disease-resistant.
How often should I fertilize my pear tree?
Fertilize once in early spring (before buds break) with a balanced 10-10-10 or fruit-tree-specific formula. Avoid over-fertilizing, which can lead to excessive leaf growth at the expense of fruit. Young trees (under 3 years old) may only need a light application. Test soil every 2–3 years to adjust nutrients—pear trees often thrive in slightly acidic to neutral soil (pH 6.0–7.0).
What should I do if my pear tree isn’t bearing fruit?
Lack of fruit can stem from poor pollination, over-pruning, or nutrient deficiencies. Ensure your tree has a compatible pollinator variety (many pears are self-fruitful but produce more with a partner). Thin branches to improve sunlight penetration, and fertilize with phosphorus-rich food (like bone meal) in early spring. Patience is key: Dwarf trees may take 3–5 years to fruit, while standard trees can wait up to 7 years.
Wrapping up and next steps
Caring for your pear tree is a rewarding journey that yields delicious fruit and stunning beauty—and you’ve got this! 🌳 From seasonal pruning to soil health and pest management, each step ensures your tree thrives year-round.
Start small, stay consistent, and soon you’ll be harvesting juicy pears while basking in the pride of a well-maintained tree.
Ready to take the next step? Grab your pruners, mark your calendar for seasonal tasks, and watch your pear tree flourish! 🌟