
Pruning
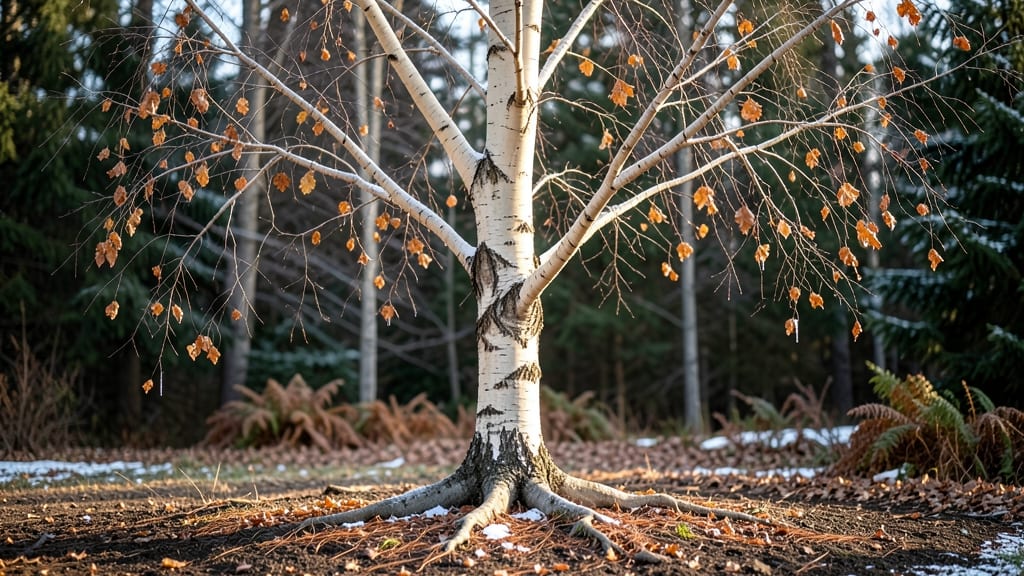
The picture of a tree in winter captures a quiet beauty—those bare branches hold secrets of spring. 🌿 I've spent years photographing winter trees, and the stark elegance of frost-laced limbs or the bold silhouettes against snow never fails to inspire.
What most people miss is how a few simple cuts now can turn those skeletal branches into a lush canopy by May.
The magic happens in late winter when trees are dormant. A sharp pair of pruners and an hour of focused work can remove dead wood, open up the center for better light, and encourage stronger growth.
My favorite subjects? Fruit trees, crape myrtles, and even overgrown shrubs—they all respond dramatically to winter pruning. The key is timing: prune after the worst cold snaps but before buds swell.
By spring, you'll see the difference: fuller branches, more blooms, and a tree that looks like it got a spa day. The winter's stark beauty becomes a foundation for vibrant growth, and your garden transforms from dormant to dynamic.
It's like giving nature a fresh start with just a few strategic cuts.
This works for any yard size, from urban backyards to country estates. The same principles apply whether you're shaping a young tree or revitalizing an old one. Let's turn those winter branches into next year's showstopper—one cut at a time.
📚 In This Guide
- What you need
- Instructions
- Tips and common mistakes
- Wrapping up and next steps
What you need
- ● Pruning shears: Bypass pruners (for clean cuts on small branches, 5–7 inches long, with sharp, stainless steel blades).
- ● Loppers: Medium-sized (18–24 inches) for thicker branches (up to 2 inches in diameter).
- ● Pruning saw: Curved-tooth saw for branches larger than 2 inches (avoid rust—opt for aluminum or carbon steel).
- ● Gloves: Heavy-duty, cut-resistant (gardening gloves with reinforced palms for safety).
- ● Ladder or step stool: Sturdy, non-slip (extendable ladder for taller trees; ensure it’s rated for your weight).
- ● Disinfectant: 70% isopropyl alcohol or bleach solution (1 part bleach to 9 parts water) to sterilize tools and prevent disease spread.
- ○ Pruning sealant (optional):strong> Tree wound paint (only for large cuts on oaks, elms, or walnuts—skip for most other trees!).
- ● Trash bags or bucket: For collecting debris (1–2 large bags or a 5-gallon bucket).
- ○ Notebook & pen: To sketch a pruning plan (optional but helpful for tracking cuts!).
- ● Timing: Prune during dormant season (late winter, before buds swell) for minimal stress on the tree.
- ● Weather: Choose a dry, calm day (avoid rain or wind to prevent tool rust and ensure safety).
- ● Safety gear: Safety glasses (to protect from debris) and closed-toe shoes (no sandals!).
- ● Tree knowledge: Research your tree’s species—some (like maples) bleed sap when pruned in early spring!
How to transform a winter-bare tree into spring beauty
Here's how I bring life back to dormant trees—step by step, from pruning to first blooms.
✂️ Step 1: Prune for Structure and Health
Start by removing dead, diseased, or crossing branches with clean, sharp pruning shears. I always cut just outside the branch collar—the swollen area where the branch meets the trunk—to prevent damage. Focus on thinning out dense areas to improve airflow and sunlight penetration.
Look for branches that rub against each other or grow inward; these are prime candidates for removal. You'll see a clear improvement in the tree's shape once you're done. Avoid heavy pruning—never remove more than 25% of the tree's foliage at once, as this stresses the plant and can delay spring growth.
🌱 Step 2: Apply Fertilizer for Spring Growth
Use a balanced, slow-release fertilizer (like a 10-10-10 formula) in early spring, just as new growth begins. I scatter the granules evenly under the tree's drip line—about 10-12 feet from the trunk—and water them in thoroughly. This ensures nutrients reach the roots without burning them.
For established trees, a pound of fertilizer per inch of trunk diameter works well. You'll notice fresh, vibrant leaves emerging within 4-6 weeks if the tree is healthy. If your tree is young or recently planted, use half the recommended dose to avoid overfeeding.
☀️ Step 3: Mulch to Protect Roots and Retain Moisture
Spread 2-3 inches of organic mulch—like shredded bark or wood chips—around the base of the tree, keeping it 6 inches away from the trunk. This layer insulates roots from temperature swings and retains moisture. I always rake mulch into a slight mound around the trunk to prevent water from pooling.
Replenish mulch annually in late winter or early spring, as it breaks down over time. You'll see fewer weeds and better soil moisture retention, which helps the tree recover from winter dormancy faster. Avoid piling mulch too high—more than 4 inches can suffocate roots and attract pests.
💧 Step 4: Water Deeply During Dry Spells
Water the tree once a week during dry periods, delivering 10-15 gallons depending on its size. I use a soaker hose or drip irrigation to water slowly at the base, ensuring moisture reaches the root zone without wasting water. You'll know you've watered enough when the soil 6 inches down feels damp but not soggy.
Deep watering encourages roots to grow downward, making the tree more drought-resistant. Avoid shallow watering—this only wets the surface and promotes weak, shallow roots. If your tree shows signs of stress (like wilting leaves or brown edges), increase watering slightly and monitor closely.
🌿 Step 5: Monitor for Pests and Diseases
Inspect the tree regularly for signs of pests like aphids, scale, or borers. I look for sticky residue (honeydew), chewed leaves, or sawdust-like frass near the trunk. If you spot issues early, treat with neem oil or insecticidal soap—these are gentle but effective for most common tree pests.
Keep an eye out for fungal diseases too, like powdery mildew or canker. Prune affected branches immediately and dispose of them in the trash (not your compost). A healthy tree with good airflow and proper care rarely develops serious problems, but prevention is key—especially in early spring when pests are most active.
Tips & tricks for reviving winter-bare trees
Transforming a dormant tree into a vibrant spring beauty takes patience and the right approach. Here's what I've learned after years of working with trees in every season.
Pruning Precision: When you're removing those crossing branches in Step 1, look for what arborists call "water sprouts"—fast-growing, vertical shoots that steal energy from the tree. Cut these out first, then focus on branches that are rubbing against each other. I always make my cuts at a 45-degree angle just outside the branch collar, and I sterilize my pruning shears between cuts with rubbing alcohol to prevent spreading disease. This careful approach makes all the difference in how quickly your tree recovers.
Fertilizer Timing: The instructions mention applying fertilizer in early spring, but here's the thing: the exact timing matters more than you might think. I've found that waiting until you see the first tiny green buds appear—usually in late March or early April depending on your climate—gives the tree just enough energy to start growing before the fertilizer kicks in. This prevents fertilizer burn when the tree is still dormant. For established trees, I also like to split the recommended pound of fertilizer into two applications—half now and half again in 6 weeks—to give the tree a steady nutrient supply.
Mulch Mastery: That 2-3 inch layer of mulch in Step 3 is your tree's winter blanket, but there's a trick to making it work even better. After spreading the mulch, I water it thoroughly to help it settle and break down faster. This creates a more consistent moisture barrier for the roots. Also, if your tree is in a windy area, consider adding a windbreak made of burlap or a temporary fence to protect the newly mulched area from drying out too quickly. The goal is to mimic the natural moisture and temperature regulation of forest floors.
Watering Wisdom: The once-a-week watering recommendation in Step 4 is perfect for most mature trees, but younger trees need more frequent attention. For trees planted in the last 2-3 years, I water every 3-4 days during dry spells, giving them about 5 gallons each time. You'll know you're doing it right when you can push your finger 6 inches into the soil and feel moisture—but not sogginess. This deep watering encourages roots to grow downward where they'll find more stable moisture, rather than staying near the surface where they dry out quickly.
Pro Tips for Picture Of A Tree In Winter
- Transforming a dormant tree into a vibrant spring beauty takes patience and the right approach. Here's what I've lear...
- Pruning Precision: When you're removing those crossing branches in Step 1, look for what arborists call "water sprout...
- Fertilizer Timing: The instructions mention applying fertilizer in early spring, but here's the thing: the exact timi...
Frequently asked questions
Got questions about capturing or caring for trees in winter? You’re not alone! Here are some of the most common queries—plus straightforward answers to help you get the perfect shot or keep your tree thriving.
Why do trees look so bare in winter?
Trees shed their leaves (or needles) in winter to conserve energy and water. Deciduous trees like oaks and maples drop leaves entirely, while evergreens like pines keep their needles year-round. This natural process helps them survive harsh conditions—no need to worry unless you’re seeing unusual browning or dieback.
What’s the best time of day to photograph a tree in winter?
Early morning or late afternoon (the "golden hours") are ideal for soft, warm lighting that highlights textures like bark and frost. Avoid midday sun, which can create harsh shadows and wash out details. Overcast days also work well—the diffused light enhances the tree’s bare structure without glare.
Can I prune a tree in winter, or will it harm it?
Winter is a great time to prune dormant deciduous trees (November–March in most climates). Avoid pruning evergreens in freezing temps, as it can stress them. Focus on removing dead, diseased, or crossing branches. Just be gentle—sap flow is minimal, so wounds heal slower in cold weather.
How do I make a winter tree photo look more vibrant?
Use contrasting colors to add life! Look for berries, evergreens, or even snow for texture. Play with composition—try framing the tree with a winter landscape or using leading lines (like branches) to draw the eye. Post-processing can help too: boost saturation slightly or add a subtle vignette to emphasize the tree’s silhouette.
What should I do if my tree’s branches look dead or damaged?
First, check for signs of life: Scrape a small section of bark—if it’s green underneath, the branch is alive. If it’s brown and brittle, it’s likely dead and should be pruned. For severe damage (like storm breaks), cut back to a healthy bud or branch collar. When in doubt, consult a certified arborist to avoid further harm.
Wrapping up and next steps
A picture of a tree in winter isn’t just a barren scene—it’s a blank canvas waiting for transformation! 🌱 Pruning in late winter sets the stage for vibrant blooms and lush growth by spring, ensuring your tree thrives with minimal effort.
Whether you’re a seasoned gardener or a curious beginner, taking action now will reward you with healthier, more beautiful trees in just a few months.
Ready to turn those bare branches into a masterpiece? Grab your tools, follow the steps, and start pruning today! Your future tree—and your future self—will thank you. 🌿✨