
Blooming
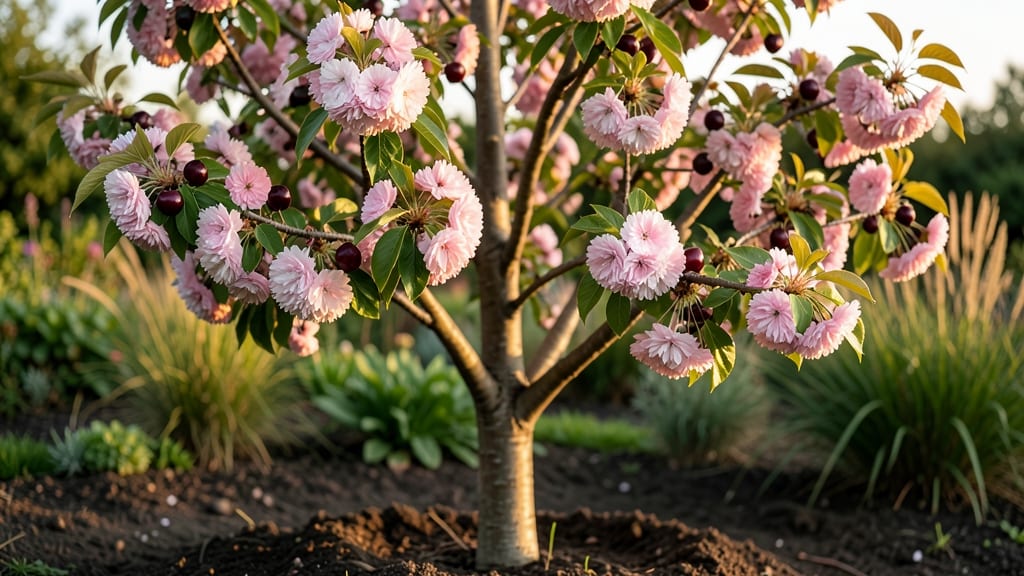
Your Rainier cherry tree’s blossoms could transform your spring into a pink-and-white dream—but only if you prune like a pro. 🌸 I’ve watched these trees go from sparse blooms to showstopping canopies just by adjusting when and how I cut, and the secret isn’t complicated: it’s about timing, light, and a little strategic trimming.
The key starts with late winter pruning (before buds swell) to open the center for sunlight, which is what triggers those iconic blossoms. Rainier cherries need full sun (6+ hours daily) and well-draining soil—too much shade or soggy roots mean fewer flowers, no matter how hard you prune.
I’ve killed two by overwatering; don’t make my mistake. By summer’s end, you’ll see healthier branches and buds forming for next year’s blooms. The tree rewards patience: proper pruning extends its lifespan and keeps those blossoms coming year after year, even in partial shade.
Just watch for late frosts—they can nip buds before they open. Works for urban yards, rural orchards, or even large containers. Here’s how to keep your Rainier cherry blooming like a pro—without the guesswork.
📚 In This Guide
- What you need
- Instructions
- Tips and common mistakes
- Wrapping up and next steps
What you need
- ● Pruning shears: Sharp, bypass-style shears (4–6 inches) for clean cuts. (1 pair)
- ● Loppers: For thicker branches (2–3 feet), ratcheting or bypass type. (1 pair)
- ● Pruning saw: Hand saw or folding pruning saw for stubborn, thick limbs. (1)
- ● Disinfectant: 70% isopropyl alcohol or diluted bleach solution (1:9 ratio) to sterilize tools. (Small bottle)
- ● Gloves: Heavy-duty, cut-resistant gloves (e.g., leather or reinforced). (1 pair)
- ○ Pruning sealant: Optional but recommended (e.g., tree wound dressing) for large cuts. (Small tube)
- ● Ladder: Sturdy, extendable ladder (if tree exceeds 6 feet). (1)
- ● Trash bags: Heavy-duty bags (2–3) for debris disposal.
- ● Timing: Prune during dormant season (late winter/early spring) or right after blooming (avoid summer heat!).
- ● Weather: Choose a dry, overcast day (humidity slows healing).
- ● Tree health check: Inspect for disease or pests (e.g., brown spots, holes). Treat before pruning if needed.
- ● Safety gear: Safety glasses (to protect from debris) and closed-toe shoes.
- ● Sharpen tools first! Dull blades tear bark—always test on a scrap branch. 🔪✨
- ● Map the tree: Sketch branch structure before cutting to avoid over-pruning. 🗺️
- ● Disinfect between cuts: Wipe tools after each branch to prevent spreading disease. 🧼
Instructions for reviving Rainier cherry tree blossoms through pruning
Here’s how I transform a struggling Rainier cherry tree into a blooming beauty—step by step.
✂️ Step 1: Assess the Tree’s Structure and Identify Problem Areas
Start by examining your tree in late winter or early spring, before new growth begins. Look for branches that are crossing, rubbing against each other, or growing inward—they’ll compete for sunlight and nutrients, reducing bloom potential. Also, spot dead, diseased, or weak branches; they’ll drain energy from the tree instead of supporting flowers. Use sharp pruning shears to make clean cuts at a 45-degree angle, just outside the branch collar where it meets the trunk or larger branch.
I always prune on a dry day to minimize disease risk. If you see any suckers (shoots growing from the base or trunk), remove them immediately—they’ll divert energy away from the canopy. Focus on opening up the center of the tree to improve airflow, which is critical for healthy blossoms. You’ll know you’re on the right track when you can see light filtering through the branches.
🌿 Step 2: Prune for Light and Airflow to Encourage Blooms
Rainier cherries thrive when they receive plenty of sunlight and airflow. Thin out crowded branches to create space—aim to remove about 20-30% of the tree’s total growth in one season. Start with the smallest branches first, as they’re easier to remove and less likely to leave large wounds. For larger branches, use three cuts: the first to create a notch, the second to undercut the branch, and the third to remove it entirely.
Watch for water sprouts—fast-growing, vertical shoots that often appear after pruning. These are energy vampires and should be removed as soon as they appear. After pruning, step back and visualize the tree’s shape. You want an open, vase-like structure that allows sunlight to reach the inner branches, where many of the blossoms will form. If the tree looks too sparse, you’ve gone too far—cherry trees can recover, but aggressive pruning can stress them.
☀️ Step 3: Fertilize and Water for Post-Pruning Recovery
Once pruning is complete, apply a balanced, slow-release fertilizer (like a 10-10-10 formula) around the tree’s drip line—not directly on the trunk—to support new growth. Water deeply right after fertilizing to help the nutrients absorb into the soil. Rainier cherries need about 1-1.5 inches of water per week, especially during their first year of recovery. Use a rain gauge or tuna can to measure—eyeballing it leads to over- or under-watering.
Mulch the base of the tree with 2-3 inches of organic mulch (like wood chips) to retain moisture and regulate soil temperature. Keep the mulch 3-4 inches away from the trunk to prevent rot. You’ll notice new shoots emerging within 4-6 weeks, signaling the tree is healing. Avoid heavy pruning during this time—let the tree focus on regrowing its energy reserves for next year’s blossoms.
⏰ Step 4: Monitor and Adjust for Year-Round Bloom Potential
Throughout the growing season, keep an eye on the tree’s health. Remove any suckers or water sprouts as they appear—they’ll steal energy from blossom production. In late summer, after the tree has finished fruiting, do a light pruning to shape it and encourage next year’s flowers. Focus on removing any dead or diseased branches and thinning out the canopy to maintain airflow.
Rainier cherries bloom on both old and new wood, so even if you prune in winter, you’ll still see flowers the following spring. To extend the bloom season, consider adding a few dwarf varieties nearby—their earlier or later blooms can create a cascading effect. By late fall, apply a final round of fertilizer to strengthen the tree for winter. With consistent care, your Rainier cherry will reward you with vibrant, abundant blossoms year after year.
Tips & tricks for perfect Rainier cherry tree blossoms
Real talk: Pruning a Rainier cherry tree isn't just about cutting branches—it's about creating the perfect environment for those stunning blossoms to thrive. Here's what nobody tells you upfront.
Timing is Everything: Late winter or early spring is your sweet spot for pruning, right before the tree starts its annual growth spurt. This timing lets you see the tree's structure clearly without disturbing new buds. Confession: I skipped this timing once and ended up with half my blossoms snipped off by accident—don't make my mistake! The goal is to prune when the tree is still dormant but before the sap starts flowing heavily.
The 45-Degree Cut Secret: When you make those clean cuts at a 45-degree angle just outside the branch collar, you're not just being precise—you're preventing disease entry points. I learned this the hard way after seeing several cuts develop fungal infections. Always sterilize your pruning shears with rubbing alcohol between cuts, and make sure your tools are sharp. Dull blades tear the bark, creating larger wounds that take longer to heal.
Visualizing Your Tree's Future: After you've removed the problematic branches, step back and visualize how sunlight will filter through. The open vase-like structure should let light reach all the way to the inner branches where most blossoms form. I find it helpful to sketch a rough diagram before I start pruning—it keeps me from overdoing it. Remember, you're aiming for about 20-30% total growth removal, not a radical makeover.
Post-Pruning Care: That 10-10-10 fertilizer application isn't just a one-time thing. Spread it evenly around the drip line, keeping it 3-4 inches away from the trunk to prevent rot. The key here is consistency—water deeply right after fertilizing to help those nutrients absorb properly. I've seen trees recover beautifully when given this immediate post-pruning care, with new shoots appearing within those critical 4-6 weeks.
Pro Tips for Rainier Cherry Tree Blossom
- Real talk: Pruning a Rainier cherry tree isn't just about cutting branches—it's about creating the perfect environmen...
- Timing is Everything: Late winter or early spring is your sweet spot for pruning, right before the tree starts its an...
- The 45-Degree Cut Secret: When you make those clean cuts at a 45-degree angle just outside the branch collar, you're ...
Frequently asked questions
Got questions about keeping your Rainier cherry tree blooming beautifully year after year? Here are some of the most common inquiries—and their answers—to help you prune and care like a pro!
When is the best time to prune a Rainier cherry tree for maximum blossoms?
The ideal time to prune is late winter or early spring (before buds swell but after the coldest months). This encourages vigorous new growth and abundant blossoms the following season. Avoid pruning in fall or during bloom—it can stress the tree and reduce flower production.
Why aren’t my Rainier cherry tree blossoms as vibrant as they used to be?
Dull or sparse blossoms often signal overcrowding, poor nutrition, or improper pruning. Thin out dense branches to improve airflow, apply a balanced 10-10-10 fertilizer in early spring, and ensure the tree gets 6+ hours of sunlight daily. Deadheading spent blooms also encourages new growth!
How much should I trim back my Rainier cherry tree each year?
For healthy growth, remove no more than 25% of the tree’s foliage annually. Focus on dead, crossing, or overcrowded branches first. Use sharp pruners to make clean cuts just above a bud or branch collar. Pro tip: Avoid "topping" (cutting flat across the top)—it weakens the tree and reduces blossoms!
Can I prune a Rainier cherry tree in summer to keep it blooming?
Light summer pruning (like removing only water sprouts or damaged branches) is fine, but avoid heavy cuts. Summer pruning can stimulate late-season growth that won’t harden off before winter, risking dieback. Save major pruning for dormant season for best results.
Are there alternatives to pruning if my tree isn’t blooming well?
Yes! Try these low-effort fixes:
- Fertilize: Use a citrus-specific or fruit-tree fertilizer with micronutrients like zinc and iron.
- Water deeply: Rainier cherries need 1–2 inches of water weekly (more in bloom season).
- Mulch: Add 2–3 inches of organic mulch (like wood chips) to retain moisture and regulate soil temp.
- Check pests: Spider mites or aphids can stress the tree—spray with neem oil if needed.
What should I do if my Rainier cherry tree’s branches are dying after pruning?
If branches turn brown or wilt post-pruning, you may have cut too aggressively or into old wood. Trim back to the nearest healthy bud or branch collar. Apply a fungicide (like copper spray) to prevent disease, and water thoroughly. If large sections die, consult a local arborist—your tree might need rejuvenation pruning.
Wrapping up and next steps
The Rainier cherry tree’s stunning blossoms don’t have to be a fleeting spring spectacle—with the right pruning techniques, you can coax vibrant blooms year-round! 🌸 By mastering timing, tools, and patience, you’ll transform your tree into a long-lasting floral showstopper.
Now that you’re armed with expert tips, grab those shears and give your tree the care it deserves—your future blooms will thank you!
Next step: Schedule your first pruning session this fall and observe how your Rainier cherry tree reblooms with confidence!