
Fertilization
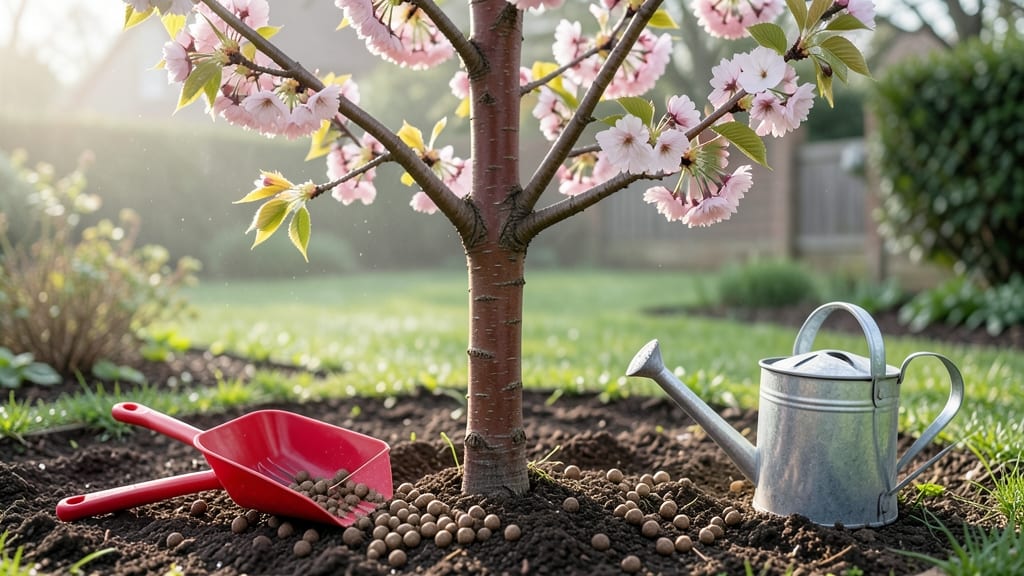
Spring tree fertilization is your secret weapon for explosive growth this season. 🌱 I’ve watched my own trees go from lackluster to vibrant green in just a few weeks after applying the right nutrients at the perfect time—right before those first buds swell with promise.
The key is timing: fertilize once the soil thaws but before new leaves burst open, usually in early spring. Too early and you risk burning roots; too late and you miss the growth window.
Organic options like compost or slow-release granules work best for most trees, but fast-growing species like willows or poplars might need a synthetic boost. You’ll see stronger branches, richer foliage, and even better fruit production by summer.
The process takes less than 30 minutes, and the payoff lasts all season. Just avoid overdoing it—more fertilizer doesn’t mean better results, and it can actually harm your trees. Works for shade trees, fruit trees, and even young saplings. Let’s get those roots fed right!
📚 In This Guide
- What you need
- Instructions
- Tips and common mistakes
- Wrapping up and next steps
What you need
- ● Slow-release fertilizer: Choose a balanced, organic option (e.g., 10-10-10 or 8-3-9 NPK ratio) for broadleaf trees. Quantity: ~1 lb per 100 sq ft of root zone or as recommended on the label.
- ● Granular or liquid fertilizer: Opt for a spring-specific formula (e.g., 12-6-6 or 16-4-8) for evergreens/fruit trees. Quantity: Follow package instructions (typically ½–1 lb per tree).
- ○ Soil test kit: Critical for precision! Test pH and nutrient levels before applying fertilizer. (Optional but highly recommended.)
- ● Garden hose with spray nozzle: For even water distribution post-fertilization.
- ● Gloves & safety goggles: Protect yourself from dust/chemicals.
- ● Handheld spreader: For granular fertilizers (e.g., Broadfork or drop spreader).
- ● Watering can or sprinkler: Adjustable for gentle watering (avoid runoff!).
- ○ Pruners (sterilized): Optional—trim dead branches before fertilizing for better absorption.
- ● Measuring tape: Mark fertilizer application zones (e.g., drip line of the tree).
- ● Clear weather: Fertilize on a dry, calm day (avoid rain for 24–48 hours).
- ● Well-aerated soil: Loosen compacted areas with a garden fork if needed.
- ● Tree health check: Ensure no pests/diseases (treat first if necessary).
Step-by-step instructions for spring tree fertilization
Here’s the straightforward method I’ve used for years to help trees wake up strong and grow lushly all season.
🌱 Step 1: Test Soil and Choose the Right Fertilizer
Before grabbing any fertilizer, grab a soil test kit—it tells you exactly what nutrients your tree is missing. Most trees need nitrogen for leafy growth, phosphorus for root development, and potassium for overall health. I always opt for a balanced, slow-release fertilizer (like 10-10-10) for spring, because it feeds roots steadily without burning them.
If your soil test shows deficiencies, pick a fertilizer with higher numbers in the missing nutrients. For example, if phosphorus is low, choose a 5-15-10 blend. Avoid quick-release fertilizers—they can scorch roots when the soil is still cool. You’ll know you’ve picked the right one when the label matches your soil test results.
🌿 Step 2: Apply Fertilizer at the Right Time and Place
Timing is everything—fertilize when the soil is workable but still cool, usually 2-4 weeks after the last frost date in your area. This gives roots time to wake up without overstimulating growth too early. Spread the fertilizer in a ring around the tree’s drip line (where the branches naturally extend), about 6 inches from the trunk.
Don’t pile it against the trunk—that’s a recipe for root burn. For mature trees, I use about 1 pound of fertilizer per inch of trunk diameter. For younger trees, halve that amount. Lightly scratch the fertilizer into the top 2-3 inches of soil with a rake or hoe to help it dissolve evenly. Water the area deeply right after application to activate the nutrients.
💧 Step 3: Water Deeply and Monitor for Signs of Health
After fertilizing, water the tree slowly and deeply—aim for 1-2 inches of water per week, either from rainfall or irrigation. You’ll know you’ve watered enough when the soil feels moist 6 inches down. This encourages roots to grow deeper, making the tree more drought-resistant over time.
Watch for new growth in 4-6 weeks: vibrant leaves, fresh shoots, and a general perking-up of the tree’s appearance. If leaves turn yellow or brown, you’ve overdone it—cut back on fertilizer next time. If growth is slow, your tree might need a second light application in late spring (around early June), but only if it’s still looking sluggish.
⏰ Step 4: Maintain with Mulch and Regular Check-Ins
Spread a 2-3 inch layer of mulch (like wood chips or shredded bark) over the root zone, keeping it 6 inches away from the trunk to prevent rot. Mulch locks in moisture and regulates soil temperature, which keeps roots happy all season. Replenish mulch annually—it breaks down over time and loses effectiveness.
Check the soil moisture every 2 weeks during dry spells. If the top 2 inches of soil feel dry, water again. Avoid fertilizing again until late summer (around August) unless your tree is a heavy feeder like a fruit tree. Most trees only need one solid feeding per year—spring is the powerhouse, but consistency is key.
Tips & tricks for spring tree fertilization
Here's what nobody tells you about making spring fertilization work like a pro—these are the little details that make all the difference between a tired tree and one that bursts with life.
Soil Test Precision: That soil test kit isn't just a suggestion—it's your roadmap. I've seen people guess wrong and over-fertilize, thinking more is better. When you get your results, note the exact NPK numbers (like 3-2-1 for nitrogen-phosphorus-potassium) and match them to a fertilizer blend. For example, if your soil shows 2 parts nitrogen to 1 part phosphorus, look for a 2-1-1 ratio. This targeted approach prevents waste and root burn.
Timing Secret: The 2-4 week window after last frost is non-negotiable for spring fertilization. Cold soil can't absorb nutrients properly, and fertilizing too early risks burning tender new roots. Check your local frost date calendar and mark that window—then set a reminder. Pro tip: If your soil stays cold longer than usual, wait until it reaches at least 50°F before applying fertilizer.
Application Technique: That ring around the drip line isn't just decorative—it's strategic. Use a garden hose to mark the drip line first (where branches extend), then spread fertilizer in a perfect circle. For mature trees, divide the total fertilizer amount into 4 equal sections and apply each section 6 inches from the trunk. This creates a nutrient-rich zone exactly where roots need it most.
Mulch Maintenance: That 2-3 inch layer of mulch you spread isn't a one-time fix. Check it every 6 months—mulch breaks down and compresses over time. If you notice it's less than 1 inch thick, add more. But here's the catch: only add to the existing layer, never pile against the trunk. I've seen people create mulch volcanoes that suffocate roots and invite pests.
Pro Tips for Spring Tree Fertilization
- Here's what nobody tells you about making spring fertilization work like a pro—these are the little details that make all the difference between a tired tree and one that bursts with life.
- Soil Test Precision: That soil test kit isn't just a suggestion—it's your roadmap.
- Timing Secret: The 2-4 week window after last frost is non-negotiable for spring fertilization.
Frequently asked questions
Got questions about spring tree fertilization?
You’re not alone! Here are answers to the most common concerns to help you get started with confidence.
When is the best time to fertilize trees in spring?
The ideal window is early spring (March–April), once the soil is workable but before new leaves emerge. This jumpstarts root growth before the tree focuses on foliage. Avoid fertilizing during extreme heat or drought—wait for mild, moist conditions for best results.
How much does spring tree fertilization cost, and is it worth it?
Costs vary: DIY (granular or liquid fertilizer) runs $10–$50 per tree, while professional services charge $50–$200+ depending on tree size and location. If your trees look tired, have sparse foliage, or struggle with pests/disease, fertilization is absolutely worth the investment for long-term health.
What if I fertilize too late in spring? Can I still save my tree?
Late spring (May–June) fertilization is better than none, but it won’t be as effective. Focus on watering deeply and using a slow-release fertilizer to avoid burning roots. If your tree is young or stressed, pair fertilization with mulch to protect roots and retain moisture.
Are there organic alternatives to chemical fertilizers?
Yes! Try compost, worm castings, or manure-based fertilizers (like cow or chicken manure) for a gentler, nutrient-rich boost. Fish emulsion or seaweed extract are also great for micronutrients. Organic options break down slower, so apply them 4–6 weeks before spring growth kicks in.
My tree’s leaves turned yellow/brown after fertilizing—what went wrong?
This is often fertilizer burn, caused by overapplication or applying to dry soil. Flush the root zone with water, reduce future doses by half, and switch to a balanced, slow-release formula. If damage is severe, prune dead branches and focus on hydration until the tree recovers.
Wrapping up and next steps
Spring tree fertilization is your secret weapon for vibrant, healthy growth—just like a well-timed spring rain! 🌱 By choosing the right nutrients, applying them correctly, and staying consistent, you’ll give your trees the energy they need to thrive all season long.
Ready to see the difference? Start small—pick one or two trees this spring, monitor their progress, and build confidence as you expand. Your green thumb (and your trees!) will thank you!