
Tools
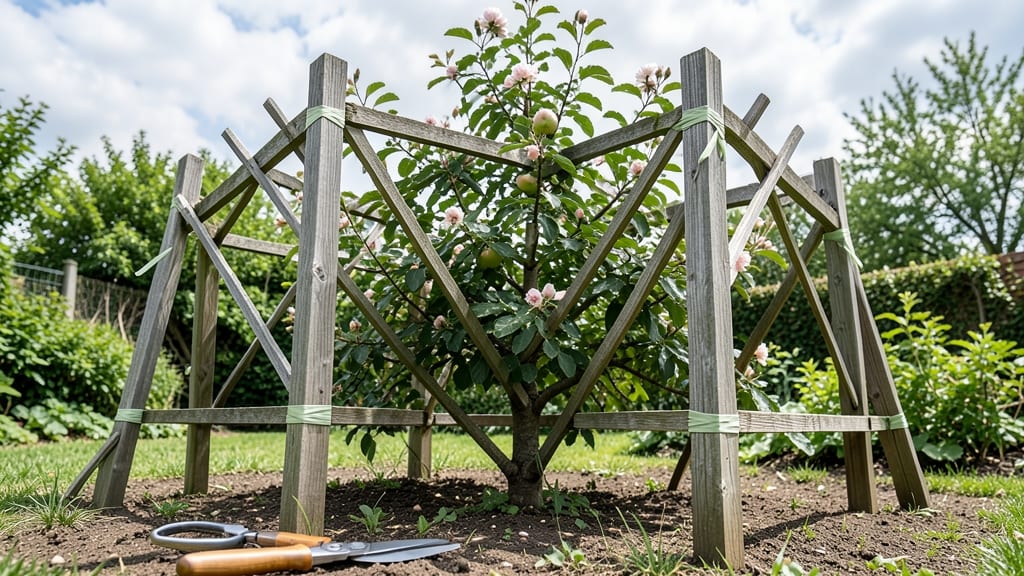
My apple tree trellis systems transformed a cramped backyard into a productive orchard. 🌱 What started as a frustration—limited space—became my most rewarding gardening project. These systems don’t just save room; they turn sprawling trees into elegant, high-yielding plants that fit even the smallest yards.
The right trellis boosts fruit quality by improving sunlight exposure and airflow, while making harvests easier. I’ve tried wood, metal, and plastic setups, and each has its strengths—wood blends naturally with the landscape, metal lasts decades, and plastic offers lightweight flexibility.
The key is matching the trellis type (like espalier or T-bar) to your tree’s growth habit and your space.
With proper installation, you’ll see stronger branches, easier pruning, and apples within arm’s reach. My 4-foot-tall espaliered trees produce just as much fruit as their untrellised counterparts—plus, they look stunning against a fence or wall. The payoff? More fruit, less work, and a garden that actually fits your space.
Whether you’re working with dwarf varieties or full-sized trees, these systems adapt to any scale. I’ll walk you through the best materials, step-by-step setup, and how to maintain them for years of trouble-free harvests. Let’s get those apples growing vertically!
📚 In This Guide
- What you need
- Instructions
- Tips and common mistakes
- Wrapping up and next steps
What you need
- ● Trellis Frame: 4–6 T-posts (5–6 ft tall, galvanized steel or pressure-treated wood) – quantity depends on trellis size
- ● 2–4 horizontal support beams (2x4 or 4x4 lumber, 8–10 ft long, pressure-treated)
- ● Cross-braces (2x2 or 2x3 lumber, cut to size for stability)
- ● Trellis Surface: Netting or mesh (plastic or UV-resistant, 1–2 inch grid, 10–20 ft roll)
- ● OR vertical slats (1x2 or 1x3 lumber, spaced 6–12 inches apart)
- ● Fasteners: Galvanized screws or nails (3–4 inches long, 1 lb box)
- ● Zip ties (for securing netting, 100-pack)
- ● Apple Tree: 1–2 dwarf or semi-dwarf apple trees (compatible with trellis training, e.g., 'Columnar' or 'Espalier' varieties)
- ● Pruning shears (for initial shaping)
- ● Measuring tape (25 ft)
- ● Drill/driver (with Phillips and flathead bits)
- ● Post-hole digger or auger (for securing T-posts)
- ● Level (4 ft)
- ● Hammer (for nails, if not using screws)
- ● Ladder (6–8 ft, for higher trellis sections)
- ● Safety gloves and eye protection (because DIY safety first!)
- ● Concrete mix (for extra stability if not using T-posts)
- ● Trellis paint or stain (to protect wood and add curb appeal)
- ● Drip irrigation kit (for efficient watering)
- ● Tree ties or soft plant straps (to secure branches gently)
Step-by-step guide to installing an apple tree trellis system
Transform your orchard into a space-efficient, high-yielding garden with this sturdy trellis approach.
🪴 Step 1: Choose and Prepare the Right Trellis Design
For dwarf apple trees, a 4-foot tall T-post trellis works best—install two posts every 6-8 feet along the row. I recommend galvanized steel T-posts (buried 2 feet deep) for durability, with horizontal wires at 12, 24, and 36 inches for structural support. Measure your row length first, then cut 1/4-inch galvanized wire to span between posts, leaving 6 inches extra for securing.
Dig holes for posts using a post hole digger, spacing them evenly. The trellis must be level—use a string line between posts to verify alignment before burying. For semi-dwarf trees, add a third wire at 48 inches to support heavier branches. Here's the thing—skipping proper spacing leads to uneven growth and fruit load imbalance.
🌱 Step 2: Install Support Wires and Attachments
After posts are set, attach insulated wire strainers to each post at wire heights. Run the horizontal wires through the strainers and pull taut—use a come-along to tighten to 50-60 pounds of tension. Secure ends with wire clamps or sleeves to prevent slipping. For vertical support, add flexible tree ties at each wire level, leaving 4-6 inches of slack for trunk growth.
I like to install drip irrigation lines along the base wire simultaneously—this keeps watering consistent without disturbing the trellis later. Space emitters every 2 feet for even moisture distribution. The key is tension without crushing—wires should hold firm but not cut into bark when tied.
☀️ Step 3: Train Young Apple Trees to the Trellis
When planting, position the tree 2-3 inches from the trellis to allow easy access. In early spring, select the strongest upward-growing branch and tie it to the lowest wire using a soft tree tie. As new shoots appear, guide them horizontally along the wires—this encourages spread rather than vertical growth, which maximizes sunlight exposure and air circulation.
Prune any competing branches that grow toward the center or downward. You'll see first-year buds forming along the scaffold branches—these become your fruit-bearing wood. Real talk: Over-pruning now reduces future harvests, so focus on structural training rather than aggressive cuts.
✂️ Step 4: Maintain and Adjust the System Seasonally
Every late winter, inspect the trellis for rust or wire sag. Tighten wires if they've lost tension, and replace any damaged components. During summer, adjust ties as branches thicken—never leave them too tight, or they'll girdle the bark. I also add fruit thinning spray in early June to prevent overloading branches, which strains the trellis.
In fall, remove all ties and reposition them 1-2 inches higher to accommodate trunk thickening. This prevents scarring and allows the tree to grow into the support naturally. Watch for suckers at the base—remove them immediately, as they drain energy from the trellised structure.
Tips & tricks for perfect apple tree trellis systems
A few strategic moves can transform your trellis from functional to exceptional—here's how to maximize your system's potential.
Post Placement Precision: When installing your 4-foot tall T-posts every 6-8 feet, consider your tree's mature spread. For dwarf varieties, 6 feet works perfectly, but semi-dwarfs may need the full 8-foot spacing. I've found that using a laser level instead of just a string line eliminates alignment issues entirely—this ensures your wires stay perfectly horizontal, which is critical for even branch distribution. The 2-foot deep burial is non-negotiable for wind resistance, especially in exposed orchards.
Wire Tension Technique: That 50-60 pounds of tension in your horizontal wires isn't just arbitrary—it's the sweet spot for supporting fruit without restricting growth. I recommend using a bungee cord tension gauge to verify tension after installation. Too little tension causes sagging (which leads to fruit rot), while too much restricts branch movement. Pro tip: Install wires in this order—36 inches first, then 24, then 12—this prevents the lowest wire from getting overloaded with weight as branches grow.
Tree Training Timeline: The early spring timing for initial branch training isn't just about weather—it's about growth hormones. Apple trees flush new growth in spring, making them most receptive to shaping. I've seen dramatic differences when training branches at this time versus summer or fall. For the 2-3 inch spacing from trellis to trunk, use soft fabric ties (never wire or plastic) that won't cut into bark as the tree grows. The 4-6 inch slack in vertical ties is crucial—this prevents girdling as branches thicken.
Maintenance Calendar: That late winter inspection isn't just about rust—it's your chance to assess the trellis's structural integrity before the growing season. I've had clients skip this step and end up with collapsed wires mid-summer when fruit load peaked. For the 1-2 inch annual tie adjustment, mark the original tie position with a paint pen before removing—this helps you see exactly how much the trunk has thickened. The early June fruit thinning is equally important; overloaded branches can snap under their own weight, especially on semi-dwarf varieties with that extra 48-inch wire.
Pro Tips for Apple Tree Trellis Systems
- A few strategic moves can transform your trellis from functional to exceptional—here's how to maximize your system's potential.
- Post Placement Precision: When installing your 4-foot tall T-posts every 6-8 feet, consider your tree's mature spread.
- Wire Tension Technique: That 50-60 pounds of tension in your horizontal wires isn't just arbitrary—it's the sweet spot for supporting fruit without restricting growth.
Frequently asked questions
Got questions about apple tree trellis systems?
You’re not alone! Here are answers to the most common queries to help you get started with confidence.
What’s the best time of year to install an apple tree trellis?
Install your trellis in late winter or early spring—before buds break but after the worst frost. This gives roots time to establish before summer growth. For potted trees, install it immediately after planting to encourage vertical growth.
How do I choose the right trellis size for my apple tree?
Match the trellis height to your tree’s mature size: dwarf varieties (6–8 ft) need 5–6 ft trellises, semi-dwarf (10–12 ft) require 8–10 ft, and standard trees (15+ ft) benefit from 12+ ft systems. Width should be 3–4 ft for proper airflow and sunlight.
Can I use a trellis with any apple tree variety?
Yes, but dwarf and semi-dwarf varieties (like ‘Gala’ or ‘Fuji’) thrive best on trellises. Standard trees can work but may need stronger support (e.g., T-posts or cables). Avoid trellising columnar varieties—they’re already naturally upright!
What if my apple tree isn’t growing straight on the trellis?
Gently tie branches to the trellis with soft plant ties (avoid wire!) every 6–12 inches. Prune suckers or crossing branches to encourage upward growth. If the tree leans, stake it temporarily until it stabilizes.
Are DIY trellis systems cheaper than buying pre-made ones?
DIY options (like PVC pipes, bamboo stakes, or wooden frames) cost $20–$50, while pre-made trellises run $100–$300+. Just ensure materials are durable and rust-resistant for long-term use.
Wrapping up and next steps
Transforming your orchard—or even a cozy backyard—into a space-efficient apple haven is easier than you think! With the right apple tree trellis system, you’ll save space, boost yields, and enjoy easier maintenance.
Whether you’re a seasoned gardener or just starting out, this setup is your ticket to a bountiful, organized harvest.
Ready to get growing? Start by sketching your trellis design, gathering your materials, and diving into installation. Before you know it, you’ll be savoring homegrown apples—one trellis at a time! 🍏✨