
Tools
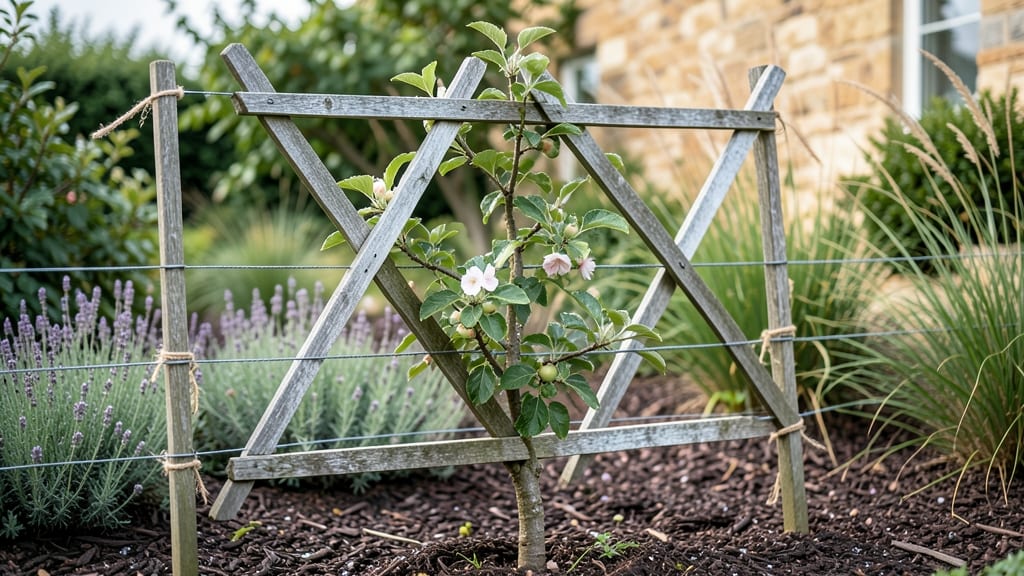
An espalier apple tree trellis transforms tight spaces into productive orchards. 🌳 I built mine against my garage wall, and now I grow three varieties in the footprint of a single patio chair. The key isn't just the trellis—it's how you train the branches to spread flat like a painting.
You'll need sturdy posts, horizontal wires, and a young apple tree with flexible branches. My design uses 3-foot spacing between wires and 12-inch spacing between posts, but adjust based on your tree's growth habit. The materials are simple: T-posts, galvanized wire, and a few basic tools you likely already own.
Once installed, you'll harvest fruit at eye level and watch the tree's delicate silhouette become a garden centerpiece. The first year focuses on training, but by year two, you'll have a professional-looking display that produces more apples than a traditional tree.
Perfect for urban yards, small homesteads, or even large containers. The same principles work for pears, peaches, or decorative fruit trees too—just scale the spacing to match your plant's needs.
📚 In This Guide
- What you need
- Instructions
- Tips and common mistakes
- Wrapping up and next steps
What you need
- ● Apple Tree Sapling: 1-3 dwarf or semi-dwarf varieties (e.g., 'Gala,' 'Granny Smith,' or 'Honeycrisp'), 1-3 years old, with bare roots or potted.
- ● Trellis Framework: 2x4-inch lumber (pressure-treated or cedar) – 4 pieces, 6-8 ft long (for vertical posts).
- ● 1x2-inch or 1x3-inch lumber – 4-6 pieces, 6-8 ft long (for horizontal supports).
- ○ Optional: Metal T-posts or galvanized pipes for extra stability.
- ● Trellis Wire or Netting: 16-18 gauge galvanized wire – 50-100 ft (for horizontal wires).
- ● OR 1/2-inch mesh netting – 1 roll (for a no-wire option).
- ● Fasteners: Staple gun + staples (for wire/netting).
- ● Deck screws or galvanized nails (for wood assembly).
- ● Zip ties (for securing branches).
- ● Pruning Tools: Bypass pruners (sharp and clean!).
- ○ Optional: Loppers for thicker branches.
- ● Soil & Fertilizer: Well-draining potting mix or garden soil (enriched with compost).
- ● Balanced fertilizer (10-10-10 or organic options like fish emulsion).
- ● Location: Choose a spot with 6+ hours of sunlight daily and protection from strong winds.
- ● Spacing: Allow 3-4 ft between trees if planting multiple saplings on the trellis.
- ● Pro Tip: 💡 Use a post-hole digger or auger to bury vertical posts 18-24 inches deep for stability.
- ○ Optional Extras: Drip irrigation kit for consistent watering.
- ● Mulch (straw or wood chips) to retain moisture.
- ● Decorative paint or stain for a custom look!
Step-by-Step guide to building an espalier apple tree trellis
Transform your small garden with this elegant, functional design that trains apple trees to grow flat against a wall or fence.
🪴 Step 1: Design and Mark Your Espalier Layout
Sketch your design first—common patterns include horizontal cordon, fan, or palmette shapes. For a 4-tree setup, space each tree 8-10 feet apart horizontally and 6-8 feet apart vertically along your wall or fence. Use a level and measuring tape to mark precise locations for each tree and trellis arm.
I always draw my design on paper first, adjusting for sunlight exposure and wind direction. Apple trees need 6-8 hours of direct sun, so position your trellis where the wall won’t cast long shadows. Mark each branch attachment point with stakes and twine—these will guide where you’ll later install your trellis arms.
✂️ Step 2: Install the Trellis Framework
Construct your trellis using 1x2-inch treated lumber for durability and weather resistance. For a 4-tree setup, install two horizontal arms per tree—one at 3 feet and another at 5 feet from the ground. Secure each arm to the wall or fence with heavy-duty L-brackets or post anchors, ensuring they’re level and sturdy to support future growth.
Drill pilot holes first to avoid splitting the wood, and use stainless steel screws to prevent rust. Space the arms 12-18 inches apart vertically to accommodate the tree’s spreading branches. If your wall is textured or uneven, use adjustable brackets to maintain a consistent angle for training branches.
🌱 Step 3: Plant and Train Young Apple Trees
Plant your 4 dwarf apple trees (like ‘Columnar’ or ‘Semi-Dwarf’ varieties) in deep holes, ensuring the graft union is 2-3 inches above soil level. Water deeply to settle the roots, then wait 2-3 weeks before pruning to let the tree establish itself. Once established, select 4-6 strong, flexible branches per tree for your espalier design.
Here’s the key: tie branches to the trellis arms using soft cloth strips or rubber tree ties—never wire, which can damage bark. Bend branches gently but firmly along the trellis, securing them at 45-degree angles to encourage outward growth. Avoid sharp bends; the goal is to guide, not force, the tree’s natural shape.
🌿 Step 4: Prune and Maintain Seasonal Growth
Prune in late winter or early spring before buds swell, removing any crossing or inward-growing branches to maintain an open canopy. For espaliered trees, cut back any suckers (shoots growing below the graft) and thin out crowded branches to improve airflow and fruit production. Aim to keep 3-5 main branches per tree, spaced evenly along the trellis.
Fertilize in early spring with a balanced 10-10-10 formula, and mulch around the base with 2-3 inches of organic mulch to retain moisture. Water deeply once a week during dry spells, ensuring the soil stays evenly moist but not soggy. Espaliered trees are less wind-resistant, so stake young branches during storms to prevent breakage.
⏰ Step 5: Harvest and Winterize for Long-Term Success
Harvest apples in late summer or fall, when they’re fully colored and slightly soft to the touch. Gently twist fruits from the branch—don’t pull, or you’ll risk damaging the tree. For a 4-tree setup, expect 20-50 apples per tree at maturity, depending on the variety and care. Store harvested apples in a cool, dark place to extend shelf life.
Before winter, wrap young trees in burlap to protect against frost and wind damage. Prune again in late winter to remove any dead or diseased wood, and apply dormant oil spray to prevent pests. Espaliered apple trees thrive with consistent care, so mark your calendar for spring pruning, summer watering, and fall harvesting to keep your small orchard productive for decades.
Tips & tricks for perfect espalier apple tree trellis design
Here's what I've learned after years of training apple trees—these details make all the difference in your small orchard's success.
Design Precision: When sketching your layout in Step 1, consider the mature spread of your chosen apple varieties. Dwarf trees like 'Columnar' varieties grow narrower, so you can space them 6-8 feet apart horizontally, while 'Semi-Dwarf' varieties need the full 8-10 feet spacing. I always draw my design to scale using graph paper—this helps visualize how shadows will move throughout the day and ensures each tree gets its required 6-8 hours of direct sun.
Framework Stability: In Step 2, don't skimp on securing those 1x2-inch treated lumber arms—trellises bear surprising weight as trees mature. I recommend using three-point mounting for each arm: one at each end and one in the center. This prevents sagging, which can distort your espalier shape. For particularly windy areas, add diagonal bracing between the 3-foot and 5-foot arms to create a triangle of support. The 12-18 inch vertical spacing between arms is perfect for training branches at those ideal 45-degree angles mentioned in Step 3.
Branch Training Technique: The 2-3 week waiting period after planting before training branches is crucial—it gives roots time to establish. When you're ready to bend those 4-6 strong branches in Step 3, use the "three-finger test": if you can't bend the branch 45 degrees without it snapping between your fingers, it's not ready. I've found that wrapping branches with soft cloth strips (like old T-shirts) works better than rubber ties for the first year—they're gentler on young bark and can be easily adjusted as branches grow.
Seasonal Maintenance: That late winter or early spring pruning window in Step 4 is your best chance to shape the tree while it's dormant. I mark my calendar with colored dots: red for pruning, blue for fertilizing, and green for mulching. For the 10-10-10 fertilizer, I split the application into two doses—half in early spring and half after harvest—to avoid overfeeding. And when you're thinning branches to keep 3-5 main branches per tree, cut just above an outward-facing bud to encourage proper growth direction.
Pro Tips for Espalier Apple Tree Trellis
- Here's what I've learned after years of training apple trees—these details make all the difference in your small orch...
- Design Precision: When sketching your layout in Step 1, consider the mature spread of your chosen apple varieties. Dw...
- Framework Stability: In Step 2, don't skimp on securing those 1x2-inch treated lumber arms—trellises bear surprising ...
Frequently asked questions
Got questions about espalier apple trees and trellises?
Here are some of the most common ones—plus straightforward answers to help you get started (or troubleshoot) with confidence!
How do I choose the right apple tree variety for espaliering?
Opt for dwarf or semi-dwarf varieties like ‘Gala,’ ‘Granny Smith,’ or ‘Honeycrisp’—they’re naturally compact and adapt well to training. Avoid standard-sized trees; their branches will overpower your trellis. Check your USDA zone for cold-hardy picks!
How long does it take for an espalier apple tree to bear fruit?
With patience, you’ll see fruit in 3–5 years (vs. 5–7 for untrained trees). Early blooms may not yield much, but consistent pruning and care speed up maturity. Pro tip: Use dwarf rootstocks—they fruit faster than full-sized trees!
Can I use a DIY trellis instead of buying one?
Build a sturdy frame with T-posts, wire mesh, or wooden slats (3–4 feet tall). Angle branches at 45° for airflow. Just ensure it’s weatherproof—galvanized metal or treated wood lasts longest. Here’s a simple DIY guide!
Why are my espaliered apple tree leaves curling or yellowing?
Common culprits:
- Overwatering (root rot) or underwatering (stress).
- Pests like aphids or mites (spray neem oil).
- Nutrient deficiency (add compost or fertilizer).
Do espalier apple trees need winter protection?
Yes! In zones 5–7, wrap the trellis in burlap or use frost cloth to shield branches. Mulch the base with straw (3–4 inches) to insulate roots. Pro tip: Prune in late winter after frost risk passes!
Wrapping up and next steps
Transforming your small garden into a stunning, space-saving orchard is easier than you think! With an espalier apple tree trellis, you’ve got the perfect solution to grow beautiful, bountiful fruit while maximizing every inch of space.
The key is patience, creativity, and a little elbow grease—but the rewards are delicious and visually breathtaking.
Ready to take the next step? Start by sketching your trellis design, gathering your tools, and choosing the right apple variety for your climate. Then, roll up your sleeves and watch your garden—and your harvest—thrive! 🍏✨