
Trees
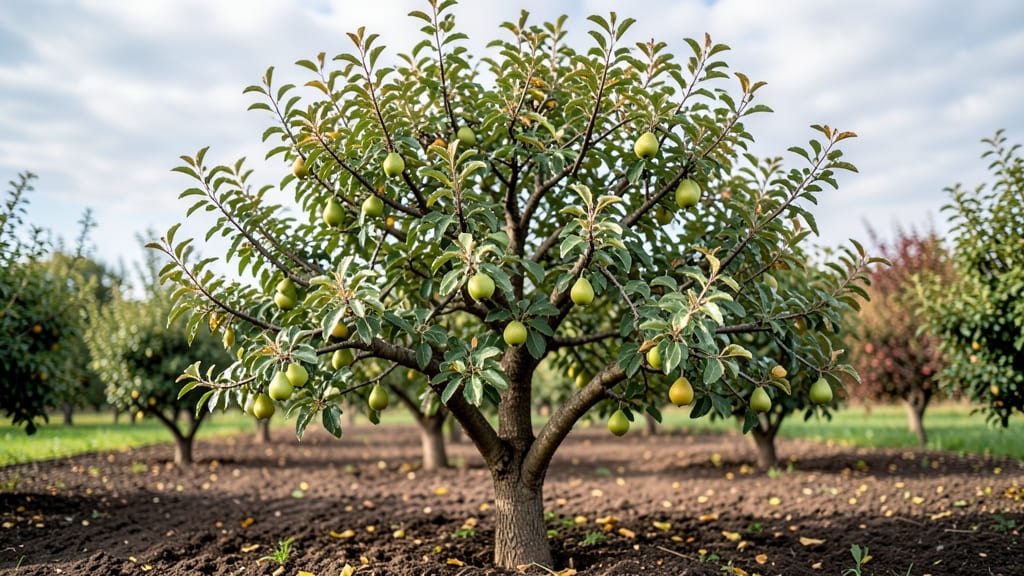
Bartlett pear tree leaves tell the story of your tree's health—wilted, spotted, or yellowing foliage is its way of screaming for help. 🌿 I’ve watched my own Bartlett go from lush and productive to a sad, skeletal shadow after ignoring early warning signs, and I’m here to help you avoid that heartbreak.
The good news? Most leaf problems—whether it’s fire blight’s blackened edges, powdery mildew’s white dust, or aphids’ sticky residue—have simple fixes once you know what to look for. Start with basic checks: watering habits, soil nutrients, and sunlight exposure.
A single adjustment often turns a struggling tree around before treatments are even needed.
📚 In This Guide
- What you need
- Instructions
- Tips and common mistakes
- Wrapping up and next steps
What you need
- ● Bartlett pear tree (Pyrus communis) – Ensure it’s planted in well-draining soil with full sun exposure (6+ hours/day). 🌞
- ● Pruning shears or loppers – Sharp, clean tools (sterilize with rubbing alcohol between cuts to prevent disease).
- ● Gloves – Heavy-duty gardening gloves to protect against thorns and sap.
- ● Organic mulch (wood chips or straw) – 2–3 inches thick, applied in a 3-foot radius around the trunk.
- ● Balanced fertilizer (10-10-10 or 20-20-20) – Use sparingly (follow package instructions) during early spring and late summer.
- ● Watering can or hose with adjustable nozzle – Deep watering (1–2 inches per week) is key, especially during dry spells.
- ● Fungicide (copper-based or neem oil) – For preventive care against fire blight or powdery mildew.
- ● Insecticidal soap or horticultural oil – Targets common pests like aphids, mites, or scale insects.
- ● Soil pH test kit – Bartlett pears prefer slightly acidic to neutral soil (pH 6.0–7.0). Adjust with lime or sulfur if needed.
- ● Tree collar sprayer – For targeted application of fertilizers or treatments without waste.
- ● Drip irrigation system – Automates watering for consistent moisture, especially in hot climates.
- ● Bird netting – Protects fruit (and leaves) from birds and pests during harvest season.
- ● Leaf analysis kit – Tests nutrient deficiencies (e.g., yellowing leaves may indicate nitrogen or magnesium issues).
Instructions for maintaining healthy Bartlett pear tree leaves year-round
Here's the straightforward approach I've used to keep Bartlett pears thriving with vibrant, disease-free foliage—no mystery involved.
🌿 Step 1: Prune for Airflow and Sunlight in Late Winter
Start by removing any dead, crossing, or diseased branches with clean, sharp pruners. I target 10-15% of the tree's total branches—this keeps it open enough for sunlight to reach all leaves. Focus on branches growing inward or rubbing against others, as these create shade and invite fungal diseases.
Look for V-shaped branch unions—these are strong. Avoid cutting where branches form a U-shape, as these often split later. Make cuts just outside the branch collar (the swollen area where the branch meets the trunk) at a 45-degree angle to prevent water pooling.
☀️ Step 2: Apply Balanced Fertilizer in Early Spring
Once new leaves emerge (usually 3-4 weeks after last frost), spread a 10-10-10 fertilizer around the drip line—about 6-8 feet from the trunk. I use a broadcast spreader for even coverage, then water deeply to activate the granules. This timing ensures roots wake up with nutrients for leaf production.
Watch for dark green, glossy leaves as your signal that fertilization is working. If leaves appear yellow between veins, that's a classic nitrogen deficiency—apply a second light dose of fertilizer 6 weeks later. Avoid over-fertilizing; brown leaf edges mean you've overdone it.
💧 Step 3: Water Deeply During Dry Periods
Bartlett pears need 1-1.5 inches of water weekly during growing season, delivered at the base—not overhead. I use a soaker hose for 1-2 hours to saturate the root zone 12 inches deep. The soil should feel moist but not soggy—think of a damp sponge.
Check moisture by pushing a screwdriver into the soil. If it goes in easily, water again. If it resists, wait another day. Overhead watering encourages fungal leaf spots, so always water at the base. Mulch with 2-3 inches of wood chips to retain moisture and prevent soil-borne diseases from splashing onto leaves.
✂️ Step 4: Monitor for Pests and Treat Early
Inspect leaves weekly for signs of pests like aphids or mites—look for sticky residue (honeydew) or tiny webs on undersides. I treat lightly at first with a strong spray of water to dislodge pests, then apply neem oil if needed. For fungal issues like powdery mildew (white fuzzy patches), prune affected leaves immediately and apply copper fungicide.
Don't wait until leaves are severely damaged. The moment you spot yellowing, curling, or spotting, act fast. Healthy leaves should be smooth, deep green, and firm to touch. If you see holes or excessive browning, check for borers or caterpillars and treat accordingly.
🪴 Step 5: Prepare for Winter Dormancy in Fall
Stop fertilizing by late August to let the tree harden off. Remove any remaining diseased leaves and dispose of them in the trash (not compost). I apply a 4-inch layer of mulch around the base to insulate roots, but keep it 6 inches away from the trunk to prevent rot.
Winter care is about protection. If your area gets heavy snow, gently brush accumulation off branches to prevent breakage. In very cold climates, wrap the trunk with burlap for extra insulation. Healthy winter leaves (even dormant ones) should appear plump and greenish-brown, not shriveled or blackened.
Tips & tricks for maintaining healthy Bartlett pear tree foliage
Here's what I've learned after years of keeping my Bartlett pears lush and disease-free—these details make all the difference.
Pruning Precision: In Step 1, when you're removing those 10-15% of branches, look for "water sprouts"—those fast-growing, vertical shoots that steal energy from your tree. These often grow from the trunk or larger branches and should be your first targets. They rarely produce fruit and create dense areas where diseases thrive. Make your cuts just outside the branch collar at that 45-degree angle—this prevents water from pooling and causing rot at the wound site.
Fertilizer Timing Secret: That 3-4 week window after last frost for Step 2 is critical because it aligns with root activity. I've found that applying fertilizer too early can burn tender new roots still waking up from dormancy. For the second application 6 weeks later, use half the amount—this prevents the brown leaf edges that signal over-fertilization. Think of it like feeding a child small portions rather than one big meal.
Watering Wisdom: Those 1-2 hours with the soaker hose in Step 3 might seem like a long time, but it's about slow, deep saturation—not surface wetting. I test soil moisture by pushing that screwdriver in—if it goes in easily up to the handle, your tree's getting enough. The key is consistency: Bartlett pears hate having wet feet but also can't handle drought stress. The 2-3 inches of wood chips helps maintain that perfect moisture balance by acting like a natural sponge.
Pest Prevention: In Step 4, when you spot that sticky residue (honeydew), it's already too late for some pests—they've been feeding for days. Start your weekly inspections in early spring when aphids first appear. I keep a spray bottle of soapy water (1 tsp mild dish soap per quart of water) handy for immediate treatment. For fungal issues, remove those affected leaves immediately and dispose of them in the trash, not compost, to prevent reinfection.
Pro Tips for Bartlett Pear Tree Leaves
- Here's what I've learned after years of keeping my Bartlett pears lush and disease-free—these details make all the difference.
- Pruning Precision: In Step 1, when you're removing those 10-15% of branches, look for "water sprouts"—those fast-growing, vertical shoots that steal energy from your tree.
- Fertilizer Timing Secret: That 3-4 week window after last frost for Step 2 is critical because it aligns with root activity.
Frequently asked questions
Got questions about keeping your Bartlett pear tree leaves lush and healthy? You’re not alone! Here are answers to the most common concerns—from pruning tips to pest troubleshooting—so you can enjoy vibrant foliage year-round.
When is the best time to prune Bartlett pear tree leaves?
Prune your Bartlett pear tree in late winter or early spring (before buds swell) to avoid spreading diseases. Summer pruning is possible, but focus on removing dead or diseased leaves immediately. Pro tip: Use sterilized tools and seal cuts with pruning sealant to prevent infections.
How do I protect Bartlett pear tree leaves in winter?
Bartlett pears are hardy, but young trees or harsh winters may need help. Apply a 3-inch layer of mulch around the base (not touching the trunk) to insulate roots. Wrap the trunk with burlap if temps drop below -15°F. Avoid heavy snow buildup on branches—gently brush it off to prevent breakage.
What should I do if my Bartlett pear tree leaves have holes or spots?
Holes or spots often signal pear slugs (sawfly larvae) or fungal issues like scab disease. For pests, handpick larvae or use neem oil. For fungal spots, apply copper fungicide in early spring. Preventative tip: Space trees for airflow and clean up fallen leaves to reduce fungal spores.
Can I use Bartlett pear tree leaves for compost or mulch?
Yes! Fresh leaves can be composted, but they decompose slowly—chop them first for faster breakdown. Avoid using diseased leaves in compost. For mulch, let leaves dry and shred them to prevent matting. Bonus: Pear leaves add potassium to compost, great for fruiting plants!
Why are my Bartlett pear tree leaves yellowing?
Yellowing leaves often mean overwatering, nutrient deficiency, or root issues. Check soil moisture—pears prefer well-draining soil. Test for iron or nitrogen deficiency (common in alkaline soils) and amend with chelated iron or compost. If roots are waterlogged, improve drainage or consider a root aeration treatment.
Wrapping up and next steps
Caring for your Bartlett pear tree leaves is all about consistency and attention to detail—whether it’s pruning for airflow, monitoring pests, or nourishing the soil. Healthy foliage doesn’t just happen; it’s the result of your dedication to year-round maintenance.
With the right tools, knowledge, and a little patience, your tree will reward you with lush, vibrant leaves and bountiful harvests for seasons to come.
Ready to take the next step? Schedule a quick seasonal check-in—even just a monthly inspection of your tree’s leaves can make a world of difference! 🌿 Whether you’re a seasoned gardener or just starting out, every little effort adds up to a thriving Bartlett pear tree.