
Size
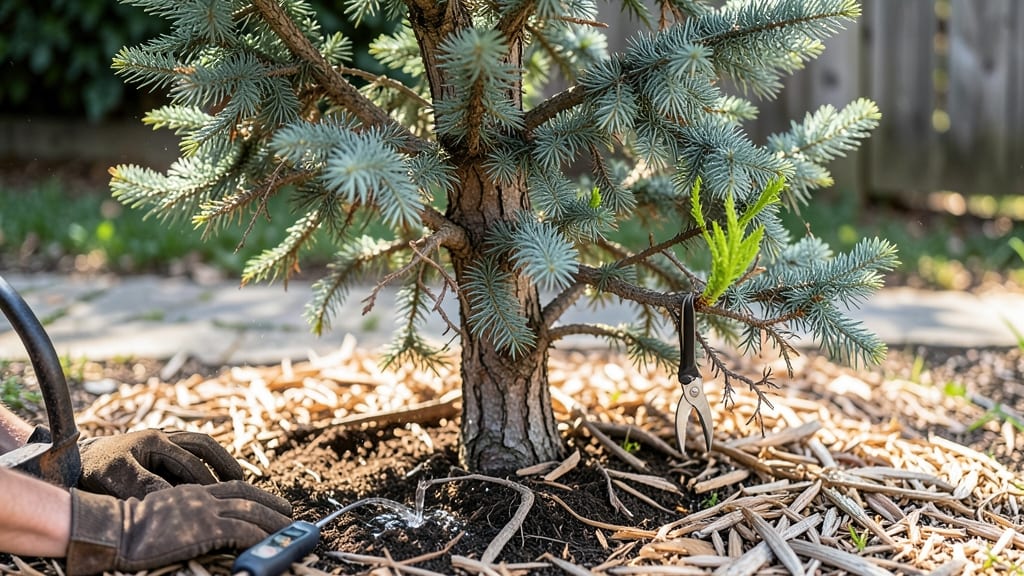
Can you bring a tree back to life? It’s not magic—it’s science. 🌳 I've nursed back more trees than I've lost, and the difference always starts with understanding what's really wrong beneath the soil.
Most gardeners rush to water or fertilize first, but the real clues hide in the roots, bark, and leaf patterns. Start by checking the bark for cracks or oozing sap, then scrape a small area to see if the green layer beneath is still alive.
Drooping leaves might mean root rot, while yellowing could signal overwatering or nutrient starvation. The key is matching symptoms to causes—not guessing. My first revival came from fixing a single issue: compacted roots starving for air.
With the right approach, you can see new growth in as little as 4-6 weeks. I've seen oaks, maples, and even fruit trees bounce back when given the right care—watering deeply but infrequently, pruning dead branches cleanly, and sometimes even grafting in new life. The worst mistake?
Waiting too long to act. Not every tree can be saved, but knowing when to try makes all the difference. Let's assess yours step by step—before it's too late.
📚 In This Guide
- What you need
- Instructions
- Tips and common mistakes
- Wrapping up and next steps
What you need
- ● Pruning shears or sharp bypass pruners – Clean, sterilized tools to trim dead branches (avoid dull blades that tear bark).
- ● Garden trowel or spade – For carefully digging around roots without damaging them (choose a 5–6 inch wide blade for precision).
- ○ High-quality rooting hormone – A powder or gel (e.g., Rootone or Dip ‘N Grow) to boost regrowth. Optional but highly recommended for stressed trees.
- ● Well-draining potting mix or compost – A blend of 50% peat moss, 30% perlite, and 20% coco coir (or store-bought cactus/succulent mix for drought-prone species).
- ● Watering can with a fine rose nozzle – For gentle, deep hydration (avoid pressure sprays).
- ● Clear plastic bag or humidity dome – To create a mini greenhouse effect (use a large Ziploc or humidity tent for small trees).
- ● pH test kit – Ensures soil pH is 5.5–7.0 (ideal for most trees; adjust with lime or vinegar if needed).
- ● Mycorrhizal fungi granules – Sprinkle near roots to enhance nutrient absorption (e.g., MycoApply).
- ● Slow-release fertilizer (10-10-10 or 5-5-5) – 1 tbsp per gallon of soil for nutrient-deficient trees.
- ● Misting bottle – For daily light misting (critical for humidity-loving species like ferns or citrus).
- ● Tree support stake (if needed) – A bamboo or metal stake + soft tie for weak or top-heavy trees.
- ● LED grow lights (12–16 hrs/day) – For low-light conditions (e.g., Samsung LM300 bulbs).
Step-by-Step guide to reviving a stressed tree
Here's how to assess damage and take action before it's too late.
🌱 Step 1: Diagnose the Problem and Assess Damage
Start by examining the tree's leaves, bark, and soil. Look for signs like yellowing leaves, wilting branches, or cracks in the bark—these indicate stress. I check for pests or fungal growth first, as these often cause sudden decline. Run your fingers through the soil around the base; if it's bone-dry or waterlogged, that's your first clue.
Gently scratch the bark on the trunk with your fingernail. Healthy bark feels firm and smooth, while damaged bark may appear sunken, oozing sap, or peeling. If you see dead branches, use clean pruning shears to remove them just outside the branch collar. Never leave stubs—they invite disease. This step ensures you're addressing the root cause, not just symptoms.
💧 Step 2: Adjust Watering and Improve Soil Conditions
Water deeply at the base of the tree, providing 1-2 inches per week during dry spells. Use a garden hose with a slow setting or a soaker hose to prevent runoff. I like to water in the early morning so the moisture has time to soak in before the heat of the day. Avoid wetting the leaves to prevent fungal infections.
Loosen the top 6 inches of soil around the tree's drip line (the edge of its canopy) with a garden fork. This improves root access to oxygen and water. If the soil is compacted or clay-heavy, mix in 2-3 inches of compost to boost organic matter. You'll see healthier growth within a few weeks as the roots recover.
☀️ Step 3: Provide Proper Light and Airflow
Thin out any overcrowded branches to improve airflow, especially if the tree is shaded by buildings or other plants. Use pruning shears to make clean cuts just outside the branch collar. Remove any dead, diseased, or crossing branches first—they're the weakest points. I always sterilize my tools with rubbing alcohol between cuts to prevent spreading pathogens.
If the tree is in a low-light area, consider selective pruning of nearby vegetation to allow more sunlight. Avoid heavy pruning in late summer or fall, as this stresses the tree when it's already preparing for dormancy. You'll notice new buds forming along the branches within 4-6 weeks if the tree is recovering.
✂️ Step 4: Fertilize and Protect for Long-Term Recovery
Apply a balanced, slow-release fertilizer (10-10-10) in early spring or late fall, following the package instructions. Spread it evenly over the root zone, then water deeply to activate it. Avoid over-fertilizing—too much nitrogen can burn roots and cause more stress. I like to use organic options like composted manure or worm castings for a gentler boost.
Install a tree guard or mulch ring around the base to protect the trunk from lawn equipment and pests. Use 2-4 inches of organic mulch (like wood chips or straw), keeping it 6 inches away from the trunk to prevent rot. This helps retain moisture, regulate soil temperature, and suppress weeds. Check the mulch every few months and replenish as needed.
⏰ Step 5: Monitor and Adjust for Seasonal Changes
Keep a log of the tree's progress, noting changes in leaf color, branch growth, and overall vigor. In winter, protect young or newly revived trees from harsh winds and freezing temperatures with burlap wraps or tree wraps. I always remove these in early spring to avoid trapping heat and causing bark damage.
If the tree shows no improvement after 3-4 months, consult a certified arborist. Some damage, like deep root rot or severe pest infestations, requires professional intervention. But with patience and the right care, many trees can bounce back—just give them time to heal.
Tips & tricks for reviving stressed trees
Reviving a struggling tree takes patience and precision—here's how to maximize your chances of success.
Diagnosis is Key: When you're examining the bark in Step 1, pay special attention to any discoloration or unusual textures. Healthy bark should feel smooth and firm—if you notice sticky residue or holes, this could indicate pest infestations that need targeted treatment. I always carry a small magnifying glass when inspecting trees, as some signs of stress are microscopic but critical to catch early.
Watering Wisdom: The 1-2 inches per week guideline in Step 2 works best for most trees, but young trees or newly planted specimens often need more—up to 3 inches during their first growing season. Use a rain gauge or tuna can buried near the tree to measure water accurately. Deep watering is crucial; shallow watering encourages roots to stay near the surface where they're more vulnerable to drought.
Seasonal Pruning Strategy: In Step 3, timing matters more than you might think. For deciduous trees, late winter or early spring (just before buds swell) is ideal for pruning. Evergreens can be pruned anytime except during extreme cold. I've seen trees recover beautifully when pruned correctly in the right season, but poorly timed cuts can actually set them back. Always make cuts at a 45-degree angle just outside the branch collar for optimal healing.
Fertilizer Timing Matters: When applying that 10-10-10 fertilizer in Step 4, remember that timing is everything. Early spring applications give trees time to establish new growth before summer heat stress. Late fall applications allow nutrients to be stored for winter dormancy. I've learned the hard way that applying fertilizer in summer can actually stress the tree by encouraging new growth when it should be conserving energy.
Pro Tips for Can You Bring A Tree Back To Life
- Reviving a struggling tree takes patience and precision—here's how to maximize your chances of success.
- Diagnosis is Key: When you're examining the bark in Step 1, pay special attention to any discoloration or unusual tex...
- Watering Wisdom: The 1-2 inches per week guideline in Step 2 works best for most trees, but young trees or newly plan...
Frequently asked questions
Got questions about reviving a struggling tree? You’re not alone! Here are some of the most common concerns—and expert-backed answers—to help you bring your wilted wood back to life.
What are the first signs my tree is still alive and worth saving?
Check for green leaves or buds—even if they’re sparse. Scratch the bark: if it’s green underneath, roots may still be active. Tap the trunk—if it sounds hollow, the tree is likely dead. Pro tip: Look for new growth in spring; that’s your best sign of hope!
How long does it take to revive a dying tree?
Revival timelines vary wildly! A mildly stressed tree might bounce back in weeks with proper care, while severely damaged ones could take 1–3 years or never recover. Patience is key—focus on consistent watering, pruning dead branches, and soil health.
Can overwatering kill a tree I’m trying to save?
Absolutely.
Overwatering suffocates roots by cutting off oxygen, leading to rot. Stick your finger 2–3 inches into the soil—if it’s soggy, hold off. Water deeply but infrequently, aiming for 1–1.5 inches per week (adjust for climate). Drainage is non-negotiable!
What if my tree’s roots are completely exposed or rotting?
Exposed or mushy roots = bad news. You’ll need to prune dead roots (sterilize tools first!) and amend the soil with compost or mulch to encourage regrowth. For severe rot, consult an arborist—some trees may need root grafting or replacement. Don’t give up yet!
Are there any “quick fixes” or products that guarantee revival?
No magic potions exist, but mycorrhizal fungi (root-boosting microbes) and slow-release fertilizers can help. Avoid chemical sprays—they often do more harm. Focus on organic solutions: mulch, proper pruning, and stress reduction (like avoiding compacted soil).
Should I replace a tree that won’t revive, even if it’s old?
Consider replacement if:
- The trunk is hollow or oozing sap.
- No new growth appears after 2+ years of care.
- It’s a safety hazard (e.g., dead branches hanging over structures).
Wrapping up and next steps
Bringing a tree back to life isn’t just possible—it’s a rewarding journey rooted in science, patience, and care. 🌱 Whether you’re reviving a wilting houseplant or nurturing a struggling sapling, understanding the right techniques and materials makes all the difference.
Remember, even the smallest steps—like proper pruning, hydration, or soil enrichment—can spark new growth and vitality.
Ready to roll up your sleeves? Start small: assess your tree’s needs, gather the right tools, and take action today. Every gardener’s success story begins with a single leaf—and yours could be next! What’s one tree you’ll revive first?