
Pruning
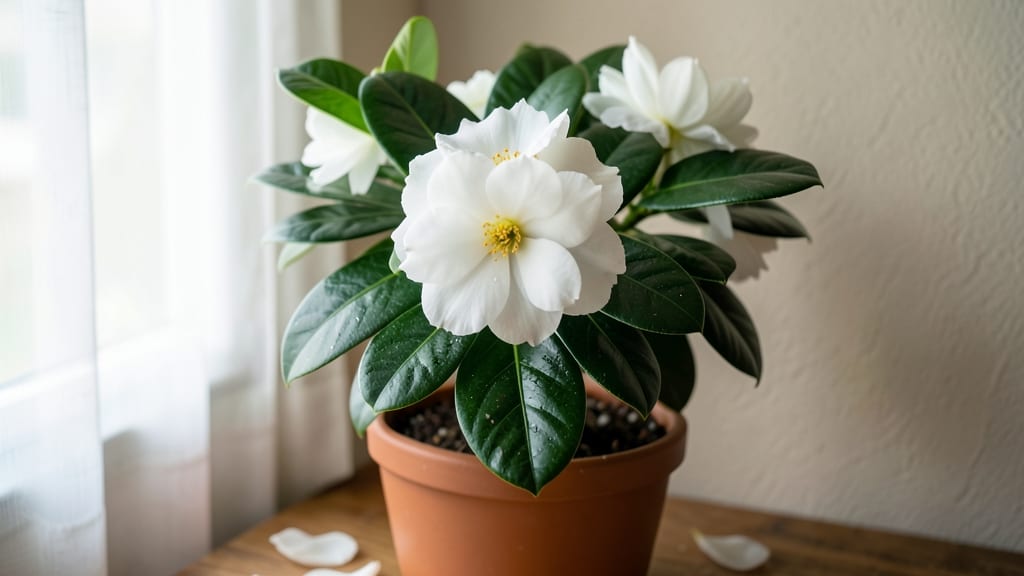
Growing a gardenia tree in a pot transforms your patio into a fragrant paradise—if you nail the pruning and care. 🌿 The key isn’t just the soil or water; it’s knowing when to trim for bushier blooms and how to keep roots happy in limited space.
My first gardenia nearly died from overwatering, but after learning these tricks, it’s now the centerpiece of my deck with year-round scent. Start with well-draining soil mixed with perlite, a pot with drainage holes, and a location that gets 6+ hours of morning sun.
Gardenias hate soggy roots, so water when the top inch feels dry—never on a schedule. Prune right after flowering to shape the tree and encourage denser growth, but never cut into old wood. By summer, you’ll have glossy leaves and clusters of creamy-white blooms that perfume the air.
The secret is patience: gardenias reward consistent care with fragrance that lasts from spring through fall, and sometimes even winter. This works for patio gardenias, balcony varieties, or even dwarf types. Just avoid cold drafts, and you’ll have a plant that outshines store-bought flowers—without the upkeep of a full garden.
📚 In This Guide
- What you need
- Instructions
- Tips and common mistakes
- Wrapping up and next steps
What you need
- ● Gardenia plant: A healthy, potted gardenia (preferably Gardenia jasminoides), sized to fit your space (small: 12" pot, medium: 18" pot, large: 24"+).
- ● Well-draining potting mix: 2–3 gallons of a blend specifically for acid-loving plants (e.g., 50% peat moss, 30% pine bark, 20% perlite).
- ● Pot with drainage holes: A container 2–4 inches larger in diameter than the current pot (terracotta or ceramic preferred for breathability).
- ● Pruning tools: Bypass pruners (for clean cuts on stems ½ inch thick).
- ● Sterilized hand pruners (for smaller branches).
- ○ Sharp garden shears (optional, for shaping).
- ● Organic fertilizer: A slow-release, acid-forming fertilizer (e.g., 10-10-10 or 8-3-9 with sulfur) for repotting.
- ● Mulch: 1–2 inches of pine bark or orchid bark to retain moisture and acidity.
- ● Gloves: Heavy-duty gardening gloves to protect from thorns and sap.
- ● Hose or watering can: With a gentle spray nozzle for hydration.
- ● pH test kit: To monitor soil acidity (ideal range: 5.0–6.5).
- ● Spray bottle: For misting leaves (especially in dry climates).
- ○ Optional: Copper fungicide (to prevent leaf spot).
- ● Support stake (if your gardenia is top-heavy).
- ● Humidity tray (for indoor plants).
- ● A sunny spot: 6+ hours of filtered sunlight (direct sun can scorch leaves).
- ● Warmth: Gardenias thrive in 65–75°F (avoid drafts or temps below 50°F).
- ● Patience: Pruning best done in spring after flowering (or late summer for shaping).
Step-by-Step guide to pruning your potted gardenia tree
Here’s how I keep my gardenia blooming abundantly year-round—just follow these simple pruning steps.
✂️ Step 1: Prune After the First Major Flowering
Wait until your gardenia finishes its first big flush of blooms, usually in late spring or early summer. This is the best time to prune because you’ll encourage a second, even more vigorous round of flowers. Use clean, sharp pruning shears to make cuts just above a leaf node—this is where new growth will sprout.
Real talk: I always cut back about one-third of the plant’s height, focusing on shaping it into a rounded form. This mimics its natural bushy shape and prevents leggy growth. Avoid cutting into old wood—new growth will bloom better, and old stems rarely produce flowers.
✂️ Step 2: Lightly Trim in Late Summer for Fall Blooms
About 6-8 weeks before your first frost, give your gardenia a light trim to promote one last burst of flowers before winter. Remove only the dead or damaged branches and any growth that looks weak or spindly. You’re not shaping here—just tidying up to keep the plant healthy.
I like to do this in the morning when the plant is well-hydrated. This helps it recover faster and reduces stress. Avoid heavy pruning now—you want the plant to focus on hardening off for winter, not putting out new growth.
✂️ Step 3: Renew and Shape in Early Spring
As soon as you see new growth in early spring, it’s time for a renewal prune. Cut back any dead or crossing branches first, then trim back about one-quarter of the plant’s height to encourage fresh, vigorous growth. This is also when I shape the tree—gardenias respond well to a slightly open center to allow airflow and light penetration.
Here’s the thing—if you see any leggy growth or branches that are growing inward, cut them back to a strong outward-facing bud. This keeps your gardenia bushy and full, not just a tall, sparse stem with a few flowers at the top.
✂️ Step 4: Maintain Year-Round with Light Trims
Throughout the rest of the year, keep an eye out for any branches that are growing out of shape or looking overcrowded. A quick trim here and there—just a few inches at a time—keeps your gardenia looking neat without shocking the plant. I also remove any spent blooms as they fade to encourage more flowers.
Don’t overdo it, though. Gardenias are sensitive to too much pruning, especially in the heat of summer. A little maintenance goes a long way—think of it like giving your plant a haircut rather than a full makeover.
Tips & tricks for perfect year-round gardenia blooms
These small adjustments will transform your potted gardenia into a fragrant, flowering powerhouse—without the guesswork.
Tool Prep: Always sterilize your pruning shears with rubbing alcohol before each use, even if you're just doing light trims. I learned this the hard way after my gardenia developed brown spots from contaminated cuts. Sterilizing prevents bacterial infections that can weaken new growth, especially important after Step 1 when you're making those one-third height cuts.
Seasonal Timing: The 6-8 week window before frost in Step 2 is critical—use your average first frost date as your starting point. For example, if frost typically hits November 15th, begin light trims around September 20th. This timing gives your gardenia just enough time to push out fall blooms before winter dormancy. Mark your calendar now so you don't miss this window!
Visual Cues: When shaping in Step 3, look for these visual clues: outward-facing buds are your friends—they'll grow away from the center, creating that lush, rounded shape. Inward-facing buds will create dense, crowded growth. I always make my cuts just above a leaf node that's growing outward, which gives you that perfect 45-degree angle for new growth to emerge.
Recovery Strategy: After any significant pruning (especially the one-third cut in Step 1), give your gardenia a recovery boost. Mix 1 tablespoon of epsom salt into the soil's top inch and water thoroughly. The magnesium helps strengthen cell walls, which is especially important for potted plants that can't draw nutrients from wide root systems. Do this immediately after pruning to support new growth.
Pro Tips for Gardenia Tree In Pot
- These small adjustments will transform your potted gardenia into a fragrant, flowering powerhouse—without the guesswork.
- Tool Prep: Always sterilize your pruning shears with rubbing alcohol before each use, even if you're just doing light trims.
- Seasonal Timing: The 6-8 week window before frost in Step 2 is critical—use your average first frost date as your starting point.
Frequently asked questions
Got questions about keeping your gardenia tree thriving in a pot? Here are some of the most common ones—and their answers!
Whether you're a newbie or a seasoned plant parent, these FAQs will help you avoid pitfalls and enjoy that intoxicating fragrance year-round.
How often should I repot a gardenia tree in a pot?
Repot your gardenia every 2–3 years or when roots start circling the pot. Spring is the best time—after pruning but before new growth. Choose a container just 2–3 inches larger in diameter to avoid over-potting, which can lead to soggy soil and root rot. Pro tip: Add fresh, well-draining potting mix with peat moss or perlite to keep roots happy!
Why aren’t my gardenia leaves yellowing or dropping?
Yellowing or dropping leaves usually signal overwatering, poor drainage, or nutrient deficiency. Check the soil—it should be slightly moist but never soggy. If your pot lacks drainage holes, transfer your gardenia to one with them. Feed it with an acid-loving fertilizer (like a 6-6-6 blend) every 4–6 weeks in spring/summer. Troubleshoot: If leaves feel mushy, reduce watering immediately!
Can I grow a gardenia tree in a pot indoors year-round?
Yes, but it needs bright, indirect light (like an east or west-facing window) and humidity. Place a tray of water with pebbles nearby or use a humidifier. Gardenias thrive outdoors in USDA Zones 7–11, but with proper care, a potted gardenia can survive indoors—just expect slower growth and fewer blooms without seasonal outdoor time. Bonus: Move it outside in summer for a fragrance boost!
When is the best time to prune a potted gardenia tree?
Prune your gardenia right after flowering (late spring to early summer) to shape it and encourage new growth. Avoid heavy pruning in fall/winter—it stresses the plant. Use sterilized shears to cut just above a leaf node at a 45-degree angle. Never prune more than ⅓ of the plant at once! This keeps it healthy and blooming. Remember: Dead or diseased branches can be trimmed anytime.
What’s the best alternative if my gardenia isn’t blooming?
If your gardenia skips blooms, it might need more sunlight, proper pruning, or balanced care. Try these alternatives for fragrance and low-maintenance potted plants:
- Jasmine (Trachelospermum) – Thrives in pots, highly fragrant, and loves shade.
- Gardenia ‘Radicans’ – A trailing variety perfect for hanging pots.
- Plumeria (Frangipani) – Loves heat, blooms prolifically, and has a tropical scent.
- Lantana – Drought-tolerant, colorful, and attracts pollinators.
For gardenias, ensure 6+ hours of sunlight daily and consistent moisture—blooms often follow!
Wrapping up and next steps
Growing a gardenia tree in a pot is a rewarding way to enjoy its intoxicating fragrance year-round—with just a little strategic pruning and care! 🌿 By mastering the art of shaping, deadheading, and seasonal trimming, you’ll keep your plant lush, healthy, and blooming beautifully.
Whether you’re a beginner or a seasoned gardener, the key is patience and consistency.
Ready to take the next step? Start small—pick one pruning technique to practice this season, then gradually expand your skills. Before you know it, your fragrant gardenia will be the star of your patio or balcony! 🌸