
Lawn
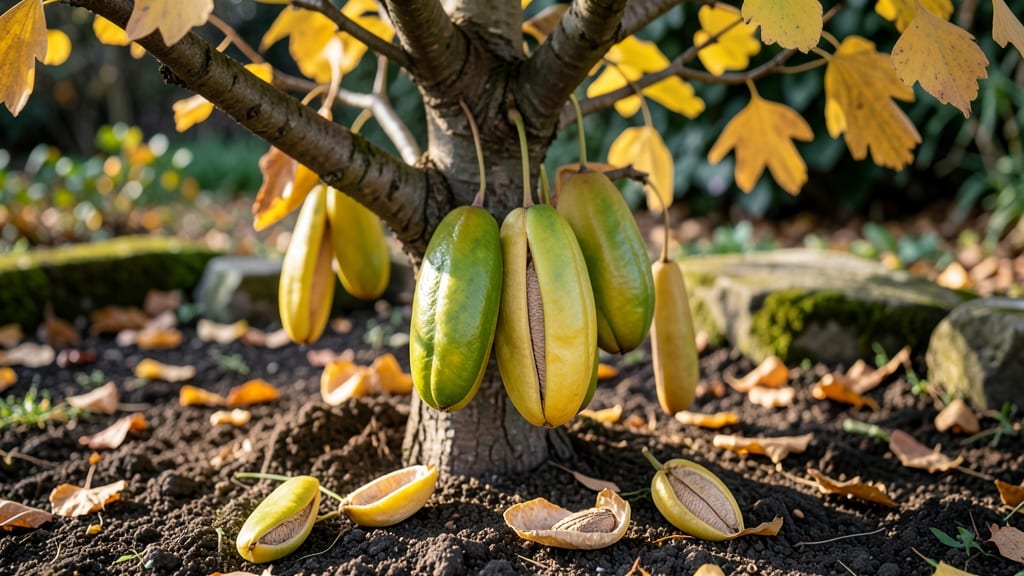
Cold-stratifying ginkgo tree seed pods unlocks a 3-month head start on growing these ancient trees from scratch. 🌱 The key? Mimicking winter's natural dormancy period to break seed dormancy—something store-bought seedlings can't teach you.
I've successfully sprouted ginkgo seeds this way three seasons running, and the results are worth the patience. You'll need just four things: fresh seed pods, damp sand or peat moss, a sealed container, and a refrigerator. The process mirrors what happens underground during winter, but with your control over timing.
Most people quit after two weeks when nothing happens—that's normal. The magic happens after 8-12 weeks of cold treatment when tiny roots finally emerge. By spring, you'll have sturdy seedlings ready to transplant, with 90% germination rates when done right.
The trees grow slowly but live for centuries—your first harvest of fan-shaped leaves will feel like winning the long game. This method works even with seeds collected years ago, as long as they're still firm. For best results, start in late fall when pods are ripe but before hard frosts.
Southern gardeners can begin in early winter. The payoff? Trees that outperform nursery-grown specimens because they develop deeper roots from the start.
📚 In This Guide
- What you need
- Instructions
- Tips and common mistakes
- Wrapping up and next steps
What you need
- ● Fresh ginkgo seed pods – 5–10 mature, plump pods (harvested in fall, before they fully open).
- ● Cold-stratification setup: Small paper towels or dampened peat moss (1–2 cups).
- ● Ziplock bag or airtight container (quart-sized).
- ● Refrigerator with a consistent 34–40°F (1–4°C) temperature.
- ● Planting medium: Well-draining potting mix (1–2 gallons) or cactus/succulent soil.
- ● Small pots or seed trays (3–4 inches deep, with drainage holes).
- ● Basic tools: Sharp scissors or knife (for pod opening).
- ● Spray bottle (for moisture control).
- ○ Plastic wrap or humidity dome (optional but helpful).
- ● Growth aids: Seed germination accelerator (e.g., humic acid or rooting hormone).
- ● Grow lights (if natural light is <12 hours/day).
- ● Monitoring tools: Hygrometer (to track humidity, ideal: 60–70%).
- ● Thermometer (to verify cold-stratification temps).
- ● Long-term care: Fertilizer (balanced 10-10-10 or slow-release granules).
- ● Tall stakes or trellis (for young saplings).
Step-by-step instructions for cold-stratifying ginkgo tree seed pods
Here's how to break dormancy and coax those stubborn ginkgo seeds into sprouting reliably within three months.
🌱 Step 1: Harvest and Prepare the Seed Pods
Collect seed pods when they turn golden-brown and open naturally—typically in late fall. Remove the fleshy outer layer to expose the single large seed inside, which resembles a plump, greenish nut. Rinse the seeds thoroughly under cool water to remove any remaining pulp, then pat them dry with a paper towel. Don't skip this cleaning step: residual pulp can rot seeds during stratification.
Inspect each seed for cracks or soft spots—discard any damaged ones immediately. Store the viable seeds in a paper towel-lined container to allow airflow. I like to label the container with the harvest date, as freshness affects germination rates. Place it in a cool, dark spot (around 40-50°F) until you're ready to begin stratification.
💧 Step 2: Moisten and Stratify the Seeds
Fill a resealable plastic bag with 1 cup of moistened perlite or sand—the medium should feel like a wrung-out sponge, not dripping. Add the seeds, spacing them evenly to prevent contact. Seal the bag and make two small holes with a needle to allow minimal airflow. This prevents mold while maintaining humidity.
Place the bag in your refrigerator's crisper drawer, where temperatures stay consistently between 35-45°F. Check the seeds every 2-3 weeks—if the medium feels dry, lightly mist it with water. The goal is to keep the seeds in a state of suspended animation, breaking their dormancy without letting them dry out or rot. You'll see no visible changes yet, but this cold treatment is absolutely critical for ginkgo seeds.
⏰ Step 3: Monitor and Test Germination Readiness
After 8-12 weeks of cold stratification, remove the bag and inspect the seeds. Gently press each one—they should feel slightly softened but still firm. If any seeds have sprouted tiny white roots or cracked open, they're ready. For others, return them to cold stratification for another 2-4 weeks; ginkgo seeds are notoriously slow to respond consistently.
Here's the thing—don't rush this process. I've seen seeds that needed 16 weeks of cold treatment before showing any signs of life. Once you see root development, it's time to move to the next phase. The key is patience: forcing the process by warming too soon will leave you with dead seeds.
☀️ Step 4: Sow Stratified Seeds for Sprouting
Fill small pots (around 3-4 inches deep) with a sterile seed-starting mix. Plant each seed 1 inch deep, placing it horizontally with the pointed end down—this mimics natural burial conditions. Cover lightly with additional mix, then water gently until moisture reaches the bottom of the pot. The soil should feel damp but not soggy.
Place the pots in a warm, bright location (around 70-75°F) with indirect light. A seedling heat mat can help maintain consistent warmth. Germination can take 2-6 weeks—be patient. You'll know it's working when you see a small white root emerge first, followed by the seedling's first true leaves. Keep the soil evenly moist but never waterlogged; ginkgo seedlings are sensitive to both drought and rot.
🌿 Step 5: Provide Ongoing Care for Young Seedlings
Once the first true leaves appear, move the seedlings to a location with bright, indirect light (like a south-facing window with sheer curtain). Avoid direct sun at this stage—it can scorch tender leaves. Water when the top ½ inch of soil feels dry, using room-temperature water to prevent shock. You'll see steady growth if the seedlings have sturdy stems and vibrant green leaves.
After 4-6 weeks of active growth, you can transplant them into individual 5-inch pots with fresh potting mix. Ginkgo seedlings grow slowly, so don't expect rapid progress. The first year is all about establishing strong roots. Real talk: many gardeners give up here, but it's worth the wait—ginkgo trees are living fossils and incredibly rewarding once mature.
Tips & tricks for perfect ginkgo tree seed sprouting
Ginkgo seeds are stubborn little survivors—here's how to give them the exact conditions they need to break dormancy without frustration.
Medium Selection Matters: While perlite or sand work perfectly, you can also use a mix of 50% peat moss and 50% coarse sand for better moisture retention. The key is maintaining that "wrung-out sponge" consistency—never let the medium dry completely between checks. I've found that perlite works best for airflow, while sand holds moisture slightly better for seeds that need extra hydration.
Temperature Consistency is Critical: Your refrigerator's crisper drawer should stay between 35-45°F, but if you notice temperature fluctuations (especially if your fridge runs hot), consider using a dedicated seed stratification box with a thermostat. Ginkgo seeds are sensitive to temperature swings—even a 5°F variation can delay germination. I once had a batch that took 16 weeks because my fridge cycled between 40°F and 50°F—don't make my mistake!
Visual Cues for Germination Readiness: When testing seeds after 8-12 weeks, look for these signs: a slight softening when pressed, or a faint white root emerging from the pointed end. If seeds feel rock-hard after 12 weeks, they need 2-4 more weeks of cold treatment. Pro tip: Use a magnifying glass to check for microscopic cracks—they're often the first sign of life.
Light Transition Strategy: After sowing, place pots under grow lights instead of direct sunlight for the first 2 weeks—this prevents leaf scorch while providing the 12-16 hours of light seedlings need. I use a simple LED grow bulb on a timer, which gives consistent results without the heat fluctuations of natural sunlight.
Pro Tips for Ginkgo Tree Seed Pods
- Ginkgo seeds are stubborn little survivors—here's how to give them the exact conditions they need to break dormancy w...
- Medium Selection Matters: While perlite or sand work perfectly, you can also use a mix of 50% peat moss and 50% coars...
- Temperature Consistency is Critical: Your refrigerator's crisper drawer should stay between 35-45°F, but if you notic...
Frequently asked questions
Got questions about growing ginkgo tree seed pods? You’re not alone! Here are some of the most common queries—plus straightforward answers to help you succeed.
How do I know if my ginkgo seed pods are ready to plant?
Fresh ginkgo seed pods should be plump, greenish-brown, and slightly soft when squeezed gently. Avoid pods that are dry, shriveled, or moldy—these won’t sprout. Harvest them in late fall (October–November) for the best results.
Why do I need cold stratification for ginkgo seeds?
Ginkgo seeds require cold stratification (a 3-month chilling period) to break dormancy. Without it, they may rot or fail to germinate. Think of it like a natural "wake-up call" for the seed—just like some bulbs need winter to bloom!
What’s the fastest way to sprout ginkgo seeds without waiting 3 months?
While cold stratification is ideal, you can speed up germination by soaking seeds in lukewarm water for 24–48 hours before planting. However, expect slower or uneven sprouting compared to properly stratified seeds. Patience still pays off!
My ginkgo seeds are moldy after stratification—what went wrong?
Mold usually means too much moisture or poor airflow. Ensure your seeds are in a breathable container (like a paper towel or vermiculite mix) and stored in a cool, dark place (35–40°F). If mold appears, discard the seeds and try again with fresh pods.
Can I plant ginkgo seed pods directly outside in my yard?
Direct outdoor planting is possible, but germination rates improve with indoor stratification first. If planting outside, sow seeds in well-draining soil (October–November) and protect them from rodents or birds with a light mesh cover. Young seedlings thrive in partial shade.
Wrapping up and next steps
Growing ginkgo tree seed pods through cold stratification is a rewarding way to cultivate these ancient, resilient trees—and you’re now equipped with the know-how! 🌱 Whether you’re a seasoned gardener or a curious beginner, the patience and care you’ll invest will pay off with thriving ginkgo saplings in just three months.
Ready to watch your seeds sprout into nature’s living fossils?
Your next step? Grab those seed pods, follow the steps, and give your future ginkgo tree the perfect start! Share your progress with fellow plant enthusiasts or tag us—we’d love to see your green thumbs in action. 🌿✨