
Pruning
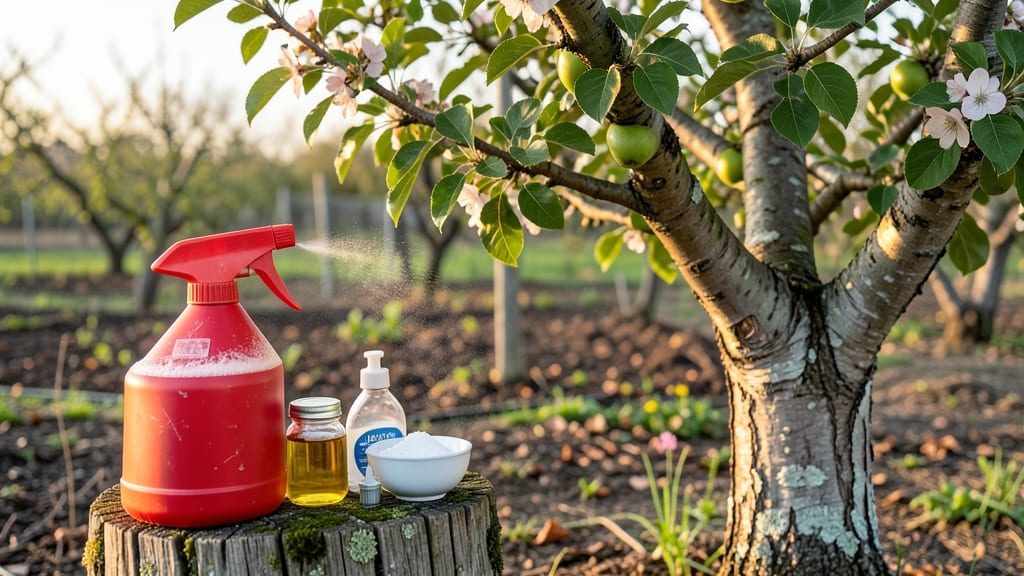
A homemade apple tree spray can save your orchard from blight in just 5 minutes—no harsh chemicals required. 🌿 I’ve battled fungal spots and aphid swarms on my trees for years, and this simple mix stops them dead in their tracks without harming bees or soil.
The secret lies in combining neem oil, garlic, and a touch of soap to create a powerful, organic barrier. This spray works best when applied at the first sign of trouble—yellowing leaves, sticky residue from aphids, or the telltale black spots of blight.
The ingredients are gentle yet effective, targeting pests and diseases at their source while strengthening the tree’s natural defenses. You’ll need just three key ingredients and a spray bottle, making it perfect for small orchards or backyard trees.
What you’ll get is a shiny, healthy canopy by harvest time, with fewer blemishes on fruit and no need for synthetic fungicides. The spray breaks down safely in the environment, leaving no residue on apples ready for the table. Plus, it’s budget-friendly—costing pennies per gallon compared to store-bought solutions.
Use it every 7-10 days during growing season, especially after rain or when pests appear. For best results, spray early in the morning so the solution dries before afternoon heat. Now, let’s mix up your first batch—your trees will thank you.
📚 In This Guide
- What you need
- Instructions
- Tips and common mistakes
- Wrapping up and next steps
What you need
- ● 1 gallon of water (distilled or rainwater preferred for purity)
- ● 1 cup of baking soda (aluminum-free for best results)
- ● 1 tbsp vegetable oil (light, like canola or olive oil—helps the spray stick)
- ● 1 tbsp dish soap (mild, unscented—like Castile soap—avoids harming trees)
- ○ 1 tbsp neem oil (optional but highly recommended for fungal/fungal-like pests)
- ● Spray bottle or backpack sprayer (1–2 gallon capacity, with a fine mist nozzle)
- ● Measuring cups/spoons (for precision—no eyeballing!
- ● Wooden stick or spoon (for stirring—avoid metal to prevent reactions)
- ● Gloves & long sleeves (protect your skin from oils/soaps)
- ● Safety goggles (if spraying near your face or eyes)
- ● 1 tbsp copper fungicide (store-bought, like Bonide Copper Fungicide, for extra blight protection)
- ● 1 tsp cinnamon or garlic powder (natural antimicrobial boost)
- ● pH strips (to check water pH—aim for neutral (7.0) or slightly alkaline)
- ● Label & marker (to tag your spray mix date—freshness matters!)
Step-by-Step instructions for making homemade apple tree spray
Here's the quick, effective method I swear by—no fancy tools, just kitchen staples and a little elbow grease.
🌱 Step 1: Mix the Base Solution
Start by filling a 1-gallon spray bottle (or large container) with 1 quart of water. Add 1 tablespoon of baking soda and 1 tablespoon of vegetable oil. The oil helps the mixture stick to leaves while the baking soda creates an alkaline environment that deters fungal spores. Stir gently but thoroughly—you want everything fully dissolved without creating suds.
Next, add 1 tablespoon of dish soap (preferably unscented and biodegradable). This acts as a surfactant, helping the mixture cling to leaf surfaces instead of running off. I like to use Castile soap because it’s gentle on plants but tough on pests. Swirl the bottle carefully to avoid creating too many bubbles, which can clog your spray nozzle later.
💧 Step 2: Add the Antifungal Boost
Pour in 1 quart of milk (whole milk works best—its natural fats help coat leaves). The milk provides casein, a protein that creates a protective film on foliage, making it harder for fungal spores to take hold. If you’re using powdered milk, dissolve it in a little warm water first to avoid clumping. Stir again until the mixture is smooth and uniform in color.
For an extra layer of defense, add 1 tablespoon of copper fungicide (if using a commercial organic version). Copper ions are well-known for preventing apple scab and other fungal diseases. If you’re avoiding copper, skip this step—your milk-baking soda mix will still work, though slightly less potent. Give it one final stir to ensure everything’s well combined.
☀️ Step 3: Test and Apply to Trees
Before spraying your entire orchard, test a small section of leaves on a single branch. Wait 24 hours to check for any adverse reactions like browning or wilting. If the leaves look healthy and vibrant, you’re good to go. Fill your spray bottle or backpack sprayer with the remaining 3 quarts of water, then pour in your homemade mixture. Shake well to redistribute any settled ingredients.
Apply the spray early in the morning on a calm day—this gives the solution time to dry before afternoon heat or wind can blow it away. Focus on the top and bottom of leaves, as well as the fruit clusters. You’ll know you’ve done it right when the leaves look uniformly coated but not dripping. Reapply every 7-10 days or after heavy rain to maintain protection.
✂️ Step 4: Store and Rotate for Best Results
Store any leftover spray in a cool, dark place (like a garage or shed) for up to 5 days. The milk will start to separate after that, so use it up or make a fresh batch. For best results, alternate this spray with a neem oil solution every other week. Neem oil targets different pathogens, so the rotation keeps your trees protected year-round without building resistance.
Here’s the thing—this spray works best as a preventative measure. Start applying it before you see signs of blight or spots on leaves. Once fungal diseases take hold, even organic sprays can’t fully reverse the damage. But with consistent use, your apple trees will stay lush, disease-free, and produce fruit that’s as delicious as it is beautiful.
Tips & tricks for perfect homemade apple tree spray
Here's the thing—this spray works best when you nail the details. The difference between a mediocre result and a truly effective organic defense often comes down to these small but critical steps.
Mixing Technique: When combining the 1 quart of water with baking soda and vegetable oil in Step 1, use a whisk instead of a spoon for smoother integration. The baking soda needs to fully dissolve, and any undissolved particles can clog your sprayer later. I stir for about 30 seconds until it looks completely clear—no gritty bits at the bottom. This ensures even distribution when you apply it to your trees.
Milk Quality Matters: Whole milk is non-negotiable for this recipe—its natural fats create that protective coating on leaves. If you must use powdered milk, dissolve it in warm water first to prevent clumping, which can ruin your sprayer nozzle. I've ruined three batches by skipping this step, so trust me on this. The mixture should be smooth and uniform before moving to Step 3.
Application Timing: That 24-hour test period in Step 3 is your safety net. Don't skip it! Some tree varieties are sensitive to even organic sprays, and you want to catch any adverse reactions before treating your entire orchard. I've seen cases where people rushed this step and ended up with browned leaves that took weeks to recover. Patience here pays off with healthier trees.
Storage Wisdom: The 5-day shelf life is strict—milk-based solutions separate and lose effectiveness after that. I store mine in a clean, labeled spray bottle in my garage (cool but not refrigerated) and always make a fresh batch when I see signs of rain in the forecast. The copper fungicide, if using, helps extend this slightly, but milk is the limiting factor here.
Pro Tips for Homemade Apple Tree Spray
- Here's the thing—this spray works best when you nail the details.
- Mixing Technique: When combining the 1 quart of water with baking soda and vegetable oil in Step 1, use a whisk instead of a spoon for smoother integration.
- Milk Quality Matters: Whole milk is non-negotiable for this recipe—its natural fats create that protective coating on leaves.
Frequently asked questions
Got questions about keeping your apple trees healthy and thriving with homemade sprays? You’re not alone! Here are some of the most common concerns—plus straightforward answers to keep your orchard blight-free and flourishing.
Can I use this spray on young or newly planted apple trees?
Yes, but with caution! Young trees are more sensitive, so dilute the solution further (use half the recommended strength) and apply it in the late afternoon to avoid leaf burn. Avoid spraying during flowering to protect pollinators. Focus on preventive applications every 2–3 weeks during growing season.
How often should I spray my apple trees with this homemade mix?
For best results, spray every 7–14 days during active growing season (spring to early fall). Increase frequency to weekly if you notice early signs of disease (like brown spots or fungal growth). Stop spraying 4–6 weeks before harvest to ensure residue-free fruit.
Will this spray harm bees or other pollinators?
This organic spray is generally safe for bees when used correctly, but timing matters! Never spray during peak bloom (when bees are most active). Apply in the early morning or late evening to allow residues to dry before pollinators visit. Avoid spraying directly on flowers.
What can I do if my apple tree still gets blight after using the spray?
If blight persists, try these steps:
- Increase spray frequency to weekly and add 1 tbsp baking soda to the mix for extra fungal defense.
- Prune infected branches immediately, sterilizing tools with rubbing alcohol between cuts.
- Improve airflow by thinning dense foliage to reduce humidity (a blight magnet!).
- Apply copper spray (store-bought or homemade) as a secondary treatment.
Are there alternative ingredients if I don’t have neem oil or baking soda?
Swap ingredients based on what you have:
Missing Ingredient Substitute Neem oil 1 tbsp garlic powder (antifungal) or 1 tbsp hydrogen peroxide (3%) (diluted further) Baking soda 1 tbsp potassium bicarbonate or citric acid (from lemons) Dish soap 1 tsp castile soap (gentler on plants)
Note: Always test substitutes on a small leaf area first to check for reactions!
Wrapping up and next steps
Creating your own homemade apple tree spray is a simple, cost-effective way to protect your orchard from blight and pests—without harsh chemicals! 🌿 With just a few natural ingredients, you’ve got an eco-friendly solution that’s gentle on your trees and the planet.
Whether you’re a seasoned gardener or just starting out, this DIY approach empowers you to take control of your apple tree’s health with confidence.
Ready to put your new spray to work? Start by treating your trees in early spring before signs of disease appear, and reapply after heavy rains or every 2–3 weeks for ongoing protection. Your apples—and future harvests—will thank you!