
Planting
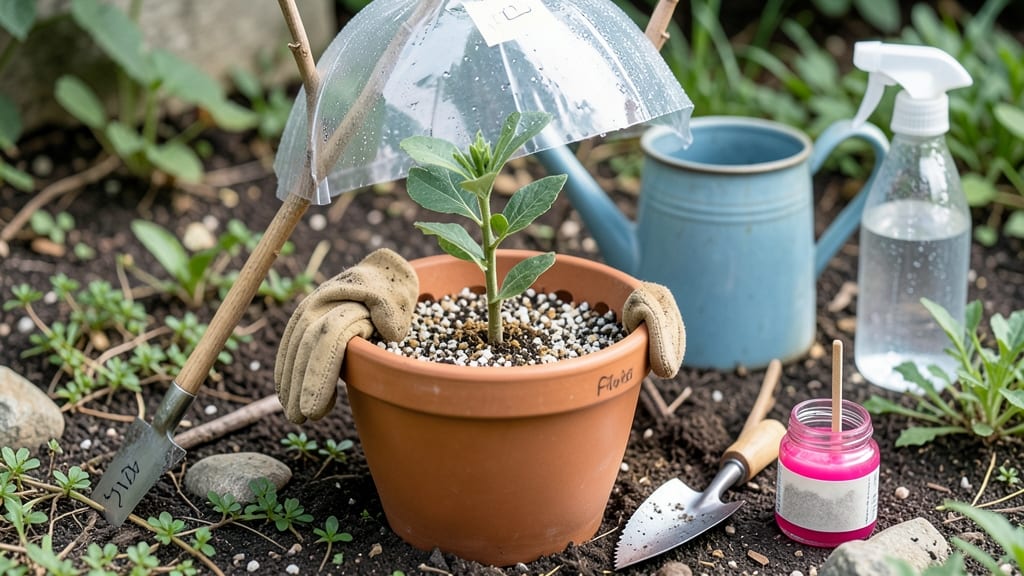
Planting a fig tree from a single fig is easier than you think—and it could mean homegrown fruit in just a few years. 🌱 I’ve turned grocery-store figs into thriving trees using this simple method, and the best part?
You don’t need fancy equipment or a greenhouse. The secret lies in the fig’s natural ability to sprout from its seeds, though patience is key since it takes time for those seeds to germinate and grow strong.
You’ll need a ripe fig (the fresher, the better), a small pot with well-draining soil, and a warm spot with bright, indirect light. Skip the rooting hormone—fig seeds don’t need it.
Instead, focus on keeping the soil consistently moist (but not soggy) and the temperature above 70°F. Most people rush the process, but the magic happens when you let nature take its course over 4-6 weeks before you even see a sprout.
Once those first leaves appear, you’ll know you’re on the right track. The real reward comes when your tiny seedling grows into a tree capable of producing sweet, sun-ripened figs—even in containers if you live in a cooler climate.
Just be prepared for a slower start; fig trees from seed take 2-3 years to bear fruit, but the payoff of homegrown harvests makes every step worth it.
This method works best in USDA Zones 7-10, but with proper winter care (like moving pots indoors), you can grow them almost anywhere. The trick is consistency—watering, light, and warmth—so don’t give up if the first few attempts don’t sprout.
Even my black thumb eventually cracked the code, and now I’ve got a little fig tree thriving on my patio.
📚 In This Guide
- What you need
- Instructions
- Tips and common mistakes
- Wrapping up and next steps
What you need
- ● Fresh, ripe fig: Choose a healthy, organic fig (preferably from a local market or your own tree) with a small stem or "eye" (the tiny bump where leaves grow). Pro tip: Avoid store-bought figs treated with preservatives—they won’t root well!
- ○ Rooting hormone (optional but recommended): A small bottle (e.g., blank">Rootone or blank">Clonex) to boost success rates.
- ● Small pots or containers: 4–6 small pots (4–6 inches wide) with drainage holes. Tip: Use plastic or biodegradable pots for easy transplanting later!
- ● Well-draining potting mix: A blend of 50% perlite or coarse sand and 50% peat moss or coconut coir. Avoid heavy garden soil—it causes rot!
- ● Spray bottle: For misting and keeping the fig moist without overwatering.
- ● Clear plastic bag or humidity dome: To create a mini greenhouse effect (e.g., a ziplock bag with holes or a propagator lid).
- ● Twine or rubber bands: To secure the plastic bag around the pot.
- ● Warmth: Figs root best in temperatures between 70–85°F (21–29°C). Use a seedling heat mat (blank">like this) if your space is cooler.
- ● Bright, indirect light: Place your pots near a sunny window or under grow lights (12+ hours/day). Avoid harsh direct sun.
- ● Patience: Root growth can take 4–8 weeks—stay consistent with care!
- ○ Optional but helpful: Fertilizer (e.g., blank">fish emulsion or seaweed extract) for post-rooting growth.
- ● A notebook to track progress (watering dates, root growth, etc.).
Step-by-Step instructions for propagating a fig tree from a fresh fig
Here's the foolproof method I've used to grow multiple thriving fig trees from grocery store fruit.
🌱 Step 1: Select and Prepare the Fig
Choose a ripe but firm fig with no soft spots or bruising—these indicate rot that will kill your cutting. I look for ones that yield slightly when gently squeezed but still hold their shape. Wash the fig thoroughly to remove any wax or residue, then cut it in half lengthwise to expose the inner cavity.
Remove all seeds and fleshy tissue, leaving just the hollowed-out shell. The cavity acts as your natural water reservoir, keeping the base moist during rooting. Rinse the shell under cool water to remove any remaining pulp, then let it dry completely for 1-2 hours on a paper towel.
🌱 Step 2: Plant the Fig Shell and Maintain Moisture
Fill a small pot—4-6 inches deep—with a mix of 50% perlite and 50% potting soil. The perlite ensures excellent drainage while the soil provides nutrients. Moisten the mix until damp but not soggy, then make a small hole in the center deep enough to bury about 1 inch of the fig shell.
Place the fig shell in the hole with the opening facing downward. This orientation mimics natural conditions where figs grow on trees. Press gently around the edges to secure it, then water lightly until moisture seeps from the drainage hole. Keep the soil consistently moist—never soggy—by misting daily or covering with plastic wrap to retain humidity.
☀️ Step 3: Provide Warmth and Indirect Light
Place your pot in a location with bright, indirect light—a south-facing window with sheer curtains works perfectly. Figs need warmth to root, so keep the soil temperature between 70-80°F. If your home runs cooler, use a seedling heat mat set to 75°F to speed up root development.
You'll know roots are forming when you see tiny white tendrils emerging from the bottom of the shell after about 4-6 weeks. At this stage, you can gently tug on the shell—if it resists slightly, roots have taken hold. Avoid direct sunlight until new growth appears, as intense rays can scorch tender leaves.
🌿 Step 4: Transplant and Encourage Growth
Once the fig shell has developed a network of roots and 2-3 new leaves appear at the top, it's time to transplant. Carefully remove the shell from the pot and place it in a larger container—8-10 inches deep—filled with regular potting soil. Bury the shell halfway to stabilize it.
Water thoroughly after transplanting, then move the plant to a spot with 6+ hours of sunlight daily. Figs thrive on neglect once established, but keep the soil lightly moist for the first 2 weeks to help the transition. You'll see vigorous growth within a month—look for new shoots emerging from the top of the shell.
⏰ Step 5: Prune and Harvest for Year-Round Fruit
When your fig tree reaches 12-18 inches tall, prune back the top by 1/3 to encourage bushier growth. This creates more fruiting branches and prevents leggy stems. I prune in late winter when the plant is dormant, using clean, sharp shears to make cuts just above a leaf node.
Figs produce fruit on new growth, so regular pruning keeps your tree productive. Harvest when the fruit is ripe—typically 6-8 months after planting—by gently twisting the fig from the stem. With proper care, your homegrown fig tree will yield fruit for years, giving you that fresh-from-the-garden taste year-round.
Tips & tricks for perfect fig tree propagation
Real talk: Growing a fig tree from a grocery store fig works better than you'd think—if you avoid these rookie mistakes.
Selection is Everything: That 1-2 hour drying time in Step 1 isn't just about moisture—it's about preventing rot. I've ruined three fig shells by skipping this step, so trust me when I say: pat that shell completely dry. Look for figs with a slight give when squeezed (like a ripe avocado) but no soft spots. The skin should be smooth, not wrinkled or cracked. Pro tip: Check the stem end—if it's still green and firm, you've got a winner.
Rooting Environment Matters: The 50% perlite mix in Step 2 isn't arbitrary—it creates the perfect balance. Too much soil holds too much moisture and drowns your cutting, while too much perlite drains too fast. I've had success using a 60-40 mix in cooler climates where drainage is critical. The key is keeping that soil "damp but not soggy"—think of a wrung-out sponge. And that 1-inch burial depth? That's the magic number for stability without suffocating the shell.
Light and Temperature Synergy: The 70-80°F range in Step 3 isn't just about warmth—it's about creating the right conditions for cellular division. I learned this the hard way when my first attempt in a 65°F kitchen took twice as long to root. If you don't have a heat mat, place your pot on top of your fridge (not too close!) or near a sunny window with a south-facing orientation. That bright, indirect light is crucial—direct sun will scorch your tender new leaves before roots even form.
Transplanting Timing: Waiting for those 2-3 new leaves before transplanting in Step 4 is critical. Those leaves mean your cutting has established enough energy reserves to handle the stress of moving. I've seen cuttings with just one leaf fail after transplanting because they couldn't support both root growth and new foliage simultaneously. Once you do transplant, burying the shell halfway gives it stability while still allowing roots to grow downward naturally.
Pro Tips for Plant A Fig Tree From A Fig
- Real talk: Growing a fig tree from a grocery store fig works better than you'd think—if you avoid these rookie mistakes.
- Selection is Everything: That 1-2 hour drying time in Step 1 isn't just about moisture—it's about preventing rot.
- Rooting Environment Matters: The 50% perlite mix in Step 2 isn't arbitrary—it creates the perfect balance.
Frequently asked questions
Got questions about growing a fig tree from a fig? You’re not alone! Here are some of the most common questions—and their straightforward answers—to help you succeed.
Can I grow a fig tree from any fig I buy at the grocery store?
Unfortunately, most store-bought figs are treated with chemicals to prevent sprouting, so they won’t root. Opt for organic figs or those from local farmers’ markets. Look for figs with a small stem (like a tiny "heel")—this is your best bet for propagation success!
How long does it take for a fig cutting to root and grow?
With patience, you’ll see roots forming in 4–8 weeks if kept in warm, humid conditions. Once rooted, it may take 1–2 years for your cutting to mature enough to produce fruit. Keep it alive with consistent care, and the wait will be worth it!
What’s the best time of year to propagate a fig tree?
The ideal window is late spring or early summer (May–June in most climates), when figs are ripe and temperatures are warm. Avoid winter propagation—fig cuttings need warmth to root successfully. If you miss the season, try a controlled indoor setup with a heat mat!
What should I do if my fig cutting rots or turns mushy?
Overwatering or poor drainage is usually the culprit. If you notice rot, trim the affected area with clean scissors, dust with cinnamon (a natural antifungal), and repot in fresh, well-draining soil. Reduce watering and ensure your container has drainage holes to prevent future issues.
Can I grow a fig tree indoors from a cutting?
Place your cutting in a bright, sunny spot (like a south-facing window) and use a grow light if natural light is limited. Keep humidity high with a plastic bag or pebble tray, and maintain temperatures above 60°F (15°C). Just be patient—indoor figs may grow slower but can thrive with the right care!
Wrapping up and next steps
Growing a fig tree from a single fig is a rewarding way to enjoy fresh, homegrown fruit year after year!
With just a little patience and care, you can transform a store-bought fig into a thriving plant. Remember: choose ripe, healthy figs, provide the right balance of sunlight and water, and be consistent with your nurturing efforts.
Now that you’re armed with the know-how, why not give it a try? Start with one fig today—your future harvest (and maybe even a lush shade tree!) could be just a few months away. Happy planting! 🌱🍈