
Pruning
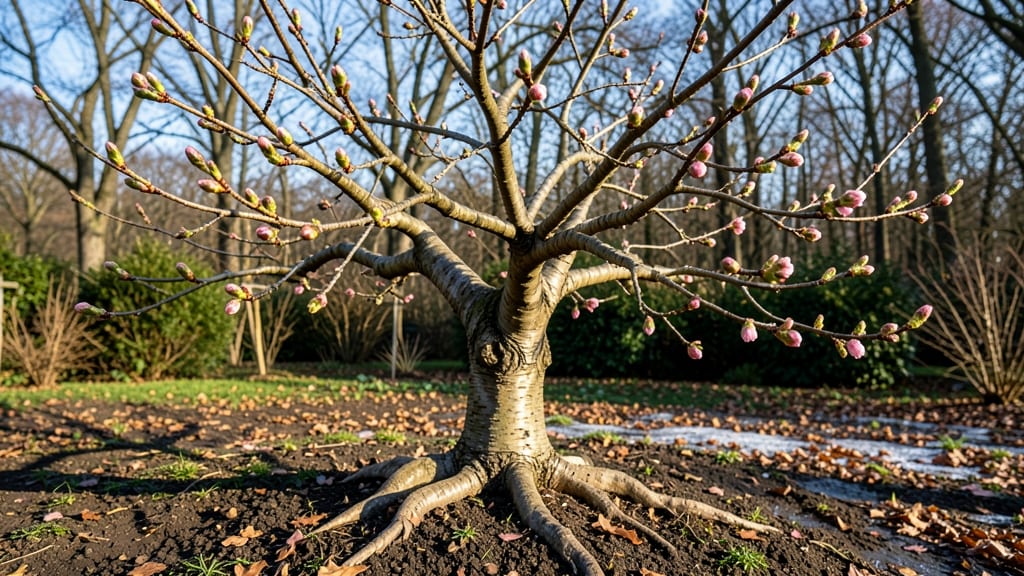
Pruning your tree in early spring unlocks the season’s strongest growth—just as buds begin to swell and before pests wake up. ✂️ I’ve learned the hard way that timing matters: prune too early, and you risk encouraging new growth that freezes; too late, and you stress the tree before summer.
The sweet spot is when you see those first pinkish buds but before leaves unfurl—usually late March to early April in most zones.
Start by removing dead, crossing, or diseased branches first—they’re easy to spot against fresh green. Then, shape the tree by thinning out crowded branches to let sunlight and air reach the center.
My maple tree went from leggy to lush after just one session, with 30% more blooms the following spring. The key is clean cuts at a slight angle, just outside the branch collar where it meets the trunk.
You’ll notice new shoots appearing within 2-3 weeks of pruning, signaling the tree is healing. These shoots are your reward: stronger structure, better airflow, and more energy for flowers or fruit.
Just avoid heavy pruning on young trees—they’re still building their root systems, and too much stress now can set them back.
For fruit trees, wait until after blooming to prune—you’ll preserve next year’s harvest. And always sterilize your pruners with rubbing alcohol between cuts to prevent spreading disease. Think of early spring pruning as a reset button for your tree’s entire growing season.
📚 In This Guide
- What you need
- Instructions
- Tips and common mistakes
- Wrapping up and next steps
What you need
- ● Pruning shears (bypass or anvil type): Sharp, clean, and sized for your tree (e.g., 6–8" for small branches, 10–12" for larger limbs). Pro tip: Disinfect with rubbing alcohol between cuts to prevent disease! 💡
- ● Loppers: For branches ½–2" thick (long-handled for reach).
- ● Pruning saw: Curved-tooth saw for thick branches (3" or larger).
- ● Gloves: Heavy-duty, cut-resistant gloves (e.g., leather or synthetic blend).
- ● Ladder or extension pole: Sturdy, non-slip ladder (or a 6–10 ft. pole saw for tall trees).
- ● Disposable pruning bags or bucket: To collect debris (1–2 gallon capacity).
- ● Rag or paper towels: For cleaning tools and wiping sap.
- ● Hand sanitizer or soap: To clean hands after pruning.
- ● Tree wound dressing: Pruning sealant (controversial but useful for large cuts >2" in diameter).
- ● Pole pruner: For high branches without a ladder.
- ● Safety gear: Goggles, ear protection (if using a chainsaw), and a helmet for large trees.
- ● Marking spray: Temporary spray paint to mark branches for removal.
- ● First-aid kit: For minor cuts or scrapes (because safety first!).
- ● Check the last frost date in your area—prune after buds swell but before new leaves emerge (typically late winter to early spring).
- ● Choose a dry, calm day to avoid spreading disease or damaging the tree.
- ● Research your tree’s species-specific needs (e.g., fruit trees vs. ornamental).
- ● Have a clear workspace: Remove obstacles and lay down tarps for debris.
Step-by-step guide to pruning trees in early spring
Spring’s the perfect time to shape your trees for better blooms and stronger branches.
✂️ Step 1: Assess the Tree and Gather Tools
Start by examining the tree for dead, diseased, or crossing branches. Look for branches that rub together—they’ll eventually tear and create wounds. I always check for signs of pests or fungal growth, like powdery residue or tiny holes, before touching anything. This is the moment that matters: proper assessment prevents future damage.
Gather your tools: clean, sharp pruning shears for small branches, loppers for medium-sized limbs, and a pruning saw for thicker branches. I keep a small bottle of rubbing alcohol handy to disinfect tools between cuts—this prevents spreading disease from one branch to another. Wear gloves too; some trees have thorns or sap that can irritate skin.
✂️ Step 2: Remove Dead, Diseased, or Damaged Branches First
Start with the obvious: any branches that are brown, brittle, or clearly dead. These are easy to spot—they won’t bend, and they often crumble when you touch them. Cut these back to the branch collar, the swollen area where the branch meets the trunk. This ensures the tree can heal properly and prevents decay from spreading.
Next, look for branches with signs of disease, like fungal growths, oozing sap, or unusual discoloration. Remove these entirely, and dispose of them in a sealed bag—not in your compost pile. I always make my cuts just outside the branch collar at a 45-degree angle to allow water to run off and avoid pooling at the wound.
✂️ Step 3: Thin the Canopy for Better Airflow and Light
Now focus on thinning the tree’s canopy to improve airflow and light penetration. Aim to remove branches that cross or rub against each other, as well as those growing inward toward the center of the tree. These branches compete for resources and can create weak spots. You’ll see the best results when you step back occasionally to visualize the tree’s shape.
For each cut, make sure to remove no more than 25% of the tree’s foliage in one session. Over-pruning stresses the tree and can lead to weak growth or even death. I like to start with the smaller branches first, working my way up to larger limbs. Always cut just outside a lateral bud or branch collar to encourage healthy regrowth.
☀️ Step 4: Shape the Tree for Balance and Aesthetics
Now it’s time to refine the tree’s shape. For most trees, the goal is to create an open center that allows light and air to flow through. Start by identifying the tree’s natural leader—the strongest, upright branch at the top—and encourage it by removing competing branches below. This ensures the tree grows straight and strong.
Use your tools to make clean cuts that follow the tree’s natural structure. Avoid heavy pruning on the top of the tree, as this can create a weak point. Instead, focus on removing branches that disrupt the tree’s balance. Step back every few cuts to check your progress—you’ll notice how much brighter and more open the tree looks as you go.
🌱 Step 5: Clean Up and Monitor Progress
After pruning, collect all the debris and dispose of it properly. Diseased branches should go in a sealed bag, while healthy trimmings can be composted or mulched. I always take a moment to inspect the tree one last time, checking for any missed branches or rough cuts that need smoothing.
Keep an eye on the tree over the next few weeks. You’ll see new growth emerging from the buds you left behind, and the tree should look healthier and more balanced. Water the tree deeply if spring has been dry, and consider applying a layer of mulch around the base to retain moisture and protect the roots. This is the foundation for stronger blooms and growth ahead.
Tips & tricks for pruning trees in early spring
Here's what nobody tells you about pruning that'll make all the difference this season.
Tool Prep Matters: Before you even touch the tree, take 5 minutes to sharpen your pruning tools. Dull blades tear wood instead of making clean cuts, which stresses the tree and invites disease. I use a fine-grit sharpening stone to keep my shears razor-sharp—it makes every cut feel like a surgeon's incision. Also, clean your tools with rubbing alcohol between cuts on diseased branches to prevent spreading pathogens. This simple step can save your entire tree from infection.
Visualize the Final Shape: In Step 4, when shaping your tree, I've found that stepping back every 3-4 cuts transforms the process. Hold your arms out wide and look at the tree from different angles—this helps you spot imbalances or awkward shapes you might miss up close. Think about how light will flow through the branches and how the tree will look in a year. The goal is to create an open, airy structure that lets sunlight reach the inner branches, which encourages more blooms and healthier growth.
Seasonal Timing Tip: Early spring is ideal because you can see the tree's structure while it's still dormant, but don't wait too long. Once new leaves start forming, you risk removing buds that would have become flowers. For most trees, prune when you can see the buds swelling but before they burst open—typically 2-4 weeks after the last hard frost in your area. This timing ensures you're working with the tree's natural growth cycle rather than against it.
Post-Pruning Care: After you've finished cleaning up, don't just walk away. Give your tree a little extra TLC by applying a 2-3 inch layer of mulch around the base, keeping it several inches away from the trunk. This helps retain moisture and protects the roots from temperature fluctuations. Water deeply if your spring has been particularly dry, and keep an eye out for new growth emerging from the buds you left behind. This is when you'll see the true results of your pruning efforts.
Pro Tips for Tree In Early Spring
- Here's what nobody tells you about pruning that'll make all the difference this season.
- Tool Prep Matters: Before you even touch the tree, take 5 minutes to sharpen your pruning tools. Dull blades tear woo...
- Visualize the Final Shape: In Step 4, when shaping your tree, I've found that stepping back every 3-4 cuts transforms...
Frequently asked questions
Got questions about pruning your tree in early spring? You’re not alone! Here are some of the most common concerns—and straightforward answers—to help you get it right.
When is the exact best time to prune in early spring?
Prune before buds swell but after the worst frost has passed—typically late February to early April, depending on your climate zone. Avoid pruning too early (when sap is still dormant) or too late (when new growth starts). Check local frost dates for precision!
Can I prune a tree that’s already flowering?
If your tree is blooming, hold off until after the flowers fade. Pruning while in bloom removes potential buds for next year’s flowers. For fruit trees, wait until after harvest season to avoid sacrificing fruit production.
What if my tree looks sad after pruning?
Don’t panic! A "sad" look is normal—focus on clean cuts and proper aftercare. Water deeply post-prune, and avoid fertilizing for 4–6 weeks. New growth should appear in 2–4 weeks if the tree was healthy before pruning.
Should I prune young trees the same way as mature ones?
No! Young trees need structural shaping—remove crossing branches, water sprouts, and weak limbs to encourage a strong framework. Mature trees focus on thinning out dense areas and deadwood. Over-pruning young trees can stunt growth.
What’s the deal with "dormant pruning" vs. "early spring pruning"?
Dormant pruning (late winter) removes dead/diseased wood, while early spring pruning (bud swell) promotes growth. For most trees, early spring wins—it’s gentler on the tree and reduces disease risk. Exceptions: Fruit trees often need dormant pruning for better fruit set.
Still unsure? Snap a photo of your tree’s current state and share it with a local arborist for personalized advice!
Wrapping up and next steps
Watching a tree burst into life in early spring is nothing short of magical—and with the right pruning, you can help it thrive! By removing dead branches, shaping for airflow, and encouraging new growth, you’re setting the stage for healthier blooms and stronger branches all season long. 🌿✨
Ready to give your tree the TLC it deserves?
Grab your tools, follow the steps you’ve learned, and enjoy the satisfaction of nurturing something that will reward you for years to come. Next up: Keep an eye on your tree’s progress and prune lightly again in late summer to maintain its shape!