
Pruning
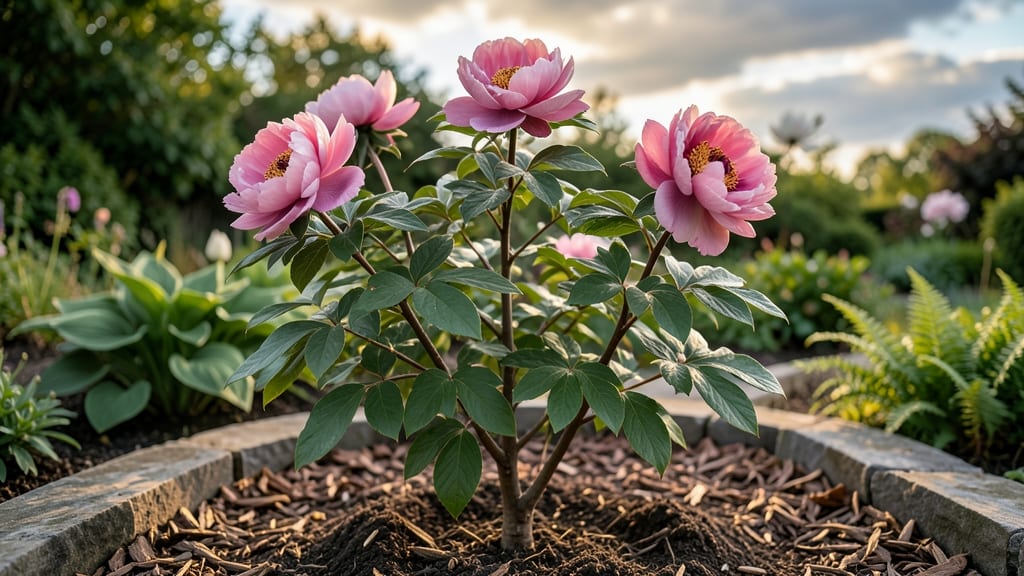
Tree peonies (Paeonia suffruticosa) reward patience with bold, fragrant blooms that last for weeks—if you prune them right. 🌸 I’ve pruned these woody beauties for years, and the difference between a tangle of sticks and a showstopping shrub comes down to just three strategic cuts made at the right time.
Unlike herbaceous peonies that die back to the ground, tree peonies are woody perennials that need minimal pruning—just enough to shape growth and encourage those globe-sized flowers. The key?
Prune right after blooming (late spring to early summer) to avoid cutting off next year’s buds, which form on old wood. Grab your loppers and let’s transform those leggy branches into a bloom machine.
After just one season of proper pruning, you’ll see thicker stems, more buds, and flowers that arrive earlier—and they’ll last longer too. The blooms aren’t just pretty; they’re heavy enough to droop if you don’t support them, but with the right cuts, your peony will stand tall and proud.
Plus, the fragrance? Intoxicating—like walking through a garden in full bloom.
This method works for all tree peony varieties, whether you’ve got the classic ‘Duchesse de Nemours’ or a newer hybrid. Even if your peony’s been neglected, don’t worry—three cuts can revive it. Let’s get those branches bloom-packed for next season.
📚 In This Guide
- What you need
- Instructions
- Tips and common mistakes
- Wrapping up and next steps
What you need
- ● Pruning shears or secateurs – Sharp, bypass-style (avoid anvil shears to prevent crushing stems). 1 pair (sterilized with rubbing alcohol).
- ● Garden gloves – Heavy-duty, cut-resistant (protects hands from thorns and sap). 1 pair.
- ● Disinfectant (rubbing alcohol or 10% bleach solution) – 1 small spray bottle or cloth (sterilizes tools between cuts).
- ○ Pruning saw (optional but helpful) – For thicker branches (if your peony has stems thicker than ½ inch).
- ● Sharpie or permanent marker – For marking branches to remove (if planning ahead).
- ● Compost bin or bag – For collecting pruned branches (or mulch them in place).
- ● Hand pruners with a long reach – For high branches (extendable or telescoping).
- ● Knee pads or stool – For comfort if pruning large shrubs.
- ● Garden twine or zip ties – To temporarily secure branches if needed.
- ● Plant food or fertilizer – Balanced 10-10-10 or peony-specific (apply after pruning for a post-cut boost).
Step-by-step pruning for Paeonia tree peonies
Here's the straightforward method I use every year to keep my tree peonies blooming abundantly without stressing the plants.
✂️ Step 1: Time Your Pruning After Blooming
Wait until late summer or early fall, after the foliage naturally yellows and dies back. This timing ensures you don't cut back new growth that's storing energy for next year's blooms. I mark my calendar for 6-8 weeks after flowering—this gives the plant time to recover while preventing disease from lingering in old stems.
Real talk: If you prune too early, you risk removing next year's flower buds before they form. Tree peonies develop buds on the previous year's growth, so patience here pays off. Use clean, sharp pruners to make 45-degree cuts just above a healthy bud or node. This angle helps water run off and prevents rot.
✂️ Step 2: Remove Dead or Weak Growth First
Start by cutting out any stems that are dead, diseased, or crossing—these compete with healthy growth and invite pests. I scan each branch for signs of blackened wood or fungal spots. If a stem is hollow, cracked, or has less than 3-4 inches of green growth, it's time to go. Remove these completely down to the base or a healthy lateral branch.
Here's the thing—tree peonies are forgiving, but weak stems never produce strong blooms. You'll see healthy stems have thick, green bark and multiple buds spaced evenly along the length. Keep these for next year's flowers. Never remove more than 30% of the plant's total growth in one season—this ensures the root system can support new shoots.
✂️ Step 3: Thin Out Overcrowded Branches
Focus on the center of the plant where branches grow too close together. These crowded stems produce smaller blooms and struggle with air circulation. Select the 3-5 strongest, most outward-facing branches and prune the rest back to the base. This opens up the center for better light penetration and airflow, which reduces fungal diseases like botrytis.
I always step back to visualize the plant's shape after thinning. The goal is an open, vase-like form with branches spreading evenly. Avoid "lion's tail" pruning—cutting all stems to the same length—this stresses the plant and reduces flowering. Instead, make each cut just above a bud that faces outward, encouraging the plant to grow in a balanced, open structure.
🌿 Step 4: Clean Up and Mulch for Recovery
After pruning, rake up all debris and dispose of it in the trash—not the compost—since diseased material can reinfect the plant. I sterilize my pruners with rubbing alcohol between cuts to prevent spreading pathogens. Once the area is clear, apply a 2-3 inch layer of organic mulch around the base, keeping it 6 inches away from the trunk to prevent rot.
Water deeply after pruning to help the plant recover. You'll see new growth emerging from the buds within 3-4 weeks, signaling the plant is healing. This is also the time to fertilize lightly with a balanced, slow-release formula to support next year's bloom development. Avoid heavy feeding now—you want roots to establish, not foliage to explode.
Tips & tricks for perfect Paeonia tree peony pruning
Here's what I've learned after years of perfecting my tree peony pruning—these small details make all the difference.
Timing is Everything: That 6-8 week window after flowering is non-negotiable for tree peonies. I've seen gardeners rush and end up with sparse blooms the next year. The foliage should be completely yellowed and crispy before you touch those stems—this tells you the plant has finished storing energy for next season's buds. If you're unsure, wait another week rather than cutting too soon.
The 45-Degree Cut Technique: When making those cuts in Step 1, visualize a slice of pizza—your pruners should create a similar angle. This isn't just for aesthetics; it creates a wider surface for water runoff, which dramatically reduces rot risk. I keep a small notepad by my pruners to mark each cut angle as I go—it's a habit that's saved me from several failed seasons. Use clean, sharp pruners every time; dull blades crush stems and invite disease.
Visualizing the Final Shape: Before you make any cuts, step back and really look at your peony. The goal is an open, vase-like structure where light can reach all branches. I find it helpful to sketch a rough outline on paper first—mark where I'll keep the strongest branches and where I'll make cuts. This prevents that "lion's tail" mistake where everything gets cut to the same length. Remember, you're sculpting a plant that will support heavy blooms next year.
Mulch Application Insight: That 2-3 inch layer of organic mulch isn't just decoration—it's insulation. Spread it carefully, keeping it 6 inches from the trunk to prevent moisture buildup. I use shredded hardwood mulch because it breaks down slowly and improves soil structure over time. After mulching, give the base a gentle watering to help settle everything in place. This simple step can mean the difference between a struggling plant and one that thrives through winter.
Pro Tips for Paeonia Tree Peony
- Here's what I've learned after years of perfecting my tree peony pruning—these small details make all the difference.
- Timing is Everything: That 6-8 week window after flowering is non-negotiable for tree peonies.
- The 45-Degree Cut Technique: When making those cuts in Step 1, visualize a slice of pizza—your pruners should create a similar angle.
Frequently asked questions
Got questions about pruning your Paeonia tree peony? You’re not alone! Here are answers to the most common concerns—so you can keep those stunning blooms coming back year after year.
When is the best time to prune my tree peony?
Prune your Paeonia tree peony right after flowering (late spring to early summer). This timing ensures you don’t cut off next year’s buds, which form on old wood. Avoid pruning in fall or winter—cold stress can harm the plant.
How do I know if I’ve pruned too much?
If your tree peony has fewer than 3-5 strong stems left after pruning, you’ve likely overdone it. Tree peonies thrive with selective cuts—never remove more than 1/3 of the plant’s foliage. Look for healthy green leaves post-prune; yellowing or sparse growth signals stress.
Can I prune a tree peony if it hasn’t bloomed yet?
Yes, but wait until after the first flush of blooms (even if they’re sparse). If your peony hasn’t bloomed at all, check for dead or crossing branches—remove those first. Avoid heavy pruning; tree peonies reward patience with bigger blooms in 2-3 years.
Why are my peony leaves turning brown after pruning?
Brown leaves post-prune usually mean over-pruning, fungal stress, or dehydration. To fix it:
- Water deeply every 7–10 days (tree peonies hate soggy soil but need consistent moisture).
- Apply a balanced fertilizer (10-10-10) in early spring to boost recovery.
- Check for powdery mildew (white fuzzy spots)—prune infected leaves and treat with neem oil.
What if my tree peony isn’t blooming? Can pruning help?
Pruning alone won’t force blooms, but corrective cuts can improve future flowers. Ensure your peony gets:
- 6+ hours of sunlight daily (partial shade = fewer blooms).
- Well-draining soil (amend clay soil with compost).
- Pruning to open the center for airflow (reduces disease).
If it’s young (<3 years old), blooms may take time. Older plants with no flowers might need root division or a check for pests like peony sawfly larvae.
Wrapping up and next steps
Pruning your paeonia tree peony doesn’t have to be intimidating—just three simple cuts can unlock a stunning display of blooms! By focusing on dead, crossing, or overcrowded branches, you’re not just tidying up; you’re setting the stage for next year’s vibrant flowers. 🌸
Ready to give your peony the care it deserves? Grab your pruners and schedule that trim during late winter or early spring—before new growth begins. Your future blooms will thank you!