
Trees
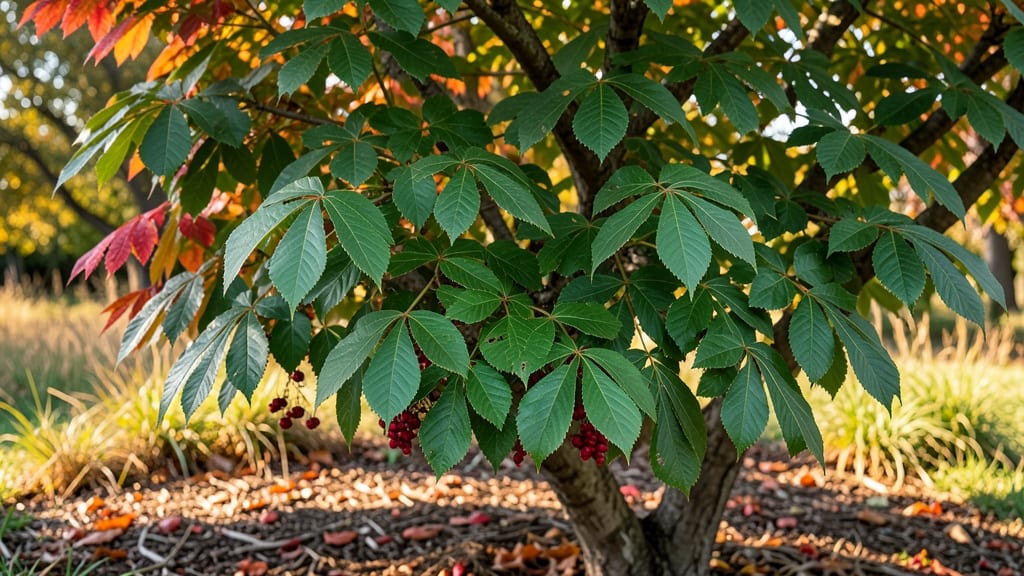
Rhus tree leaves hold a secret many gardeners overlook—vibrant natural dyes that transform fabrics into earthy masterpieces. 🌿 I’ve turned my overgrown sumac into a dye studio, and the results are stunning: rich oranges, deep reds, and golden yellows that no store-bought dye can match.
The best part? No chemicals, just nature’s palette. The key is timing: harvest leaves in late summer or early fall for peak color potential. Too early, and the hues are weak; too late, and they fade.
Steep fresh leaves in hot water for hours, then simmer with fabric for a full day. My first attempt with a plain white T-shirt turned it into a sunset-inspired masterpiece—no two batches are ever identical, which is half the fun.
📚 In This Guide
- What you need
- Instructions
- Tips and common mistakes
- Wrapping up and next steps
What you need
- ● Fresh or dried rhus tree leaves – Aim for at least 1–2 cups (dry weight) per batch (more for deeper colors). Harvest from a non-toxic variety (e.g., Rhus typhina or Rhus copallina), avoiding poisonous look-alikes like sumac.
- ● Fabric for dyeing – Natural fibers like cotton, wool, or silk work best. Pre-wash and mordant (see below) for vibrant results. 1–2 yards of fabric per test batch.
- ● Mordant – Choose one: Alum (potassium aluminum sulfate) – 1–2 tablespoons per quart of water (most beginner-friendly).
- ● Iron (ferrous sulfate) – ½ teaspoon per quart for rusty, muted tones.
- ● Tannin-rich mordant (e.g., oak galls or myrobalans) – 1–2 tablespoons for deeper, earthier shades.
- ● Large stainless steel or enamel pot – Minimum 2–4 quarts capacity (non-reactive to prevent color contamination).
- ○ pH strips (optional but helpful) – Aim for a pH of 4–5 for optimal dye uptake.
- ● Long-handled wooden spoon or spatula – For stirring dye baths without contaminating the pot.
- ● Gloves and safety goggles – Mordants like alum or iron can irritate skin.
- ● Cheesecloth or fine mesh strainer – To filter leaves and debris from the dye bath.
- ● Rubber bands or clothespins – For bundling fabric during dyeing (no clips—metal can rust!).
- ● Plastic or glass containers – For soaking fabric in mordant (1–2 gallons capacity).
- ○ Thermometer (optional) – Ideal dye temperature: 160–180°F (71–82°C).
- ● Vinegar or citric acid – 1 tablespoon per quart to lower pH and enhance colorfastness.
- ● Natural modifiers – Add turmeric, onion skins, or avocado pits to the dye bath for color variations.
- ● Soda ash (sodium carbonate) – ½ teaspoon per quart to shift hues toward yellows or greens.
- ● Journal or camera – Track results, fabric types, and dye ratios for future reference!
Step-by-Step guide to harvesting and preparing rhus tree leaves for natural dye
Ready to unlock vibrant hues from your backyard? Here's how to gather and prep rhus leaves for stunning natural dyes.
🌿 Step 1: Identify and Harvest Mature Rhus Leaves
Wait until late spring or early summer when leaves are fully mature but haven't started turning color. Look for bright green, leathery leaves on sumac bushes—these yield the richest dye. Avoid yellowing or brown leaves, as they'll produce weak, muddy tones. I wear gloves when harvesting, as sumac leaves can irritate sensitive skin.
Cut entire stems with clean pruners rather than picking individual leaves. This preserves the plant's health and gives you more leaf surface area for dyeing. Place stems in a bucket immediately after cutting to prevent wilting. You'll need about 4-5 pounds of fresh leaves to dye a small batch of fabric—roughly what fills a standard gallon-sized container.
🪴 Step 2: Clean and Prepare the Leaves
Spread the harvested leaves on newspaper or a clean tarp in a single layer. Rinse each leaf individually under cool water to remove dirt and insects, gently shaking off excess moisture. Pat dry with paper towels—wet leaves won't yield strong dye colors. This step is crucial because lingering debris can create uneven dye patches on your fabric.
Remove any damaged or discolored leaves now. Even a few brown spots can compromise your dye batch. Once cleaned, you can process the leaves immediately or store them in a paper bag in the refrigerator for up to 3 days without significant quality loss. I like to bundle them in newspaper and secure with rubber bands for easy storage.
☀️ Step 3: Create the Dye Bath
Fill a large stainless steel pot with 4-6 quarts of water (enough to fully submerge your fabric). Add the prepared leaves, packing them tightly to maximize color extraction. Bring the mixture to a gentle boil—never a rolling boil, which can scorch the leaves and create bitter dye. Reduce heat to maintain a low simmer for 45-60 minutes, stirring occasionally.
Watch the water turn a rich amber color—this is your signal the dye is working. Strain the leaves through a fine-mesh sieve or cheesecloth into a clean container. The liquid should be deep yellow with hints of green. If you're working with multiple dye batches, combine them now for consistent coloring. Let the strained dye cool completely before using—hot dye can damage fabric fibers.
💧 Step 4: Prepare and Dye Your Fabric
Pre-wash your fabric in mild detergent and rinse thoroughly to remove any finishes that might repel the natural dye. While still damp, soak the fabric in the cooled dye bath for 30-60 minutes, stirring occasionally to ensure even saturation. The longer it soaks, the deeper the color will be—though sumac typically yields medium tones rather than intense blacks or purples.
Remove the fabric and rinse in cool water until the water runs clear. Avoid hot water rinsing, as it can set the dye unevenly. Lay the dyed fabric flat to dry completely in indirect sunlight. Once dry, you'll see a beautiful golden-yellow hue that develops richer undertones over time. For deeper colors, repeat the dyeing process 2-3 times, allowing the fabric to dry between each session.
⏰ Step 5: Set and Care for Dyed Fabric
After drying, heat-set the dye by ironing the fabric on the lowest steam setting or baking it in a 200°F oven for 30 minutes. This step locks in the color and prevents fading. I always test a small hidden area first to ensure the fabric can handle the heat. Once set, your sumac-dyed fabric will maintain its color for years with proper care.
Wash dyed items separately in cold water with mild detergent and air-dry to preserve the natural color. Avoid bleach or fabric softeners, as they'll strip the dye. Store finished pieces in a cool, dark place when not in use. The first wash might reveal slight color loss, but subsequent washes will stabilize the hue. You'll be amazed at how vibrant homemade natural dyes can be!
Tips & tricks for perfect rhus tree leaf dye
Here’s what I’ve learned after experimenting with sumac dye—these small details make all the difference between muddy results and stunning golden hues.
Leaf Selection Matters: The secret to vibrant dye lies in timing and condition. Harvest leaves when they’re fully mature but still bright green—this is usually late spring to early summer. Avoid any leaves with brown edges or yellowing, as these will produce dull, weak colors. I’ve found that leaves from the middle of the bush (not the outer edges) tend to have the highest dye concentration.
Simmering Technique: During the 45-60 minute simmer in Step 3, maintain a gentle, consistent low simmer—never a rolling boil. A rolling boil can scorch the leaves and create bitter flavors in your dye. If you notice small bubbles forming around the edges of the pot, reduce the heat slightly. Stirring every 10-15 minutes helps release more color from the leaves and prevents them from sticking to the bottom.
Fabric Preparation: The pre-wash step in Step 4 is non-negotiable—it removes finishes that repel dye. For best results, use a mild detergent and rinse thoroughly. After rinsing, wring out the fabric gently but don’t twist it, as this can create uneven dye absorption. For fabrics that tend to shrink (like cotton), pre-wash and dry them first to account for any size changes before dyeing.
Dye Bath Consistency: When combining multiple dye batches in Step 3, strain them through a fine-mesh sieve or cheesecloth into a clean container. The liquid should be a deep yellow with green undertones—this is your target color. If the dye looks too light, you can simmer the leaves again with fresh water (about 2 quarts) for another 30-45 minutes. Just remember, sumac dye is subtle—don’t expect intense colors like indigo or madder red.
Pro Tips for Rhus Tree Leaves
- Here’s what I’ve learned after experimenting with sumac dye—these small details make all the difference between muddy results and stunning golden hues.
- Leaf Selection Matters: The secret to vibrant dye lies in timing and condition.
- Simmering Technique: During the 45-60 minute simmer in Step 3, maintain a gentle, consistent low simmer—never a rolling boil.
Frequently asked questions
What’s the best time to harvest rhus tree leaves for dyeing?
Harvest rhus (sumac) leaves in late summer or early fall when they’re fully mature but still green. Avoid leaves with signs of disease or pests. For deeper colors, collect them after the first frost—this boosts tannin content, which enhances dye intensity. Just be sure to wear gloves, as the leaves can cause skin irritation!
Can I use rhus leaves fresh or do I need to dry them first?
Both work, but dried leaves are more convenient and last longer. To dry them, bundle stems with rubber bands and hang upside down in a dark, well-ventilated space for 1–2 weeks. For fresh leaves, use them immediately—they yield a slightly lighter but still beautiful orange-red hue. Pro tip: Crumble dried leaves before steeping for faster color extraction!
How do I fix colorfastness issues with rhus dye?
Rhus dye can fade if not properly fixed. After dyeing, rinse fabrics in cold water, then soak in a mordant solution (like alum or iron sulfate) for 30–60 minutes. For extra durability, add a vinegar rinse (1 cup per gallon of water) before washing. Air-dry in shade to prevent color bleeding. Note: Some fabrics (like silk) hold color better than others!
Are rhus tree leaves toxic or harmful?
While rhus leaves are non-toxic, they contain ursolic acid, which can irritate skin or cause allergic reactions in sensitive individuals. Always wear gloves when handling them, and avoid inhaling crushed leaves. Never consume them—stick to dyeing! If you’re pregnant, nursing, or have allergies, opt for alternative natural dyes like avocado pits or black walnut hulls.
Where can I find rhus trees to harvest leaves?
Rhus trees (like Rhus typhina or Rhus glabra) grow wild in many regions, especially in the eastern and central U.S. Check local parks, roadsides, or nature trails—but always get permission before harvesting. For guaranteed access, visit a native plant nursery or join a foraging group. Just be sure to positively ID the plant to avoid lookalikes like poison ivy!
What are some rhus dye alternatives for similar colors?
If rhus isn’t available, try these for earthy orange-red hues:
- Madder root: Classic red-orange (requires mordanting).
- Marigold flowers: Bright yellow-orange (easy for beginners!).
- Onion skins: Warm golden-brown (great for fabric layers).
- Turmeric: Mustard-yellow (fades quickly without fixatives).
Wrapping up and next steps
Exploring the natural dye magic of rhus tree leaves opens up a world of creativity and sustainability! Whether you're a crafter, textile artist, or eco-conscious enthusiast, these vibrant leaves offer a unique, chemical-free way to transform fabrics into stunning works of art. 🌿✨
Now that you’re equipped with the knowledge and tools, it’s time to dive in and experiment. Start small—test colors on scrap fabric, play with mordants, and let your imagination run wild. Every batch of dyed fabric will be a one-of-a-kind masterpiece, born from nature’s palette.
Ready to turn your crafting space into a dye studio? Grab those leaves, follow your instincts, and enjoy the rewarding process! 🎨💚