
Pruning
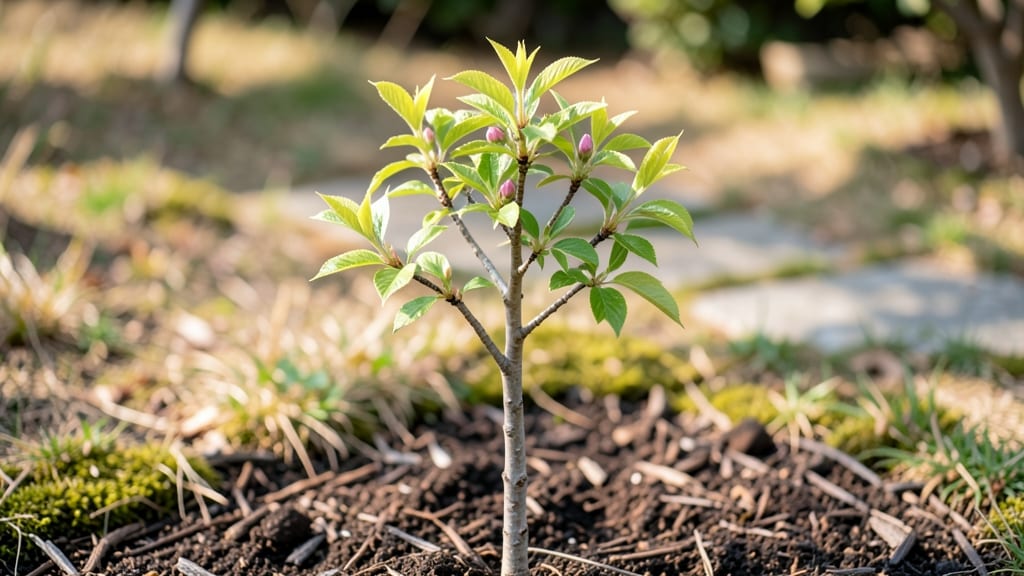
Cold-stratifying your sakura tree sapling for three weeks is the secret to breaking dormancy and ensuring those iconic pink blooms. 🌸 I’ve struggled with weak seedlings before, but this method—mimicking winter’s chill—transforms flimsy saplings into sturdy starters. The key lies in replicating nature’s timing, not rushing it.
Start by mixing equal parts peat moss and perlite for drainage, then place your sapling in a sealed bag with a damp paper towel. Store it in your fridge’s crisper drawer (not the freezer!) where temps hover around 35-45°F.
After 21 days, you’ll see roots forming—proof the magic worked. This prep period is non-negotiable for sakuras; skipping it often means weak stems or delayed blooms.
Once stratified, transplant into well-draining soil in a spot with full sun (6+ hours daily) and acidic pH (6.0-6.5). Water deeply but let the top inch dry between soakings—sakuras hate soggy roots.
Prune only to remove dead branches; their natural shape is already elegant. By spring, you’ll reward patience with 3-5 foot growth and, eventually, those legendary blossoms.
For advanced gardeners, layer mulch in fall to protect roots from winter swings. Beginners should mark planting spots with stakes—sakuras spread wider than they grow tall. Either way, the payoff? A tree that’ll steal the show for decades. Let’s get those roots growing!
📚 In This Guide
- What you need
- Instructions
- Tips and common mistakes
- Wrapping up and next steps
What you need
- ● Sakura seeds: 5–10 fresh, high-quality seeds (ensure they’re from a reliable source for best results).
- ● Cold-stratification supplies: 1 small plastic bag (resealable, quart-sized)
- ● 1 cup peat moss or coco coir (moistened, not soggy)
- ● 1 cup sand (coarse, sterilized)
- ● Planting containers: 1 small nursery pot (4–6 inches wide) or
- ● 1 seed-starting tray with individual cells
- ● Potting mix: 1 bag of well-draining, sterile seed-starting mix (avoid garden soil).
- ● Tools: Small hand trowel or spoon
- ● Spray bottle (for gentle watering)
- ● Grow lights: 1–2 LED plant lights (to supplement natural light if needed).
- ● Humidity dome: 1 clear plastic cover (to retain moisture during germination).
- ● Fertilizer: 1 bottle of balanced liquid fertilizer (5-5-5 or 10-10-10, diluted to half-strength).
- ● Thermometer: 1 small soil thermometer (to monitor cold-stratification temps, ideally 35–40°F).
- ● Label markers: 1 pack (to track planting dates and varieties).
Step-by-Step instructions for cold-stratifying sakura tree saplings
Here's the proven method I use to break dormancy and ensure strong, healthy starts for cherry blossoms.
🌱 Step 1: Select and Prepare Healthy Saplings
Choose saplings with 4-6 inches of stem and at least 3-4 buds along the main trunk. Inspect each carefully for signs of disease or pest damage—discard any with soft spots, discoloration, or webbing. I like to work with bare-root saplings since they're easier to handle and store during stratification.
Trim any damaged roots with clean, sharp pruners, leaving only 2-3 inches of healthy root attached. This encourages new root growth once stratification completes. Soak the roots in lukewarm water for 2-3 hours before planting to rehydrate them fully. You'll know they're ready when the roots feel plump and the water remains clear (not cloudy from sap).
❄️ Step 2: Layer with Moist Growing Medium
Fill a 10-12 inch deep container with a mix of 50% peat moss and 50% perlite—this combination provides both moisture retention and aeration. Moisten the mix until it feels like a wrung-out sponge: damp but not dripping. Place the sapling at a 45-degree angle in the container, burying about ⅔ of the root system while leaving the top 2-3 buds exposed.
Gently press the medium around the roots to eliminate air pockets, then cover the entire container with a plastic bag secured with a rubber band. Poke a few small holes in the bag for airflow—this maintains humidity while preventing rot. Place the container in a cool, dark location where temperatures hover around 35-45°F, like a refrigerator's crisper drawer or an unheated garage.
⏰ Step 3: Stratify for 3 Weeks with Weekly Checks
Leave the saplings undisturbed for 3 weeks, checking weekly to ensure the medium remains consistently moist. If the surface feels dry to the touch, mist lightly with water at room temperature—never soak the container. The goal is to simulate winter conditions without letting the roots dry out or rot.
After 21 days, remove the container from cold storage and inspect the saplings. You'll see swollen buds and possibly early root growth through the container's sides. This confirms successful stratification. If buds remain dormant, extend the cold period by another week—some varieties need longer exposure.
☀️ Step 4: Acclimate and Plant Outdoors
Move the container to a bright, indirect light location (like a north-facing window) for 1 week to harden off the saplings gradually. Open the plastic bag daily for 1-2 hours to acclimate them to normal humidity levels. Watch for new leaf growth—this signals the sapling is ready for transplanting.
Plant outdoors after the last frost date in a location with full sun exposure and well-draining soil. Dig a hole twice as wide as the root ball but no deeper, then water thoroughly before placing the sapling in. Backfill with native soil, firm gently, and create a 2-inch water basin** around the base to retain moisture during establishment.
Tips & tricks for perfect sakura tree stratification
Real talk: The difference between thriving cherry blossoms and struggling saplings often comes down to these key details during the cold stratification process.
Root Rehydration Check: During Step 1's 2-3 hour soak, I learned the hard way that cloudy water means the roots are still releasing sap—keep soaking until the water stays clear. This ensures your saplings start with maximum hydration for the cold period ahead. The roots should feel firm but not mushy when you squeeze them gently.
Medium Consistency Matters: In Step 2, that "wrung-out sponge" texture is critical for the 3-week stratification. Too dry and roots will desiccate; too wet and you risk rot. I use a spray bottle to mist the surface weekly instead of soaking—this maintains perfect moisture without over-saturating the peat-perlite mix.
Temperature Consistency: The 35-45°F range in Step 2 is non-negotiable for breaking dormancy properly. If your fridge's crisper drawer fluctuates, add a thermometer and adjust shelf placement. I've seen buds fail to swell when temps crept above 50°F—consistent cold is what triggers those critical growth hormones.
Acclimation Timing: That 1-week hardening off in Step 4 is where most people rush the process. Open the bag gradually—start with just 30 minutes on day 1, then increase by 30 minutes daily. Sudden exposure to normal humidity can shock the delicate new growth, especially when you're watching for those first leaf signals.
Pro Tips for Sakura Tree Sapling
- Real talk: The difference between thriving cherry blossoms and struggling saplings often comes down to these key deta...
- Root Rehydration Check: During Step 1's 2-3 hour soak, I learned the hard way that cloudy water means the roots are s...
- Medium Consistency Matters: In Step 2, that "wrung-out sponge" texture is critical for the 3-week stratification. Too...
Frequently asked questions
Got questions about growing your sakura tree sapling? Here are answers to the most common ones—so you can nurture your delicate bloom with confidence!
How long does it take for a sakura sapling to bloom?
A young sakura sapling typically takes 3–5 years to produce its first flowers, depending on the variety and growing conditions. Patience is key—focus on establishing a strong root system and healthy growth first! Pro tip: Some dwarf varieties may bloom sooner (2–3 years).
Why is cold stratification important for sakura saplings?
Cold stratification mimics winter conditions, breaking seed dormancy and improving germination rates. Sakura seeds need this 60–90 day cold period (like a mini winter!) to sprout successfully. Skip it, and you might wait years for results—or none at all!
Can I grow a sakura sapling indoors?
While possible, sakura trees thrive outdoors with full sun (6+ hours/day). If you must start indoors, place it near a bright window or under grow lights, then transplant outside after the last frost. Warning: Indoor saplings may grow leggy or weak without proper sunlight.
What’s the best soil mix for sakura saplings?
Use a well-draining mix of 60% potting soil, 30% perlite, and 10% compost. Sakura trees hate soggy roots! Add a handful of sand if your soil is clay-heavy. Pro tip: Test soil pH—sakuras prefer slightly acidic (6.0–6.5).
Are sakura saplings prone to pests or diseases?
Yes! Watch for aphids, spider mites, or fungal issues like powdery mildew. Keep the area around the sapling clean, avoid overwatering, and treat pests early with neem oil or insecticidal soap. Prevention: Space saplings for airflow to reduce humidity-related problems.
Wrapping up and next steps
Growing a sakura tree sapling from cold-stratified seeds is a rewarding journey that blends patience with pure joy! 🌸 With just three weeks of preparation, you’re already ahead of the game—ready to nurture a future tree that will bring color and serenity to your space.
Trust the process, stay consistent with care, and soon, you’ll be watching delicate pink blossoms dance in the breeze.
Now that you’re armed with the right materials and answers to common questions, it’s time to take action! Start your seeds today, and in no time, you’ll have a thriving sapling that’s the envy of every gardener. Happy growing! 🌱✨