
Pests and Diseases
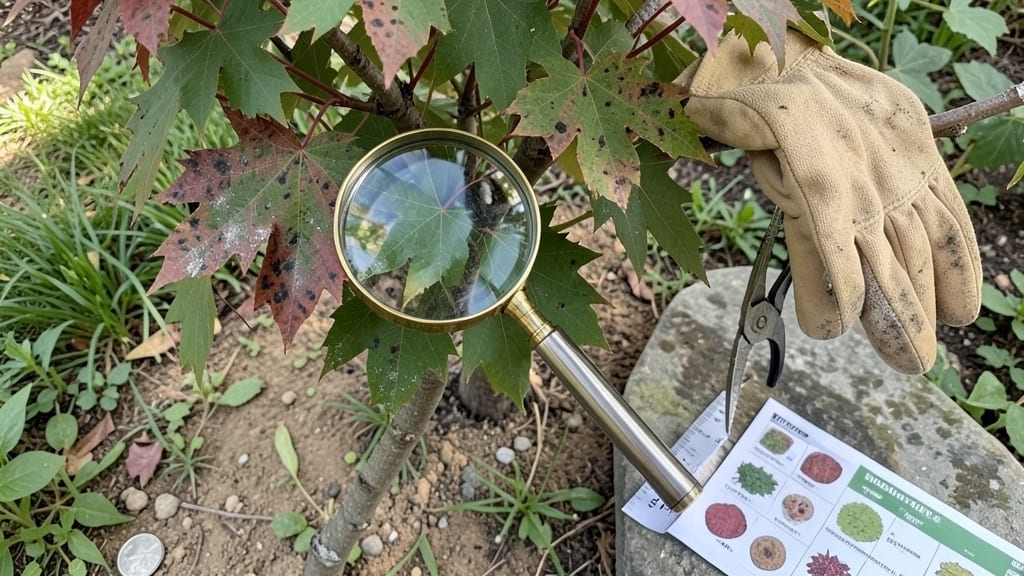
Those mysterious spots on the leaves of your tree could be silently killing it—before you know it’s too late. 🌿 I’ve seen anthracnose turn a healthy oak into a skeleton in just one season, and powdery mildew turn a rose bush into a dusty mess.
The key to saving your tree? Spotting the problem early and acting fast—before the fungus spreads or the damage becomes permanent.
Start by checking the spot’s color, shape, and whether it’s fuzzy, oily, or sunken. Black spots with yellow rings? Likely anthracnose. White powdery coating? Powdery mildew.
Then, grab some pruners, a fungicide (neem oil for organic, copper-based for severe cases), and a spray bottle—you’ll have this under control in under an hour. The sooner you act, the sooner your tree bounces back to full, spot-free glory.
📚 In This Guide
- What you need
- Instructions
- Tips and common mistakes
- Wrapping up and next steps
What you need
- ● Hand lens or magnifying glass – A 10x magnification lens works best for close-up inspection.
- ● Disposable gloves – A pair (nitrile or latex) to protect your hands from sap, spores, or irritants.
- ● Small plastic bags or containers – 3–5 resealable bags (quart-sized) for collecting leaf samples.
- ● Permanent marker – To label samples with the tree type and date.
- ● Camera or smartphone – For capturing high-resolution images of the spots (natural light helps!).
- ● Field guide or plant disease reference book – Or a reliable digital resource (e.g., UMaine Plant Disease Guide).
- ● Alcohol wipes or hand sanitizer – For cleaning tools between inspections.
- ● Petri dish or small container with moist paper towels – For culturing a small sample (advanced users only!).
- ● Spray bottle with water – To gently rinse leaves for better spot visibility.
- ● Notebook or app – For logging observations (e.g., spot color, size, leaf drop patterns).
- ● Fungicide or horticultural oil – Only if you plan to treat the tree after identification!
How to diagnose and treat fungal spots on tree leaves
No fancy tools needed—just a closer look and these straightforward steps.
🌿 Step 1: Examine the Spots Up Close
Start by collecting a few affected leaves from different parts of the tree. Hold them against a white piece of paper or your phone’s camera to see the spots clearly. Note their size, color, and texture—are they powdery, greasy, or slimy? Fungal spots often start as tiny dots that expand into concentric rings or irregular patches. Look for yellow halos around the spots, which signal active infection.
Check the undersides of leaves too. Many fungal spores hide there, waiting to spread. If you see dark specks or fuzzy growth, that’s your confirmation—this is a fungal issue, not insect damage. Grab a magnifying glass if you have one; it makes spotting the texture differences much easier. The sooner you identify the pattern, the faster you can act.
🌱 Step 2: Test for Moisture and Environment
Fungal blight thrives in damp conditions, so check how often the leaves stay wet. Water the tree early in the day so foliage dries by evening. If you’ve noticed recent rain or overhead watering, that’s likely the culprit. Run your finger along the leaf stems—if they feel slimy or sticky, excess moisture is the problem.
Next, assess airflow. Fungal spores spread less in open, breezy areas. If your tree sits in a tight space between buildings or dense shrubs, that trapped humidity is perfect for fungal growth. Move nearby plants or prune branches to improve circulation. The goal is to let air move freely around the leaves—this alone can stop the spread.
✂️ Step 3: Prune and Apply Fungicide
Start by removing heavily infected leaves and branches with clean, sharp pruners. Sterilize your tools between cuts by wiping them with rubbing alcohol. Toss the pruned material in the trash—not the compost—since fungal spores can survive there. Focus on the outer edges of the tree first, where infected leaves often cluster.
Once pruning is done, apply a copper-based fungicide or neem oil solution (mix 1 tablespoon neem oil with 1 quart water and a drop of dish soap). Spray the undersides of leaves first, then the tops, until they glisten. Reapply every 7-10 days or after heavy rain. Avoid spraying when leaves are wet—this dilutes the treatment and can harm the tree.
🌱 Step 4: Prevent Future Outbreaks
Water at the base of the tree, not overhead, to keep foliage dry. Use a soaker hose or drip irrigation to deliver moisture directly to the roots. Mulch around the tree with 2-3 inches of organic mulch (like wood chips) to retain moisture in the soil while keeping leaves dry. Reapply mulch annually to maintain this barrier.
Monitor the tree regularly, especially after rain. If you notice new spots, act fast—catching fungal issues early saves the tree from long-term damage. Prune again in late winter to remove any lingering infected branches before the growing season kicks in. Healthy trees with good airflow and proper watering rarely suffer severe fungal outbreaks.
Tips & tricks for identifying and treating leaf spots
Real talk: I've seen gardeners waste hours trying to fix leaf spots only to realize they were dealing with something completely different. Here's what nobody tells you—these tricks make all the difference.
Visual Clues in Step 1: When examining those suspicious spots, pay special attention to whether they're powdery or greasy. Powdery mildew looks like dust, while greasy spots often indicate anthracnose. I've learned the hard way that ignoring these details leads to treating the wrong problem—always check both leaf surfaces, especially the undersides where spores love to hide.
Moisture Test in Step 2: That simple finger test along leaf stems is your secret weapon. If they feel sticky, you've got moisture issues that need fixing immediately. I've seen fungal outbreaks disappear completely after just switching to morning watering and adding a few air gaps around the tree. Don't underestimate how much airflow can change everything.
Pruning Strategy in Step 3: When removing infected leaves, work from the outside in—this prevents spreading spores to healthy parts of the tree. I sterilize my pruners with rubbing alcohol between every cut because I've seen tools become contamination vectors before. And for the love of gardening, don't compost those infected leaves—spores survive and will reinfect your garden.
Fungicide Application Tip: The key to effective treatment is thorough coverage—start with the undersides of leaves where spores hide. I've found that adding a drop of dish soap to the neem oil solution helps it stick better. And remember: those 7-10 day reapplication windows are critical. Skipping them means the fungus gets a second chance to take over.
Pro Tips for Spots On Tree Leaves
- Real talk: I've seen gardeners waste hours trying to fix leaf spots only to realize they were dealing with something completely different.
- Visual Clues in Step 1: When examining those suspicious spots, pay special attention to whether they're powdery or greasy.
- Moisture Test in Step 2: That simple finger test along leaf stems is your secret weapon.
Frequently asked questions
Got questions about those mysterious spots on your tree leaves? You’re not alone! Here are some of the most common concerns—and straightforward answers—to help you tackle the issue with confidence.
What do spots on tree leaves usually mean?
Spots on leaves are often a sign of fungal infections, like powdery mildew, anthracnose, or rust. They can also result from bacterial diseases, environmental stress (e.g., sun scorch), or even pest damage. The color, size, and pattern of the spots help narrow down the cause—check for yellow halos, black centers, or powdery textures for clues.
When is the best time to treat spotted leaves?
Act as soon as you notice the spots—early intervention prevents the fungus from spreading. Spring and early summer are critical, as warm, humid weather fuels fungal growth. If you’re dealing with a severe outbreak, repeat treatments every 7–14 days until new growth appears healthy. Pro tip: Always treat in the morning so fungicides have time to dry before evening moisture sets in.
Are there natural remedies for leaf spots besides fungicides?
Yes! Try these DIY-friendly options first:
- Neem oil solution: Mix 1 tbsp neem oil + 1 tsp mild soap in 1 quart of water. Spray leaves thoroughly.
1 tsp baking soda + 1 quart water + a drop of dish soap (use sparingly). - Copper fungicide: Organic and effective for bacterial spots like fire blight.
Can spotted leaves harm my tree long-term?
If left untreated, fungal leaf spots can weaken the tree, reduce photosynthesis, and even kill branches—or the whole tree in severe cases. However, many trees recover fully with proper care. Prune infected leaves and a few inches of healthy tissue below to stop spread, and fertilize to boost immunity. Watch for: excessive leaf drop, stunted growth, or oozing sap—signs of a worsening problem.
How do I tell if the spots are from a fungus vs. pests or disease?
Use this quick spot-check guide:
Cause
Spot Appearance
Other Clues
Fungus
Powdery, greasy, or tar-like; often with fuzzy edges
Spots may appear on both sides of leaves; sometimes accompanied by leaf curling or mildew.
Pests (e.g., mites, aphids)
Tiny holes, skeletonized patterns, or sticky residue ("honeydew")
Look for visible bugs or webbing on leaves/undersides.
Bacterial disease
Water-soaked, oily, or dark with yellow halos
Often smells rotten; may ooze when wet.
Environmental (e.g., sun scorch)
Dry, brown, or crispy edges; often on one side of the leaf
Common in late summer or on young, thin leaves.
Wrapping up and next steps
Spotting those mysterious marks on your tree leaves doesn’t have to be stressful—now you’ve got the tools to identify fungal blight with confidence! 🌿 From gathering samples to comparing symptoms, these three steps will help you diagnose the issue and take action before it spreads.
Remember, early detection is key to protecting your greenery.
Ready to tackle the problem? Start by inspecting your trees today—and if the spots look suspicious, grab your magnifying glass and follow the steps you’ve learned. You’ve got this! For tough cases, don’t hesitate to consult a local arborist or extension service. Happy gardening! 🌟