
Pruning
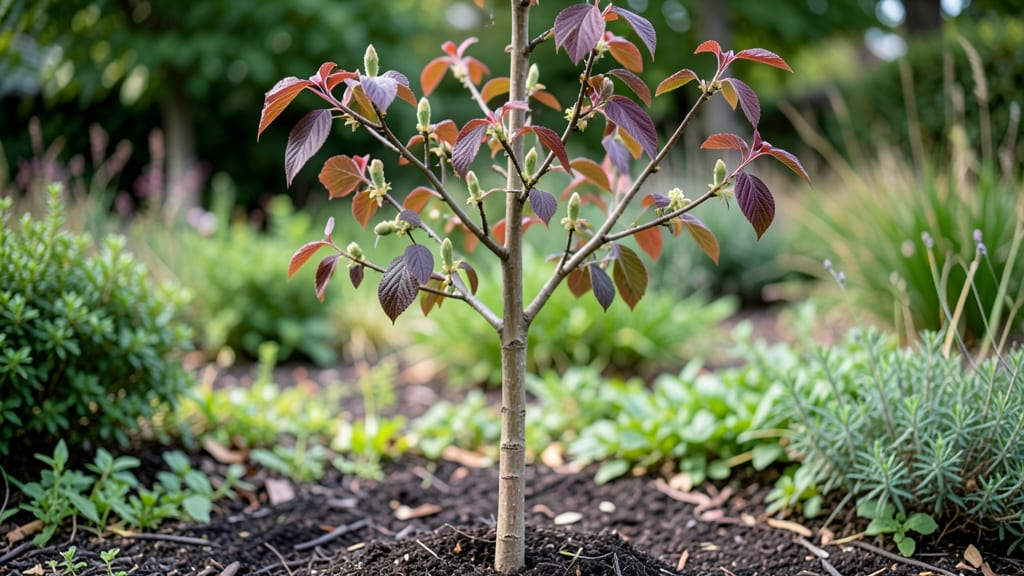
Pruning mulberry trees in early spring unlocks heavier fruit loads and stronger growth—if you time it right. 🌿 The key is cutting before buds swell, when the tree’s energy is dormant but ready to surge.
I’ve watched my own mulberries go from sparse berries to buckets of fruit just by mastering this one window. You’ll need sharp pruners, a ladder (for taller trees), and about 30 minutes to assess branches.
Focus on removing dead wood, crossing limbs, and thinning crowded areas—never cut more than 25% of the canopy at once. This keeps the tree healthy while maximizing next year’s harvest. After pruning, the tree rewards you with vibrant new shoots within weeks.
The fruit that follows is sweeter, larger, and more abundant because the tree directs energy where it counts. Plus, you’ll avoid the stress of summer pruning when pests are active. Works for both wild and cultivated varieties, though timing shifts slightly by region.
In colder zones, wait until after the last frost—but before leaves emerge. Here’s exactly how to do it without mistakes.
📚 In This Guide
- What you need
- Instructions
- Tips and common mistakes
- Wrapping up and next steps
What you need
- ● Pruning shears: Bypass pruners (sharp, clean, and disinfected with rubbing alcohol or bleach solution). Quantity: 1 pair (or 2 if working on a large tree).
- ● Loppers: For thicker branches (1–2 inches in diameter). Quantity: 1 pair.
- ● Pruning saw: For branches over 2 inches thick. Specs: Curved blade, 8–12 inches long.
- ● Gloves: Heavy-duty, cut-resistant (to protect from thorns and sharp tools). Quantity: 1 pair.
- ● Disinfectant: 1-part bleach to 9-parts water (or 70% isopropyl alcohol) for sterilizing tools between cuts.
- ○ Pruning sealant (optional): For large cuts (>1 inch diameter) to prevent disease entry.
- ● Ladder or step stool: If your tree is over 6 feet tall. Safety note: Use a stable, 3-sided ladder.
- ● Trash bags or bucket: For collecting pruned branches (quantity depends on tree size).
- ● Notebook & pen: To sketch a quick map of your tree’s structure before/after pruning.
- ● Timing: Prune in early spring (just as buds swell but before leaves emerge)—ideal window: late February to early March (varies by climate zone).
- ● Weather: Choose a dry, calm day (no rain forecast for 24 hours). Avoid pruning if frost is expected.
- ● Tree health check: Inspect for signs of disease (e.g., fungal spots, oozing sap) or pests. Pro tip: 💡 If issues are found, treat before pruning.
- ● Safety gear: Long sleeves/pants (mulberry thorns are no joke!) and closed-toe shoes.
- ● Handheld leaf blower: For clearing debris after pruning.
- ● Tree wound dressing: Alternative to sealant (e.g., pruning paint with copper-based antifungal properties).
- ● Camera: Snap photos of your tree’s structure before pruning for reference.
- ● Compost bin: Repurpose pruned branches as mulch or compost.
Step-by-step instructions for mulberry tree early spring pruning
Here’s how to refresh your mulberry tree’s shape and set it up for a bountiful summer harvest.
⏰ Step 1: Time Your Pruning for Optimal Healing
Prune your mulberry tree in early spring, right after the last frost but before buds begin to swell. This timing ensures the tree has plenty of time to heal before summer’s heat stress. I like to schedule it for late February to early March in most climates—just check your local frost dates first.
If you miss this window, wait until late winter when the tree is still dormant. Never prune in fall or during active growth periods. You’ll see fresh, plump buds forming along the branches—that’s your cue the tree is ready for pruning.
✂️ Step 2: Remove Dead, Weak, or Crossing Branches
Start by cutting out any dead or diseased branches—they’re easy to spot as they’re brown, brittle, or lack leaves. Use clean, sharp pruning shears to make 45-degree cuts just outside the branch collar (the swollen area where the branch meets the trunk). This prevents unsightly stubs and encourages faster healing.
Next, remove weak or crossing branches that rub against each other. Weak branches often grow thin and pale, while crossing branches create wounds that invite pests. Focus on the lower third of the tree first to open up space for sunlight and air circulation.
☀️ Step 3: Thin the Canopy for Light and Airflow
Step back and assess the tree’s shape. Aim to reduce the canopy by about 20% to improve light penetration and fruit production. Start at the outer edges and work inward, cutting back branches that are growing inward or downward. These branches compete for sunlight and weaken the tree’s structure.
For larger branches over ½ inch thick, use pruning saws to avoid tearing the bark. Make your cuts just outside a bud or branch collar, and always cut at a slight angle. You’ll notice the tree’s center opens up—this is where new, vigorous growth will sprout in spring.
🌱 Step 4: Shape the Tree for Balance and Fruit Production
Now’s the time to refine the tree’s shape. Mulberry trees respond well to an open-center form, which maximizes sunlight exposure for fruit development. Remove suckers (shoots growing from the base or roots) immediately—they drain energy from the main tree.
If your tree has overly dense branches, selectively thin them to create a balanced, rounded silhouette. Avoid cutting more than 25% of the tree’s foliage in one season, or you risk shocking the tree. Step back frequently to check your progress—you want a tree that looks natural but airy.
💧 Step 5: Clean Up and Apply a Protective Seal
After pruning, rake up all clippings and debris to prevent disease. Dispose of diseased branches separately. If you notice any sawdust-like residue on the cuts, it’s a sign of infection—apply pruning sealant to those areas to protect against pathogens.
Finish by watering the base of the tree deeply to help it recover. Mulberry trees are drought-tolerant, but a good soak after pruning encourages root growth. Avoid fertilizing right away—wait until new growth appears in spring before adding nutrients.
Tips & tricks for mulberry tree spring pruning
Between us, pruning a mulberry tree at the right time and in the right way makes all the difference for next year's fruit. Here's what I've learned after years of trial and error.
Timing is Everything: The early spring window—right after last frost but before buds swell—is critical. I check my local frost dates and mark my calendar for late February to early March. If you miss this, wait until late winter when the tree is still dormant. The key is seeing those plump buds forming—they signal it's time to prune. Real talk: I once pruned in fall by mistake, and my tree struggled to recover before winter.
Cutting Technique Matters: Always use clean, sharp pruning shears and make your cuts at a 45-degree angle just outside the branch collar. I learned this the hard way after leaving stubs that took years to heal. For branches over ½ inch thick, use a pruning saw to avoid tearing the bark. That sawdust-like residue you might see on cuts? It's a sign of infection—apply pruning sealant immediately to those areas. I keep a small bottle of sealant in my gardening toolbox specifically for this purpose.
Canopy Thinning Strategy: Step back and assess your tree's shape before making cuts. Aim to reduce the canopy by about 20% to improve air circulation and sunlight penetration. Start at the outer edges and work inward, focusing on branches growing inward or downward. I find it helpful to sketch a quick diagram of the tree's shape before I begin—it keeps me from getting overwhelmed. Remember, you want to create an open-center form that maximizes sunlight exposure for fruit development.
Post-Pruning Care: After you're done, rake up all clippings and debris to prevent disease. I've made the mistake of leaving pruned branches under the tree, and it led to fungal issues. Finish by giving your tree a deep watering to help it recover. Avoid fertilizing right away—wait until you see new growth appearing in spring. This gives your tree time to focus on healing rather than producing fruit.
Pro Tips for Mulberry Tree Early Spring
- Between us, pruning a mulberry tree at the right time and in the right way makes all the difference for next year's fruit.
- Timing is Everything: The early spring window—right after last frost but before buds swell—is critical.
- Cutting Technique Matters: Always use clean, sharp pruning shears and make your cuts at a 45-degree angle just outside the branch collar.
Frequently asked questions
Got questions about mulberry tree early spring pruning? You’re not alone! Here are some of the most common concerns—and their answers—to help you tackle the task with confidence.
When is the exact best time to prune a mulberry tree in early spring?
The ideal window is late winter to early spring, just as new buds swell but before leaves emerge (typically February–March in most U.S. zones). Prune too early, and you risk damaging cold-sensitive branches; wait too long, and you may encourage pest infestations or reduce fruit yield. Aim for 4–6 weeks before last frost for best results.
How much can I safely remove in one pruning session?
For established mulberry trees, never remove more than 25–30% of the canopy in a single session. Focus on dead, diseased, or crossing branches first, then thin out to improve airflow. Over-pruning stresses the tree and can reduce fruit production. Pro tip: Use a step-by-step approach—prune lightly over 2–3 years if needed!
Will pruning now affect my mulberry harvest this year?
Pruning in early spring won’t hurt your harvest—in fact, it enhances it! By removing old wood and shaping the tree, you encourage healthier growth and more fruit-bearing branches for next season. However, if you prune too late (after buds break), you might delay fruit ripening slightly. Patience pays off!
What should I do if my mulberry tree has pests or diseases after pruning?
Pruning opens wounds, so sterilize tools with rubbing alcohol before and after each cut to prevent spreading pathogens. If you spot aphids, scale, or fungal spots, treat with neem oil or horticultural oil (follow label instructions). For severe issues, consult a local extension service for targeted solutions. Prevention tip: Remove fallen leaves/debris post-pruning to deter pests!
Can I prune a young mulberry tree the same way as an older one?
Young trees (1–3 years old) need gentler pruning—focus on removing only dead/damaged wood and shaping for structure. Avoid heavy cuts; prioritize air circulation and central leader development. Older trees can handle more aggressive thinning. Key rule: Never prune more than 10–15% of the tree’s height in its first few years!
Wrapping up and next steps
Early spring is the perfect time to give your mulberry tree the care it needs to thrive!
By pruning strategically—removing dead wood, thinning branches, and shaping growth—you’ll boost airflow, sunlight exposure, and fruit production for next season. 🌿✨ Think of it as a fresh start for your tree, setting the stage for a bountiful harvest.
Ready to take action? Grab your pruners, mark your calendar for those early spring days, and roll up your sleeves. Your mulberry tree—and your future berry feast—will thank you! 🍇🌱