
Pruning
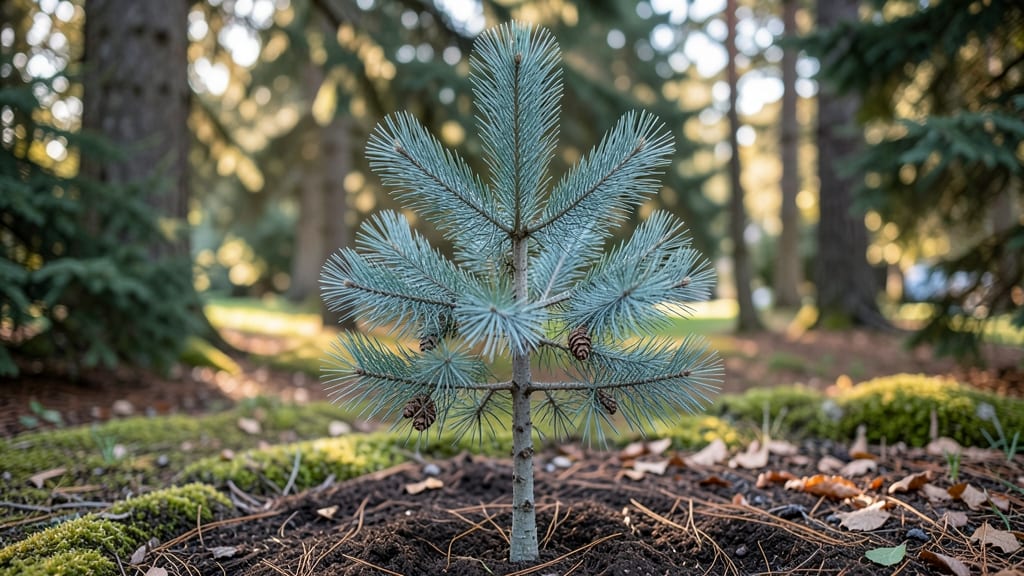
Your first spruce tree seedling could be the start of a 50-foot evergreen that defines your yard for decades. 🌲 The key to success begins with the right conditions—cool, moist soil, partial shade, and patience.
I’ve nurtured seedlings from tiny needles to sturdy saplings, and the early stages are where most gardeners trip up. You’ll need well-draining soil, a 5-gallon container for starters, and a spot sheltered from harsh winds.
Spruce seedlings like Colorado blue or Norway spruce thrive in zones 3-7, but even the hardiest varieties need consistent moisture. Overwatering? That’s the biggest rookie mistake—it causes root rot before the tree ever gets a chance to grow strong.
By year three, your seedling will be 3-5 feet tall with a full canopy, its needles a vibrant green (or striking blue, depending on the variety). The scent of pine in winter and the shade it provides in summer make every early struggle worthwhile.
Just watch for spider mites—they adore young spruces—and keep the soil slightly acidic. This method works for backyard planting, container growing, or even urban spaces with the right adjustments. Let’s get those seeds started right!
📚 In This Guide
- What you need
- Instructions
- Tips and common mistakes
- Wrapping up and next steps
What you need
- ● Spruce tree seeds: 10–20 seeds (ensure they’re fresh, ideally from a local or reputable supplier).
- ● Seed-starting mix: 2–3 cups of sterile, well-draining potting soil (avoid garden soil—it may contain pathogens).
- ● Planting containers: Small seed trays (with drainage holes) or
- ● Individual biodegradable pots (3–4 inches deep).
- ● Spray bottle: For gentle watering (avoid over-saturating seeds).
- ● Plastic wrap or humidity dome: To create a mini greenhouse effect.
- ● Grow lights or sunny windowsill: A south-facing window or a full-spectrum LED grow light (12–16 hours/day).
- ○ Fertilizer (optional but helpful): A balanced, water-soluble fertilizer (diluted to half-strength) for seedlings.
- ● Small hand trowel: For transplanting seedlings later.
- ● Pruning shears (sterilized): For trimming leggy seedlings (once they’re ~4 inches tall).
- ○ Thermometer (optional): To monitor soil temperature (ideal: 65–75°F for germination).
- ○ Hardening-off tray (optional): A shallow container for acclimating seedlings to outdoor conditions.
- ● Patience & consistency! 🌟 Spruce seedlings grow slowly—stay committed to daily care.
Step-by-Step instructions for cultivating spruce tree seedlings
Here's my battle-tested approach to growing sturdy spruce seedlings that'll thrive for decades.
🌱 Step 1: Collect and Prepare Fresh Spruce Seeds
Gather seeds from healthy, mature spruce cones—never use store-bought cones, as they're often treated to prevent germination. Collect cones in late fall when they've opened naturally. Place them in a paper bag and store in a warm, dry place for 4-6 weeks to complete stratification. You'll know they're ready when the cones begin cracking open on their own.
Remove seeds carefully with tweezers, being mindful not to damage the delicate wings. Spruce seeds are tiny—about 1/8 inch long—so work slowly. For best results, plant them immediately after extraction, as fresh seeds germinate at rates up to 80%. If you must store them, keep them in a sealed container with a damp paper towel in the refrigerator for no longer than 3 months.
💧 Step 2: Create the Ideal Germination Environment
Fill a shallow tray or seedling flat with sterile seed-starting mix moistened until it holds together when squeezed but doesn't drip. Spruce seeds need consistent moisture but will rot if waterlogged. Spread seeds 1/8 inch apart on the soil surface—don't cover them, as they require light to germinate. Gently press each seed into the mix with your finger.
Cover the tray with clear plastic wrap or a humidity dome to maintain 90% humidity and place it in a warm spot (70-75°F). A seedling heat mat set to 75°F will speed germination. Check daily for condensation—mist lightly if the plastic fogs up. Germination typically takes 4-8 weeks, though some seeds may take 12 weeks to sprout. Patience is key here; don't disturb the tray until you see green shoots.
☀️ Step 3: Provide Gentle Light and Air Circulation
Once seedlings emerge, remove the plastic cover immediately to prevent fungal growth. Place them under bright, indirect light—a south-facing window works, but supplement with a grow light if natural light is weak. Keep the light 4-6 inches above the seedlings and adjust as they grow to maintain that distance. Spruce seedlings need 12-14 hours of light daily to avoid becoming leggy.
Leggy seedlings (long, thin stems with sparse needles) signal insufficient light. If you notice this, move the seedlings closer to the light source or increase light duration. Avoid direct sunlight, which can scorch tender needles. After 4-6 weeks, when seedlings have 2-3 sets of true needles, they're ready for their first transplant into individual pots.
🪴 Step 4: Transplant Seedlings into Individual Containers
Use 3-4 inch diameter pots filled with a well-draining mix of 50% peat moss, 30% perlite, and 20% sand. This blend prevents root rot while mimicking the acidic, well-aerated soil spruces prefer in nature. Gently lift each seedling by its leaves (never the stem) and place it in the center of a pot, burying the stem up to the first set of needles. Firm the soil lightly around the base to eliminate air pockets.
Water thoroughly until water runs out the drainage holes, then place the pots in a shaded area for 3-5 days to reduce transplant shock. After this acclimation period, move them to a spot with morning sun and afternoon shade. Spruce seedlings are sensitive to heat stress, so avoid placing them in direct afternoon sunlight until they're 6-8 inches tall. Fertilize lightly with a balanced, water-soluble fertilizer (10-10-10) at half strength every 4 weeks during the growing season.
✂️ Step 5: Prune and Train for Strong Growth
When seedlings reach 6-12 inches tall, begin pruning to encourage bushier growth. Use clean, sharp scissors to trim back the top 1/3 of the leader (main stem). This redirects energy to lateral branches, creating a fuller, more stable tree. Additionally, remove any deformed or crossing branches to prevent future rubbing injuries. Prune in early spring before new growth begins, as this timing minimizes stress.
To train the leader (central stem), gently tie it to a stake or bamboo support using soft twine. This prevents the stem from bending under its own weight or snapping in wind. Re-tie the twine every 4-6 weeks as the seedling grows. Avoid tying too tightly—you should be able to fit one finger between the twine and the stem. Regular pruning and training now will pay off when your spruce reaches maturity, as it'll have a strong, symmetrical structure.
Tips & tricks for growing healthy spruce seedlings
Here's what I learned after years of nurturing spruce seedlings—these details make all the difference between thriving trees and disappointing failures.
Stratification Secret: The 4-6 week stratification period in Step 1 isn't just about time—it's about breaking seed dormancy. Place your cones in a paper bag and store them in a warm, dry spot like a basement or garage. If you're impatient, you can speed this up to 3 weeks by placing the bag in the refrigerator (around 40°F) for 2 weeks first, then moving it to warmth. This mimics natural winter conditions that spruce seeds experience in the wild.
Germination Environment: When creating that 90% humidity environment in Step 2, avoid overwatering—the seed-starting mix should be damp but never soggy. I use a spray bottle to mist the surface daily instead of pouring water, which prevents seeds from washing away or becoming waterlogged. Place a small fan on low setting near the tray (about 6 inches away) to create gentle airflow—this prevents fungal growth while maintaining humidity. The 70-75°F range is critical; if your home is cooler, consider using a seedling heat mat set to 75°F for consistent warmth.
Light Management: For the 12-14 hours of light requirement in Step 3, I recommend using a full-spectrum grow light on a timer if natural light is insufficient. Position it 4-6 inches above the seedlings and adjust as they grow. Watch for leggy seedlings (long stems with sparse needles)—this is your cue to either move them closer to the light or increase light duration. If using a south-facing window, rotate the tray quarter-turn daily to ensure even growth. Avoid direct sunlight, which can scorch tender needles and cause yellowing.
Transplanting Wisdom: In Step 4, when transplanting into 3-4 inch pots, I've found that using 4-inch pots gives seedlings more room to develop strong root systems without becoming root-bound too quickly. After the 3-5 day acclimation period in shade, gradually introduce them to morning sun. For the 10-10-10 fertilizer, I dilute it to half strength and only apply it after the seedlings show new needle growth—this prevents burning tender roots. Water thoroughly after fertilizing to help distribute nutrients evenly.
Pro Tips for Spruce Tree Seedling
- Here's what I learned after years of nurturing spruce seedlings—these details make all the difference between thrivin...
- Stratification Secret: The 4-6 week stratification period in Step 1 isn't just about time—it's about breaking seed do...
- Germination Environment: When creating that 90% humidity environment in Step 2, avoid overwatering—the seed-starting ...
Frequently asked questions
Got questions about growing your spruce tree seedling? You’re not alone! Here are answers to the most common concerns—from timing to troubleshooting—to help you nurture your tiny tree into a thriving giant.
How long does it take for a spruce seedling to grow into a mature tree?
A spruce seedling typically takes 10–15 years to reach maturity (15–20 feet tall), but growth speed depends on species, climate, and care. Dwarf varieties may mature in half the time, while larger spruces like the Colorado blue spruce take longer. Patience is key—think of it as a long-term investment in your landscape!
Can I plant a spruce seedling in winter?
Planting in late fall or early winter (November–February) is ideal in cold climates, as the ground is workable and frost protects roots. Avoid extreme cold snaps (<20°F) or planting when the ground is frozen. If you must plant in winter, mulch heavily (3–4 inches) to insulate roots. Spring planting is safer in warmer regions.
Why are my spruce seedlings turning brown at the tips?
Brown tips usually signal drought stress, overwatering, or nutrient deficiency. Check soil moisture—spruces hate soggy roots but need consistent hydration. Test soil pH (ideal: 4.5–6.0); acidic soil is critical. Yellowing needles may mean nitrogen deficiency (use a balanced fertilizer in early spring). Adjust care and monitor for pests like spider mites.
What’s a good alternative if I can’t find spruce seedlings?
Consider these low-maintenance evergreens with similar benefits:
- Pine seedlings (fast-growing, drought-tolerant)
- Fir or hemlock (softer needles, shade-friendly)
- Juniper (hardy, deer-resistant)
- Arborvitae (compact, great for hedges)
When and how should I prune my young spruce seedling?
Prune only in late winter/early spring (before new growth) to avoid stress. For seedlings (<3 years old), remove dead or crossing branches with clean, sharp shears. Avoid heavy pruning—spruces grow best with minimal shaping. Focus on air circulation to prevent disease.
Wrapping up and next steps
Growing a spruce tree seedling from scratch is a rewarding journey that connects you to nature’s patience and beauty. 🌱 With the right care—whether it’s nurturing your seedling indoors or transplanting it outdoors—you’re setting the stage for a thriving evergreen that will stand the test of time.
Now that you’re armed with the 12 essential steps, roll up your sleeves and get planting! Start small, stay consistent, and watch your tiny seedling transform into a majestic tree.