
Pruning
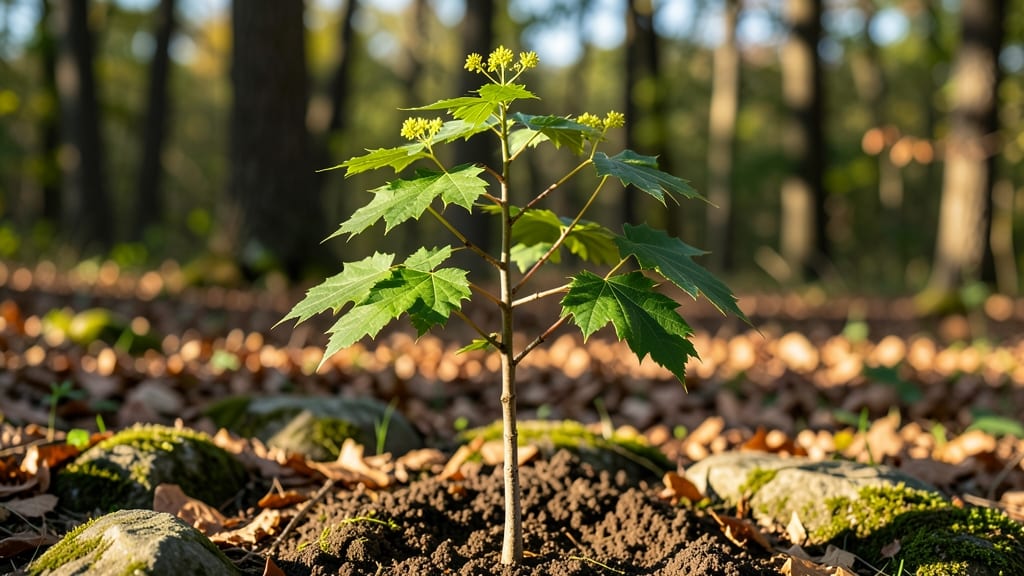
Planting a sugar maple sapling means investing in a tree that could produce syrup for generations. 🌳 I’ve watched mine grow from a 2-foot sapling to a sturdy 12-footer in just five years, and the key was getting the first few seasons right—soil, sunlight, and patience matter more than you’d think.
The right spot is critical: partial shade to full sun, well-draining soil with a pH between 5.0 and 7.0, and plenty of space—these trees grow 60+ feet tall when mature.
Mulch heavily in the first year to protect roots, and water deeply once a week (more in summer heat) until established. Overwatering is the biggest rookie mistake.
Pruning young maples isn’t about shaping—it’s about removing dead branches and encouraging strong structure. Wait until late winter or early spring when the tree is still dormant, and use clean, sharp tools to avoid tearing bark. The goal? A single strong trunk with well-spaced branches.
Long-term success comes down to two things: patience and soil health. Test your soil every few years and amend with compost if needed. These trees are tough, but they repay careful early care with decades of shade, beauty, and—if you’re lucky—future syrup harvests.
📚 In This Guide
- What you need
- Instructions
- Tips and common mistakes
- Wrapping up and next steps
What you need
- ● Sugar maple sapling (1-2 years old, 12–18 inches tall, with a healthy root system). Pro tip: Look for saplings with a sturdy trunk and vibrant green leaves!
- ● Well-draining soil mix (50% topsoil, 30% compost, 20% perlite or sand). 💡 Test soil pH (ideal: 5.0–7.0).
- ● 5-gallon nursery pot (or larger) with drainage holes (if starting indoors).
- ● Garden shovel or trowel (for planting).
- ● Watering can or hose with a gentle spray nozzle (avoid over-saturating roots!).
- ● Mulch (wood chips or straw) (2–3 inches thick, keep 3–4 inches away from the trunk).
- ● Pruning shears (sterilized, sharp blades for trimming dead/branches).
- ● Garden stakes or trellis (1–2, 4–6 feet tall, for support if needed).
- ● Organic fertilizer (balanced 10-10-10 or slow-release maple-friendly formula).
- ● Soil moisture meter (to track hydration levels).
- ● Tree guard or protective fence (to shield from deer/animals).
- ● Epsom salt (1 tbsp/month in water for magnesium boost).
- ● Mycorrhizal fungi powder (enhances root growth—mix into planting hole!).
- ● Shade cloth (30–50%) (for young saplings in hot climates).
Step-by-Step instructions for planting a sugar maple sapling
Here's how I get these majestic trees off to the right start—strong roots, perfect placement, and all the care they need to thrive.
🪴 Step 1: Choose the Perfect Planting Site
Sugar maples need room to grow—aim for a spot with at least 50 feet of space in all directions. They thrive in full sun to partial shade, but I always pick the sunniest part of the yard because young trees need that energy to build strong roots. Avoid low spots where water pools, as soggy soil will rot their roots.
Check the soil pH with a test kit—sugar maples prefer slightly acidic to neutral soil (pH 6.0-7.0). If your soil tests too alkaline, mix in 2-3 inches of peat moss or compost into the top 12 inches of soil before planting. The goal is well-draining, fertile earth that holds moisture without becoming waterlogged.
🌱 Step 2: Dig the Right-Sized Hole
Dig a hole that's twice as wide as the root ball but only as deep as the container the sapling came in. Sugar maples hate having their roots buried too deep—this encourages root rot and weak growth. If the hole is too shallow, the tree will struggle to anchor itself in wind or storms.
Loosen the sides of the hole with a shovel or hands to remove any compacted soil. This helps roots spread outward more easily. I always rake the bottom of the hole gently to create a slight slope—this prevents water from pooling right at the base. Leave the sapling in its container for now; we'll plant it once the hole is ready.
💧 Step 3: Plant and Water Deeply
Gently remove the sapling from its container and place it in the hole so the top of the root ball sits 1-2 inches above ground level. This ensures the tree won’t settle too low over time. Fill the hole with the native soil you removed, tamping it down lightly every 2 inches to remove air pockets. Don’t pack it too tightly—roots need room to breathe.
Water the sapling deeply right after planting—1-2 gallons of water should soak into the soil. You’ll know it’s enough when the water drains away and the soil around the edges feels moist. Mulch the area with 2-3 inches of wood chips or shredded bark, keeping the mulch 6 inches away from the trunk to prevent rot. This helps retain moisture and regulate soil temperature.
☀️ Step 4: Protect and Monitor Growth
Sugar maples are tough, but young saplings need extra care. Install a tree stake or spiral support if your yard gets strong winds, but avoid tying the tree too tightly—just loosely secure it so it sways slightly in the breeze. This helps the trunk strengthen naturally. Water the sapling once a week during the first growing season, giving it 1-2 gallons each time.
Watch for signs of stress: yellowing leaves usually mean overwatering or poor drainage, while crispy edges signal underwatering. If you notice pests like aphids or spider mites, spray the leaves with a soapy water solution (1 tsp mild dish soap per gallon of water). Sugar maples are generally pest-resistant, but young trees can be vulnerable. Prune any dead or crossing branches in late winter to encourage strong growth.
Tips & tricks for planting a sugar maple sapling
Here's what I've learned from years of planting these majestic trees—and how to avoid the mistakes I made early on.
Site Selection Wisdom: When choosing your 50-foot sunlit spot, consider future growth patterns. Sugar maples develop wide canopies, so avoid planting near sidewalks, driveways, or power lines. I once planted one too close to my garage, and now I'm constantly trimming branches that scrape the roof—trust me, you'll thank yourself for the extra space later. Also, test your soil pH before planting, because even the healthiest sapling will struggle in alkaline soil. That 2-3 inches of peat moss or compost makes all the difference in the long run.
The Hole That Makes All the Difference: That twice-as-wide hole in Step 2 isn't just about space—it's about creating room for roots to expand naturally. I learned this the hard way when my first sapling developed shallow roots because the hole wasn't wide enough. Use your hands to loosen the sides of the hole thoroughly, and that gentle slope at the bottom prevents water from pooling right at the roots. This small detail prevents years of potential rot and instability.
Planting Depth and Mulching Secrets: The 1-2 inch elevation of the root ball above ground level in Step 3 might seem counterintuitive, but it's crucial for preventing settling. Over time, soil naturally compacts, and you want that root ball to stay visible. For mulching, stick to the 2-3 inches recommendation but keep it 6 inches away from the trunk—this prevents moisture buildup that can cause rot. I've seen too many well-intentioned gardeners smother the base with thick mulch, which actually harms the tree.
Watering Strategy: Those initial 1-2 gallons of water after planting need to penetrate deeply. I recommend using a garden hose with a slow, steady stream rather than a quick pour. This ensures the water reaches all the roots, not just the surface. During the first growing season, that weekly watering schedule keeps the soil consistently moist but never soggy—sugar maples hate "wet feet." You'll know you're doing it right when water drains away and the surrounding soil feels moist but not saturated.
Pro Tips for Sugar Maple Tree Sapling
- Here's what I've learned from years of planting these majestic trees—and how to avoid the mistakes I made early on.
- Site Selection Wisdom: When choosing your 50-foot sunlit spot, consider future growth patterns. Sugar maples develop ...
- The Hole That Makes All the Difference: That twice-as-wide hole in Step 2 isn't just about space—it's about creating ...
Frequently asked questions
Got questions about nurturing your sugar maple sapling? You’re in the right place! Here are answers to the most common queries—from timing to troubleshooting—so you can raise a thriving future syrup tree with confidence.
How long does it take for a sugar maple sapling to produce sap?
A sugar maple sapling typically takes 10–15 years before it’s mature enough to tap for syrup. Patience is key—focus on healthy growth now, and you’ll reap rewards later! Pro tip: Ensure full sun and well-draining soil to speed up maturation.
Can sugar maple saplings survive harsh winters?
Yes! Sugar maples are cold-hardy (zones 3–8) and thrive in winter. Young saplings benefit from mulch (3–4 inches) to protect roots. Avoid heavy snow damage by gently brushing off branches if needed. Warning: Watch for sap-sucking insects in early spring.
What’s the best alternative if my sapling isn’t thriving?
If your sapling struggles, consider these fixes:
Soil issues? Test pH (ideal: 5.0–7.0) and amend with compost.
Pests? Neem oil or insecticidal soap can help.
Slow growth? Fertilize lightly in spring with a balanced 10-10-10 formula.
If all else fails, transplanting to a sunnier spot may save it!
When’s the best time to prune a young sugar maple sapling?
Prune late winter or early spring (before buds swell) to avoid disease. Remove dead/diseased branches first, then thin out crossing or weak growth to encourage strong structure. Pro tip: Sterilize pruners with rubbing alcohol to prevent infections.
Why are the leaves on my sapling turning yellow?
Yellow leaves usually signal overwatering, nutrient deficiency, or fungal issues. Check:
- Watering: Ensure soil is moist but not soggy.
- Nutrients: Test for iron/manganese deficiency (common in alkaline soil).
- Fungus: Look for black spots—treat with copper fungicide if needed.
Adjust care and monitor progress!
Wrapping up and next steps
Growing a sugar maple sapling is a rewarding journey that blends patience with the promise of sweet, golden rewards—whether you dream of tapping syrup or simply admire its majestic beauty. 🌳 With the right care, your young tree will thrive, becoming a resilient centerpiece for years to come.
Now’s the perfect time to plant that seedling or refine your pruning skills—your future syrup harvest (or backyard shade) starts with the first shovel in the soil!
Next step: Mark your calendar for early spring or fall, grab your tools, and give that sapling the love it deserves. Every cut and watering step brings you closer to a thriving tree—and maybe even a morning of pancakes drizzled with your own homemade syrup! 🥞✨