
Lawn
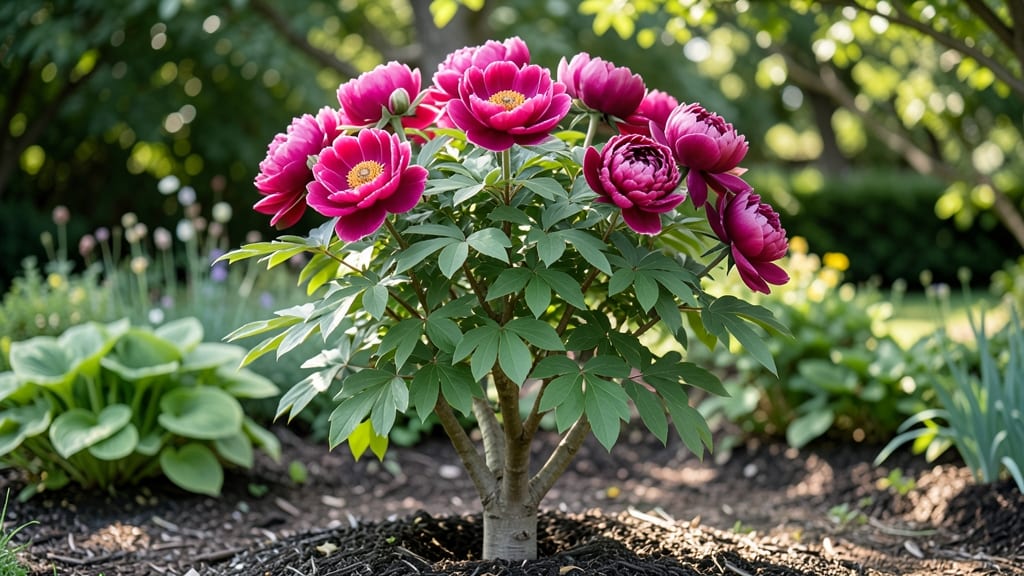
Harvesting tree peony seed pods in late fall unlocks the secret to growing these prized bloomers from scratch. 🌱 I’ve struggled with store-bought peonies that never rebloom—until I learned to cold-stratify seeds myself. The process mimics nature’s timing, breaking dormancy for reliable germination that nursery plants can’t match.
You’ll need mature pods (they turn brown and papery when ready), a sharp knife for opening, and patience for the 6-12 month stratification period. Most gardeners quit here, but the payoff—vibrant, repeat-blooming peonies—makes it worth the wait.
Start by collecting pods in October or November, then we’ll walk through the simple steps to prepare them for planting.
By spring, you’ll see tiny green leaves pushing through the soil, signaling success. These seedlings grow slower than transplants but develop stronger roots, leading to plants that outperform nursery-bought peonies in both size and bloom frequency.
The first flowers may take 3-5 years, but the journey starts with those first seed pods.
This method works best in zones 3-8, where winter cold naturally stratifies seeds. For warmer climates, simulate stratification with a refrigerator setup. Let’s get those seeds ready for a garden full of peony drama next season.
📚 In This Guide
- What you need
- Instructions
- Tips and common mistakes
- Wrapping up and next steps
What you need
- ● Tree peony seed pods: Freshly harvested (or store-bought) from Paeonia ostii or similar species. Aim for 5–10 pods for a small batch.
- ● Potting mix: A well-draining blend of 50% peat moss or coconut coir and 50% perlite or coarse sand (sterilized to prevent mold). Use a 10-inch pot or seed tray with drainage holes.
- ● Plastic storage bag or container: A quart-sized zip-top bag or a small, lidded container (like a Tupperware) for cold stratification.
- ○ Moisture control: A spray bottle with water (room temperature) and a humidity dome or plastic wrap (optional, for post-stratification).
- ● Refrigerator or cold frame: A standard fridge (35–40°F) for stratification or an outdoor cold frame (if temperatures naturally drop below 40°F).
- ● Grow lights or sunny windowsill: A full-spectrum LED grow light (or a south-facing window) for 12–14 hours of light daily after germination.
- ● Small hand trowel or spoon: For gently planting seeds without damaging them.
- ● Seed scarification tools: A sandpaper (fine-grit) or knife to lightly nick seed pods if stratification proves tricky.
- ● Fungicide: A mild solution (e.g., 1 tsp hydrogen peroxide per cup of water) to dip seeds in before planting (prevents rot).
- ● Growth hormone gel: Like rooting hormone to boost early sprouts (use sparingly!).
- ● Labeling tags: To track seed pod varieties and planting dates.
- ● Heat mat: A seedling heat mat (70–75°F) to speed up germination once seeds are out of cold storage.
Step-by-step guide to cold-stratifying tree peony seed pods
Here's how to break dormancy and coax those stubborn peony seeds into sprouting with precision timing.
🌱 Step 1: Harvest and Prepare Mature Seed Pods
Collect fully ripened seed pods in late fall when they turn brown and papery—never harvest green pods. The seeds inside must be fully mature to break dormancy. I like to leave pods on the plant until they split open naturally, then gather the seeds immediately to prevent scattering. Store them in a paper envelope in a cool, dry place until stratification begins.
Remove any remaining husk material from the seeds by gently rubbing them between your fingers. You'll see a hard, dark seed inside—this is the one you'll stratify. Discard any seeds that feel soft or shriveled, as they won't germinate. For best results, use seeds harvested within the past year, as viability declines over time.
❄️ Step 2: Perform Cold Stratification for 60-90 Days
Place the cleaned seeds in a sealed plastic bag with a small amount of slightly damp peat moss or perlite—just enough to keep the mix moist but not soggy. The moisture level should feel like a wrung-out sponge. Seal the bag and refrigerate it at 35-45°F for 60-90 days. This mimics winter conditions and breaks the seed's natural dormancy.
Check the bag every 2-3 weeks to ensure it hasn't dried out or developed mold. If condensation forms inside, open the bag slightly to let excess moisture escape. After 90 days, if no sprouts appear, you can extend stratification by another 30 days, but viability decreases with time. Real talk: Patience is key here—tree peony seeds are notoriously slow to respond.
☀️ Step 3: Sow Stratified Seeds in Light, Well-Draining Soil
Fill small pots with a mix of 50% sterile potting soil and 50% perlite to ensure excellent drainage—tree peony roots despise soggy conditions. Plant the stratified seeds ½ inch deep, spacing them 2 inches apart in the pot. Gently firm the soil around them to eliminate air pockets, but don't compact it too tightly.
Place the pots in a location with bright, indirect light (like a north-facing window) and maintain soil moisture by watering from the bottom. You'll know the moisture is right when the soil surface looks slightly damp but not glistening. Keep the pots in this setup until you see first true leaves, which typically takes 4-8 weeks after sowing.
🌿 Step 4: Acclimate Seedlings to Outdoor Conditions
Once seedlings develop 3-4 sets of true leaves, they're ready for their first taste of outdoor life. Start by placing them in a sheltered spot (like under a tree) for 2-3 hours daily, gradually increasing exposure over 2 weeks. This process, called hardening off, prepares them for full sun and prevents shock when you transplant them permanently.
Watch for leggy growth—a sign they're stretching for light. If this happens, move them closer to the light source or supplement with a grow light for 12-14 hours daily. After 2 weeks of outdoor acclimation, transplant the seedlings into individual 4-inch pots filled with the same well-draining soil mix. This gives their roots room to grow before they face the full outdoor environment.
⏰ Step 5: Plant Outdoors After Last Frost with Care
Wait until after your last frost date and choose a sunny spot with 6+ hours of direct sunlight daily. Tree peonies thrive in well-draining soil with a slightly alkaline pH. Dig holes twice as wide as the root ball but only as deep—planting too deep encourages rot. Gently remove the seedling from its pot and place it in the hole, ensuring the top of the root ball sits 1 inch below soil level.
Fill the hole with soil and water deeply to settle everything. Mulch around the base with 2-3 inches of organic mulch to retain moisture and regulate soil temperature. The first year, focus on root establishment—you won't see blooms for 3-5 years, but proper care now ensures reliable blooms later. Here's the thing—tree peonies are worth the wait, and your patience will pay off with stunning, fragrant blooms for decades.
Tips & tricks for perfect tree peony seed pod germination
These precision strategies will help you navigate the delicate balance of patience and care required for successful tree peony seed germination.
Harvest Timing: The key to viable seeds lies in perfect timing—harvest only when pods are fully brown and papery, typically in late fall. I've learned this the hard way: green pods contain immature seeds that won't break dormancy. For best results, wait until pods split open naturally, then gather seeds immediately to prevent scattering. Store them in a cool, dry place until you're ready to begin stratification. This patience in harvest pays off dramatically in germination rates.
Stratification Environment: Maintaining the 35-45°F temperature range during the 60-90 day stratification period is absolutely critical. I recommend using the crisper drawer of your refrigerator for consistent temperatures. The moisture level should mimic a wrung-out sponge—too dry and seeds won't break dormancy; too wet and you risk mold development. Place a small piece of paper towel in the bag with your seeds to help absorb any excess condensation that forms during storage. This subtle moisture control makes all the difference in successful germination.
Seedling Light Requirements: After sowing, place your pots in bright, indirect light immediately. I've found that north-facing windows provide ideal conditions for early growth. The critical factor here is avoiding direct sunlight, which can scorch delicate seedlings. If you notice leggy growth (stems stretching toward light), supplement with a grow light for 12-14 hours daily. This helps create sturdy seedlings that will better withstand transplanting. Remember, tree peonies need sunlight later in their development, but young seedlings are particularly sensitive to intense light.
Hardening Off Strategy: When your seedlings develop 3-4 sets of true leaves, begin the hardening off process gradually. Start with just 2-3 hours of sheltered outdoor exposure daily, then increase by 1-2 hours every few days. This slow acclimation prevents transplant shock that can kill young plants. I've seen seedlings that were perfectly healthy indoors suddenly wilt when exposed to full sun too quickly. The goal is to prepare them for outdoor conditions without overwhelming their systems—think of it as a gentle introduction to their new environment.
Pro Tips for Tree Peony Seed Pods
- These precision strategies will help you navigate the delicate balance of patience and care required for successful tree peony seed germination.
- Harvest Timing: The key to viable seeds lies in perfect timing—harvest only when pods are fully brown and papery, typically in late fall.
- Stratification Environment: Maintaining the 35-45°F temperature range during the 60-90 day stratification period is absolutely critical.
Frequently asked questions
Got questions about tree peony seed pods?
Here are answers to the most common ones—from germination timing to troubleshooting—so you can grow these stunning bloomers with confidence!
When should I collect tree peony seed pods for germination?
Collect pods when they turn tan or brown and begin splitting open—usually late summer to early fall (August–October). Avoid green or unripe pods, as they won’t germinate reliably. Store them in a cool, dry place until stratification (ideally within a few weeks).
How long does cold stratification take for tree peony seeds?
Tree peony seeds need 4–6 months of cold stratification (40–50°F) to break dormancy. Place pods in a sealed bag with moist peat moss or sand, then refrigerate. Pro tip: Label your bags with the collection date to track progress!
Can I skip stratification and still grow tree peony seeds?
While possible, skipping stratification drastically reduces germination rates (often <5%). If you’re impatient, try soaking seeds in warm water for 24 hours before planting, but cold treatment remains the gold standard for reliable blooms. Patience pays off!
Why aren’t my tree peony seeds germinating after stratification?
Common culprits include:
- Improper moisture: Seeds need consistent dampness (not soggy) during stratification.
- Old seeds: Viability drops after 1–2 years; collect fresh pods annually.
- Poor planting depth: Sow seeds ½ inch deep in well-draining soil.
- Temperature swings: Keep stratification steady (avoid freezer fluctuations).
How long does it take for tree peony seedlings to bloom?
Expect a long wait—tree peonies grown from seed typically bloom in 4–6 years (or longer). Young plants focus on root growth first! For faster blooms, consider grafting or purchasing established nursery stock.
Are tree peony seed pods toxic or harmful?
No—tree peony pods and seeds are non-toxic to humans and pets (unlike some other peony varieties). However, always supervise children/pets when handling plants, as ingesting large quantities of any plant material can cause mild stomach upset.
Wrapping up and next steps
Growing tree peony seed pods with cold stratification is a rewarding way to cultivate these stunning bloomers—but patience and care are key! 🌱 By following the right steps, you’ll unlock vibrant, long-lasting flowers that thrive in your garden.
Whether you’re a seasoned gardener or just starting out, every seedling you nurture is a step toward a more beautiful outdoor space.
Ready to take the next step? Start small—try a few pods this season and watch your garden transform! For even better results, join local gardening groups or consult expert forums to share tips and troubleshoot together. Happy growing!