
Pruning
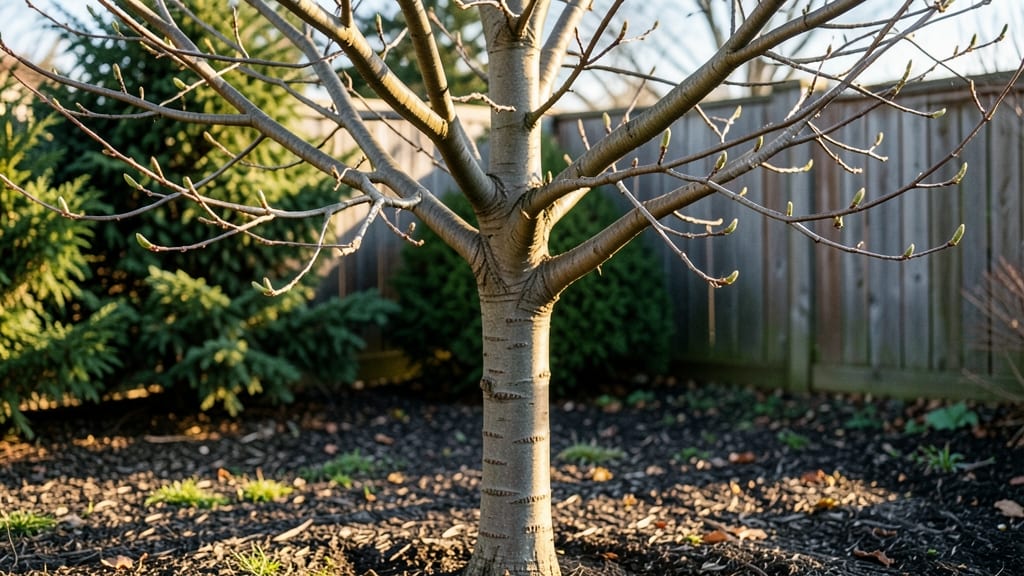
Your Bradford pear tree trunk holds the secret to stronger branches—and it starts with the right shape. ✂️ I’ve watched weak trunks turn into sturdy supports just by adjusting growth habits, and the difference shows in how the tree resists storms and disease.
The key? Year-round attention to structure, not just seasonal pruning.
Fire blight and canker love weak trunks, so we focus on open centers and balanced weight. Start by removing crossing branches—those are the first to split under snow or heavy fruit.
Clean cuts (not jagged tears) heal faster, and sealing wounds with pruning paint isn’t just optional; it’s a game-changer for long-term health.
You’ll notice thicker bark and fewer weak limbs within a season. The tree won’t just look better—it’ll stand taller through wind and rain. Even better, this method works for young trees and mature ones, so you’re not playing catch-up later.
Fair warning: If you see oozing cankers or blackened branches, that’s a sign to call an arborist. But for everyday shaping? This is the foolproof way to keep your Bradford pear standing strong for decades.
📚 In This Guide
- What you need
- Instructions
- Tips and common mistakes
- Wrapping up and next steps
What you need
- ● Pruning shears: Bypass pruners (for cuts up to ½ inch thick) – 1 pair (sharp, high-quality blades like Fiskars or Felco)
- ● Loppers: For branches ½ to 1½ inches thick – 1 pair (extendable handles for reach)
- ● Pruning saw: For thicker branches (1½+ inches) – 1 saw (bow or curved blade for clean cuts)
- ● Gloves: Heavy-duty gardening gloves (cut-resistant, like Mechanix) – 1 pair
- ● Ladder: Sturdy aluminum or fiberglass ladder (16–24 ft, depending on tree height) – 1 (with stabilizers)
- ● Disinfectant: 70% isopropyl alcohol or bleach solution (1 part bleach to 9 parts water) – small bottle (for tool sterilization)
- ○ Pruning sealant: Optional but recommended (e.g., Tanglefoot Tree Wound Pruning Seal) – small tube (for large cuts)
- ● Safety gear: Safety glasses, long sleeves, and closed-toe shoes – standard
- ● Weather check: Prune on a dry, cloudy day (avoid wind or rain). Ideal temps: 50–70°F.
- ● Tree knowledge: Familiarize yourself with Bradford pear’s growth habits (e.g., avoid over-pruning—never remove >25% of foliage at once).
- ○ Cleanup supplies: Heavy-duty trash bags (for debris) and a wheelbarrow (optional but handy).
- ○ Optional: Extension pole pruners (for high branches without a ladder).
- ● Tree paint (for sealing cuts on young trees, though modern research suggests it’s often unnecessary).
- ● Camera or sketchbook (to track branch shapes before/after pruning).
Instructions for year-round Bradford pear tree trunk care
Here’s how to sculpt a Bradford pear’s trunk and branches for structural integrity—no pruning experience required.
🌿 Step 1: Assess the Trunk and Major Branches in Early Spring
Start when the tree is just budding but before new leaves unfurl—this is when you can see structural issues clearly. Look for water sprouts (fast-growing vertical shoots) or branches growing at sharp angles (greater than 45 degrees). Run your hand along the trunk to feel for swells or cracks, which indicate weak wood or disease entry points.
I always sketch the tree’s shape first—hold a pencil vertically next to the trunk and mark where branches attach. This helps visualize the final structure before making cuts. Bradford pears are prone to weak crotches, so prioritize removing branches that grow directly upward or downward from the trunk.
✂️ Step 2: Prune for Structural Balance During Late Winter
Use clean, sharp bypass pruners to make cuts just outside the branch collar—the swollen area where the branch meets the trunk. For branches thicker than 1 inch, use a pruning saw to avoid tearing the bark. Start with the smallest branches first to reduce stress on the tree.
Remove any crossing branches (where two limbs grow toward each other) and those rubbing against each other. These create wounds that invite disease. For every cut, step back and check the tree’s balance—aim for a rounded, vase-like shape with branches spaced evenly. Bradford pears respond well to open centers, so avoid overcrowding at the top.
☀️ Step 3: Monitor Trunk Development Through Summer Growth
After pruning, watch for new shoots emerging from the trunk or major branches—these are called suckers and should be removed immediately. Use your fingers to pinch them off when they’re still small, or cut them at the base with pruners. Suckers drain energy from the tree and weaken the trunk.
In midsummer, inspect the trunk for epicormic buds—small buds that sprout along the trunk itself. These indicate stress or poor light penetration. If you see them, it’s a sign to thin the canopy further. A Bradford pear’s trunk should be smooth and free of excessive growth below the main scaffold branches.
🪴 Step 4: Winterize the Trunk for Long-Term Strength
Before the first hard frost, apply a 2-inch layer of mulch around the base of the tree but keep it 6 inches away from the trunk to prevent rot. Use shredded bark or wood chips, not rocks or dense materials. This protects the trunk from temperature fluctuations and physical damage from lawn equipment.
If the trunk shows signs of peeling bark or cankers (sunken, dead areas), clean them with a 10% bleach solution (1 part bleach to 9 parts water) and apply pruning sealant to larger wounds. Bradford pears are susceptible to silver leaf disease, so inspect the undersides of leaves for silvery sheen—remove and destroy infected foliage immediately.
Tips & tricks for perfect Bradford pear trunk shaping
Transforming a Bradford pear's trunk into a sturdy, balanced structure takes patience and precision—but these insights will help you avoid common pitfalls and achieve professional results.
Visual Assessment First: In Step 1, when sketching your tree's shape, use a small mirror to inspect hard-to-see areas like the undersides of branches. Bradford pears often hide water sprouts or weak crotches in these spots. I've found that marking potential cuts with colored chalk (red for remove, green for keep) prevents accidental pruning of good branches during the actual cutting process.
Pruning Technique Nuance: For Step 2's branch collar cuts, angle your pruners slightly downward (about 45 degrees) when cutting branches thicker than 1 inch. This creates a natural water runoff path, reducing the risk of rot. Confession: I skipped this detail for years and wondered why some cuts healed poorly—this small adjustment makes all the difference. Always sterilize your tools with rubbing alcohol between cuts to prevent disease transmission.
Sucker Prevention Strategy: The summer monitoring in Step 3 is where most people drop the ball. I've learned that applying a 2-inch wide band of copper tape around the trunk (just above where suckers appear) creates an electrical barrier that deters new growth. This chemical-free method works particularly well for Bradford pears, which are prone to aggressive sucker production. Check the tape monthly and reapply if it loosens.
Mulch Application Wisdom: When winterizing in Step 4, avoid piling mulch against the trunk—this creates moisture traps that lead to rot. Instead, create a volcano shape with the mulch, highest at the center and sloping down toward the tree's drip line. For extra protection in harsh winters, wrap the lower trunk with tree wrap (available at garden centers) to prevent sunscald damage.
Pro Tips for Bradford Pear Tree Trunk
- Transforming a Bradford pear's trunk into a sturdy, balanced structure takes patience and precision—but these insight...
- Visual Assessment First: In Step 1, when sketching your tree's shape, use a small mirror to inspect hard-to-see areas...
- Pruning Technique Nuance: For Step 2's branch collar cuts, angle your pruners slightly downward (about 45 degrees) wh...
Frequently asked questions
Got questions about your Bradford pear tree trunk and how to keep those branches strong year-round?
You’re not alone! Here are some of the most common queries—plus expert answers to keep your tree thriving.
How do I know if my Bradford pear tree trunk is healthy?
A healthy Bradford pear trunk should be firm, upright, and free of deep cracks, oozing sap, or large wounds. Look for smooth bark (though some rough texture is normal) and check for signs of pests like beetle holes or fungal growth. If you notice large, sunken areas or peeling bark, it may signal disease or structural weakness—time to inspect further!
When is the best time to prune the trunk and branches for long-term strength?
Prune Bradford pears during late winter or early spring (before buds swell) to avoid stressing the tree. This timing promotes faster healing and reduces disease risk. Avoid heavy pruning in fall—it can stimulate weak growth before winter. For minor adjustments (like removing water sprouts), summer is fine, but never prune when the tree is under drought stress.
Why does my Bradford pear trunk split or crack after pruning?
Cracks often happen due to improper cuts (leaving stubs or jagged edges) or over-pruning (removing too much wood at once). Bradford pears are also prone to weak branch unions—always make cuts just outside the branch collar (the swollen area where the branch meets the trunk). If cracks appear, seal them with pruning sealant (for wounds >1 inch wide) to prevent decay.
Are there alternatives to Bradford pears with stronger trunks?
If your Bradford’s trunk struggles with weakness or disease, consider Callery pear hybrids (like ‘Aristocrat’ or ‘Cleveland Select’), which have better structural integrity and fewer thorns. Other options: ornamental pear varieties (e.g., ‘Chanticleer’) or native trees like serviceberry or hackberry, which require less aggressive pruning and have naturally sturdier trunks.
How can I support a weak or leaning Bradford pear trunk?
For young trees with leaning trunks, install a tree stake or brace at a 45° angle to guide growth upright. Use soft ties (not wire) to avoid girdling. For mature trees with structural weaknesses, consult an arborist—you may need cabling or bracing to redistribute weight. Never use nails or harsh materials that can damage the bark.
Wrapping up and next steps
Caring for your Bradford pear tree trunk and branches year-round isn’t just about aesthetics—it’s about ensuring a strong, healthy, and long-lived tree. By mastering pruning techniques, understanding seasonal adjustments, and addressing common issues like water sprouts or weak crotches, you’ll set your tree up for success.
Remember, consistency is key, and a little effort now saves big headaches (and potential costs) later! 🌳✨
Ready to take action? Grab your pruners and schedule a maintenance session this weekend—your Bradford pear will thank you for years to come! For extra guidance, bookmark this guide or share it with fellow gardening enthusiasts. Happy pruning! 🌟