
Blooming
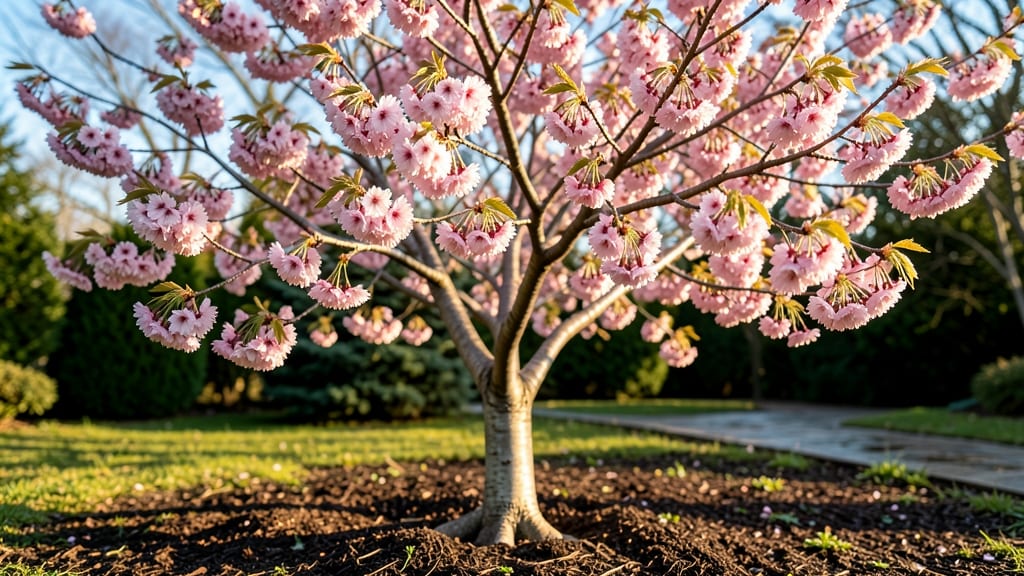
A cherry blossom tree in your front yard isn’t just a plant—it’s a seasonal masterpiece that turns heads before the first bloom even appears. 🌸 I planted mine last spring, and the way it frames the porch with pink clouds every April still makes me grin.
The key isn’t just picking any tree; it’s choosing the right spot, pairing it with plants that make its colors pop, and planning for its growth over decades.
Start with sunlight—cherry blossoms crave full sun (6+ hours daily)—and soil that drains well. My tree thrives in the same spot where my old maple struggled, thanks to amending the soil with compost before planting.
Pair it with spring bulbs like daffodils or early bloomers such as azaleas to extend the show, and add gravel or stepping stones to highlight its trunk. The right placement turns your yard into a neighborhood landmark.
By summer, you’ll have a lush canopy that provides shade, and in fall, the fiery red leaves add drama. Maintenance is simple: prune in late winter, water deeply during droughts, and watch for pests like aphids (a strong spray of water usually wins).
The payoff? A front yard that feels like a curated garden, not just a yard.
This works for any home style—modern, cottage, or traditional—because the tree’s beauty is timeless. Whether you’re starting fresh or refreshing an existing landscape, a cherry blossom tree is the centerpiece that keeps giving year after year.
📚 In This Guide
- What you need
- Instructions
- Tips and common mistakes
- Wrapping up and next steps
What you need
- ● Cherry Blossom Tree (Prunus serrulata): 1 mature tree (3–6 ft tall) or 3–5 young saplings (1–2 ft tall) for a clustered look.
- ● High-quality potting soil: 2–3 bags (sterile, well-draining mix with compost).
- ● Organic mulch: 1–2 cubic yards (shredded bark or wood chips).
- ● Slow-release fertilizer: 1 bag (balanced 10-10-10 or rose/citrus blend).
- ○ Tree supports (optional but helpful): 2–3 stakes + 1–2 tree ties (for young trees).
- ● Watering system: Hose with adjustable nozzle or drip irrigation kit.
- ● Digging tools: Shovel, trowel, and garden fork.
- ● Pruning shears: Sharp, sterilized pair for shaping.
- ● Measuring tape: 1 (for spacing plants).
- ● Wheelbarrow: 1 (for hauling soil/mulch).
- ● Gloves & knee pads: Comfortable, durable pair.
- ● Sunlight: Full sun (6+ hours daily) for optimal blooms.
- ● Space: 20–30 ft diameter for mature trees (check local spacing laws!).
- ● Soil test: pH 6.0–7.0 (amend with lime if acidic).
- ● Permits: Verify if your city requires tree-planting approvals.
- ● Season timing: Plant in early spring or fall (avoid extreme heat/cold).
- ● 🌡️ Choose disease-resistant varieties: Look for cultivars like ‘Kwanzan’ or ‘Somei-Yoshino’ for low-maintenance blooms.
- ● ✨ Layer mulch: 3–4 inches deep to retain moisture and deter weeds.
- ● 🎯 Stake young trees: Secure supports at a 45° angle to avoid trunk damage.
How to plant and care for a cherry blossom tree in your front yard
Here's how to create that dreamy springtime scene with a healthy, flowering cherry tree.
🌱 Step 1: Choose the Right Location and Planting Time
Cherry blossom trees thrive in full sun—at least 6 hours of direct sunlight daily. I always pick a spot where the tree will get morning sun and afternoon shade, especially in hotter climates. The best time to plant is in early spring or fall, when temperatures are mild and the tree can establish roots before extreme weather.
Dig a hole twice as wide as the root ball but only as deep—planting too deep suffocates the roots. Loosen the sides of the hole with your shovel so roots can spread naturally. If your soil is heavy clay, mix in a few inches of compost to improve drainage. Here's the thing—never amend the entire hole with compost, just the sides where roots will grow.
🪴 Step 2: Plant the Tree Properly for Long-Term Health
Place the tree in the hole so the top of the root ball sits 1-2 inches above ground level. This prevents water from pooling around the trunk and causing rot. Spread the roots gently outward, making sure none are curled or folded—straight roots grow better. Fill the hole with native soil, tamping down lightly every few inches to eliminate air pockets.
Water deeply right after planting to settle the soil and remove any air gaps. You'll know it's right when water drains freely from the bottom of the hole. Mulch around the base with 2-3 inches of organic mulch, keeping it 6 inches away from the trunk to prevent moisture buildup. This mulch ring protects roots from temperature swings and keeps weeds at bay.
☀️ Step 3: Provide Consistent Watering and Pruning
Water your new cherry blossom tree deeply 2-3 times per week for the first year, aiming for 1-1.5 gallons per watering. You'll see the soil dry out faster in summer—this is normal. After the first year, water only when the top 6 inches of soil feel dry. Overwatering is the #1 killer of young trees, so always check before watering.
Prune in late winter or early spring before buds swell. Remove any dead, crossing, or weak branches first. Then, thin the canopy by cutting back 25% of the smallest branches25% of the canopy in one season—this stresses the tree.
⏰ Step 4: Fertilize and Protect for Seasonal Success
Apply a balanced, slow-release fertilizer in early spring when new growth begins. I use a 10-10-10 formula spread evenly around the drip line (the edge of the canopy). Water the area thoroughly after applying. In late summer, add a low-nitrogen fertilizer to help the tree prepare for winter. Avoid fertilizing in fall—it encourages tender new growth that won't survive frost.
Watch for Japanese beetles and aphids during bloom season. I spray with neem oil at the first sign of damage—it's organic, safe, and effective. For winter protection, wrap the trunk with tree guard in late falllight burlap wrap
The real magic happens in late winter to early spring when buds swell and pink blossoms appear. Prune immediately after flowering to shape the tree while it's still dormant. In summer, the lush green canopy provides shade, and in fall
Here's the thing about cherry blossom trees—they're long-term investments that pay off in beauty. With proper care, yours will grow into a stunning focal point that transforms your front yard from ordinary to extraordinary. Real talk: the first few years are about patience, but once established, these trees require minimal maintenance while delivering maximum impact.🌿 Step 5: Enjoy the Transformation Year-Round
Tips & tricks for perfect cherry blossom tree planting
These simple yet game-changing tips will help your cherry blossom tree thrive from the very first planting.
Location is Everything: While the instructions mention full sun, here's what nobody tells you—avoid planting too close to sidewalks or driveways. Roots can crack concrete over time, and you don't want to deal with that mess later. I always measure at least 8 feet from any hard surfaces. Also, check your yard's microclimate: morning sun with afternoon shade works best in most regions, but hotter climates may need afternoon shade protection.
Root Ball Preparation: Before planting, soak the root ball in water for 1-2 hours if it feels dry. This prevents transplant shock. I also gently tease the roots at the bottom of the root ball with my fingers—just enough to encourage them to spread outward. This small step makes a huge difference in how quickly your tree establishes itself. Don't skip this, especially if you're planting in dry conditions.
Watering Wisdom: The instructions mention watering deeply 2-3 times per week, but here's the secret: water in the morning. This gives the roots time to absorb moisture before evening evaporation. I use a garden hose with a gentle spray nozzle to avoid compacting the soil around the roots. After watering, I always check for puddles—if water pools, your tree is planted too deep. The top of the root ball should always be slightly above ground level.
Seasonal Care Calendar: Create a simple checklist for each season to keep track of your cherry blossom tree's needs. In spring, focus on watering and early pruning. In summerfallwinter
Pro Tips for Cherry Blossom Tree Front Yard
- These simple yet game-changing tips will help your cherry blossom tree thrive from the very first planting.
- Location is Everything: While the instructions mention full sun, here's what nobody tells you—avoid planting too close to sidewalks or driveways.
- Root Ball Preparation: Before planting, soak the root ball in water for 1-2 hours if it feels dry.
Frequently asked questions
Got questions about adding a cherry blossom tree to your front yard? Here are some of the most common ones—and their answers! Whether you're worried about timing, maintenance, or space, we’ve got you covered.
How long does a cherry blossom tree take to bloom after planting?
A young cherry blossom tree typically takes 3 to 5 years to produce its first flowers, depending on the variety and growing conditions. Patience is key—focus on establishing a strong root system first! For faster blooms, choose grafted trees (like Prunus serrulata), as they may flower sooner than seed-grown ones.
Can cherry blossom trees survive in cold climates?
Most cherry blossom varieties thrive in USDA Zones 5–8, making them great for northern regions. Look for cold-hardy types like the Kwanzan or Autumnalis (which blooms later and resists late frosts). Just ensure your tree gets full sun and well-draining soil to handle winter chill.
How much space does a cherry blossom tree need in a front yard?
Mature cherry blossom trees can grow 20–30 feet tall and wide, so plant them at least 15–20 feet away from structures, sidewalks, or other trees. If space is tight, consider dwarf varieties (like Okame) or container-growing options for patios. Always check the specific variety’s growth habit!
Do cherry blossom trees require pruning, and when?
Pruning is minimal but helps maintain shape and health. The best time is late winter or early spring (before buds swell). Remove dead, crossing, or weak branches, and thin out dense growth to improve airflow. Avoid heavy pruning in fall—it can stimulate late growth vulnerable to frost. Pro tip: Use sterilized tools to prevent disease!
Are cherry blossom trees messy? Do they drop petals or fruit?
Yes, but it’s part of the charm! Petals create a stunning (if temporary) carpet, but they require cleanup afterward. As for fruit, most ornamental cherry blossoms produce small, inedible drupes that birds love—but they’re not a nuisance. Choose self-sterile varieties (like Yoshino) to avoid excessive fruit if that’s a concern.
What’s the best alternative if I don’t want a full-sized tree?
Consider dwarf cherry blossom varieties (e.g., Shirotae Nigra) or ornamental cherries like Prunus ‘Accolade’, which stay compact (10–15 ft tall). For instant color, try cherry blossom bushes (like Prunus ‘Spire’) or ornamental plums, which offer similar blooms with less maintenance.
Wrapping up and next steps
Transforming your front yard with a cherry blossom tree isn’t just about adding beauty—it’s about creating a seasonal masterpiece that brings joy, elegance, and a touch of nature’s magic to your home. 🌸 Whether you’re drawn to the delicate pink blooms, the lush green canopy, or the promise of autumn’s fiery hues, this tree is a timeless investment in curb appeal and tranquility.
Ready to take the next step? Start by researching Prunus serrulata varieties that thrive in your climate, then sketch a planting plan that complements your yard’s layout.
With the right care, your cherry blossom will become the heart of your outdoor space—a living work of art that blooms year after year.