
Blooming
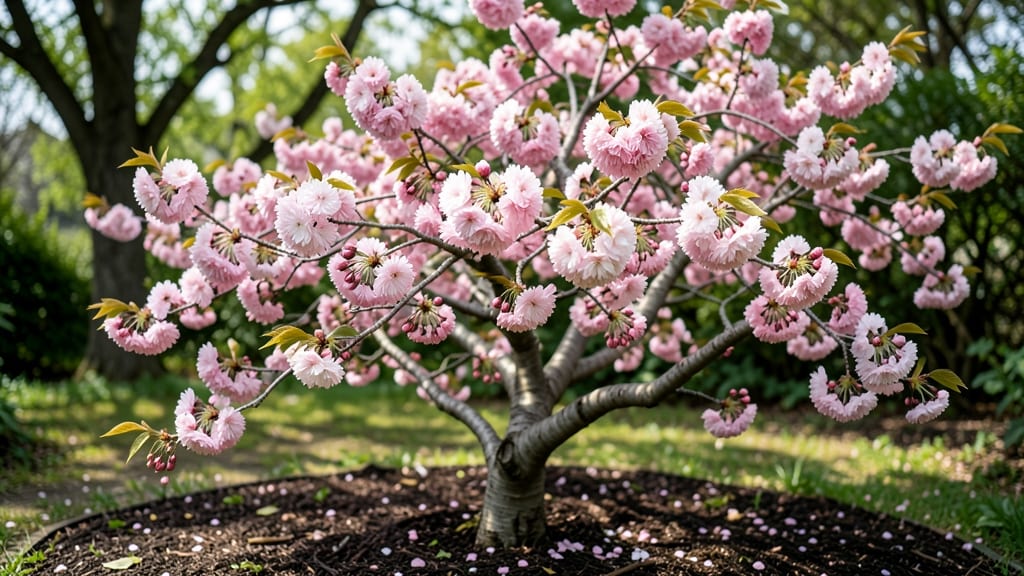
Spring’s pink canopy arrives when you nurture your cherry blossom tree just right. 🌸 I’ve watched mine transform from bare branches to a cloud of blossoms over just six weeks—here’s how to make it happen in your yard too, without the guesswork.
The secret isn’t complicated: timing your pruning for late winter, feeding with the right nutrients, and protecting those delicate buds from late frosts. Most people overlook the soil prep, but amending with compost in early spring gives roots the boost they need for explosive blooming.
I’ve seen trees with double the blossoms just from this one step. By late April, your tree will burst into color, with petals drifting like snow. The fragrance alone makes it worth the effort—imagine that scent filling your garden every spring morning.
Even better, the timing of blooms means you’ll avoid common pests that target stressed trees. Works for both ornamental varieties and edible cherries. Let’s get those branches ready for their springtime show!
📚 In This Guide
- What you need
- Instructions
- Tips and common mistakes
- Wrapping up and next steps
What you need
- ● Cherry Blossom Tree: 1 Prunus serrulata (Japanese cherry blossom) or Prunus avium (ornamental cherry) sapling (3–6 feet tall, bare-root or potted).
- ○ Optional: Grafted variety (e.g., 'Kanzan,' 'Somei-Yoshino,' or 'Autumnalis' for extended blooms).
- ● Planting Site: Full sun (6+ hours/day) or partial shade (4–6 hours for cooler climates).
- ● Well-draining soil (amend with compost if clay-heavy).
- ● Space: 20–30 feet wide and 20–25 feet tall (account for mature size!).
- ● Soil Prep: 5–10 gallons of organic compost or aged manure.
- ● 1–2 cups of slow-release fertilizer (10-10-10 NPK ratio).
- ○ Optional: 1 lb of mycorrhizal fungi to boost root health.
- ● Planting Supplies: 1 shovel (rounded or flat-edged).
- ● 1 garden trowel (for delicate root handling).
- ● 1 wheelbarrow (for mixing soil/amendments).
- ● 1 watering can (3+ gallons) or hose with soaker hose.
- ● Mulch: 2–3 inches of wood chips or straw (keep 6 inches from trunk).
- ● Hardiness Zones: 5–8 (check your zone here!). Cold-hardy varieties (e.g., 'Stella Compact') suit zones 3–7.
- ● Best Planting Time: Late fall (dormant season) or early spring (before buds swell).
- ● Pro Tip: Avoid planting in extreme heat (roots dry out quickly!). 💡
- ● Watering Tools: 1 rain gauge (to monitor 1–2 inches/week).
- ○ Optional: Drip irrigation system for deep, consistent watering.
- ● 1 tree stake (if planting in windy areas).
- ● 1 pruning shears (sterilized, for shaping).
- ● Tree guard (to protect from rodents/deer).
- ● Seasonal fertilizer: 1 lb of bloom booster (high in phosphorus) in early spring.
- ● Decorative elements: Solar lights, benches, or a picnic blanket for blossom-viewing! 🧺
Step-by-Step guide to planting a cherry blossom tree in spring
Spring’s the best time to plant these showstopping trees—here’s how to give yours the perfect start.
🌱 Step 1: Choose the Right Spot and Prepare the Soil
Cherry blossoms thrive in full sun—pick a location with at least 6-8 hours of direct light daily. Avoid low spots where cold air pools, as blossoms can suffer frost damage. I always test the soil first: dig a 12-inch hole and check drainage. If water pools after 30 minutes, amend with 2-3 inches of compost to improve aeration.
These trees love slightly acidic to neutral soil (pH 6.0-7.5). A simple soil test kit from your local garden center will tell you if you need to adjust. If your soil’s too alkaline, mix in sulfur or peat moss before planting. The hole should be twice as wide as the root ball but only as deep—cherry blossoms hate having their roots buried too deep, which can cause rot.
🪴 Step 2: Plant at the Correct Depth and Stake for Support
Gently remove the tree from its container and loosen any circling roots with your fingers—this encourages outward growth. Place it in the hole so the top of the root ball sits 1-2 inches above ground level. Backfill with native soil, tamping lightly every 2 inches to remove air pockets. A common mistake? Planting too deep, which can suffocate the tree.
Stake the tree only if needed—young, top-heavy blossoms may lean in windy areas. Use two stakes placed 12-18 inches apart, tying the trunk with a soft fabric strip (never wire, which can girdle the bark). Water deeply right after planting to settle the soil and remove any air gaps.
☀️ Step 3: Water Deeply and Mulch to Retain Moisture
Water the tree immediately after planting, giving it 1-2 gallons per inch of trunk diameter. For a standard 3-inch caliper tree, that’s about 6-8 gallons total. Let the soil soak in completely—you’ll see water drain from the bottom of the hole. Over the next 2-3 weeks, water 2-3 times per week until new growth appears, then taper to once a week once established.
Spread 2-3 inches of mulch (wood chips or bark) over the root zone, keeping it 6 inches away from the trunk to prevent rot. Mulch locks in moisture and regulates soil temperature—critical for young trees in spring’s fluctuating weather. Avoid piling mulch against the trunk; this creates a moist environment that attracts pests.
✂️ Step 4: Prune for Shape and Remove Damaged Branches
Spring is the perfect time to shape your tree while it’s dormant. Remove any dead, crossing, or weak branches using clean, sharp pruners. Cut just outside the branch collar (the swollen area where the branch meets the trunk) to promote fast healing. Never leave stubs—this invites disease. I also thin out crowded branches to improve airflow, which reduces the risk of fungal issues.
If your tree has suckers (shoots growing from the base or trunk), remove them immediately. These divert energy from the main canopy. For flowering trees, avoid heavy pruning—focus on light shaping. You’ll see new buds forming by late spring, signaling the tree’s energy is shifting from root growth to blossom production.
🌿 Step 5: Monitor for Pests and Fertilize for Strong Growth
Check the tree weekly for signs of pests like aphids or Japanese beetles—common early spring visitors. A strong spray of water usually dislodges them, but for severe infestations, use neem oil or insecticidal soap. Avoid chemical sprays during bloom, as they can harm pollinators. Healthy trees are less vulnerable, so prioritize watering and mulching over quick fixes.
Apply a balanced fertilizer (10-10-10) in early spring, following package rates. Cherry blossoms are light feeders, so over-fertilizing leads to leafy growth at the expense of flowers. Spread granules evenly over the root zone and water deeply to activate them. You’ll notice stronger stems and more vibrant foliage by midsummer—a sign your tree’s thriving.
Tips & tricks for perfect cherry blossom planting in spring
Here's what nobody tells you about planting these delicate beauties—tricks that'll make all the difference between a thriving tree and one that struggles.
Sunlight Secret: While 6-8 hours of sun is ideal, early spring light can be deceptive. If your location gets afternoon shade, position the tree where it catches morning sun—this is when blossoms need the most energy. I've seen trees in partial shade still bloom beautifully if they get those crucial morning rays.
Root Ball Rescue: When loosening circling roots in Step 2, don't just pull at them—gently tease them apart with your fingers. If they're tightly bound, soak the root ball in water for 10-15 minutes first to help them relax. I learned this the hard way after seeing roots break during planting, which stresses the tree for weeks.
Watering Wisdom: That 30-minute drainage test in Step 1 is crucial. If water pools after less time, you need more compost or even a raised bed. For the first 2-3 weeks, water in the morning so the soil has all day to absorb moisture before evening evaporation. I always check soil moisture by sticking my finger 2 inches down—if it's dry, it's time to water again.
Pruning Pro Tip: When you see those new buds forming in late spring (Step 4), resist the urge to trim them off! These are your tree's promise of next year's blossoms. Only remove buds if they're on branches you're pruning for shape—never sacrifice future flowers for current aesthetics. Healthy buds mean more spectacular blooms next spring.
Pro Tips for Cherry Blossom Tree In Spring
- Here's what nobody tells you about planting these delicate beauties—tricks that'll make all the difference between a thriving tree and one that struggles.
- Sunlight Secret: While 6-8 hours of sun is ideal, early spring light can be deceptive.
- Root Ball Rescue: When loosening circling roots in Step 2, don't just pull at them—gently tease them apart with your fingers.
Frequently asked questions
When is the best time to plant a cherry blossom tree?
Plant your cherry blossom tree in early spring or fall when temperatures are mild. This gives roots time to establish before extreme heat or cold. Avoid planting in summer—drought stress can weaken young trees. If you’re in a colder zone, wait until after the last frost for spring planting.
How long does it take for a cherry blossom tree to bloom?
Most cherry blossom trees (like Prunus serrulata) take 3–5 years to produce flowers after planting. Patience pays off! Younger trees focus on root and branch growth first. For faster blooms, choose grafted nursery trees—they may flower sooner than seed-grown varieties.
Can cherry blossom trees grow in containers?
Yes, but with limits! Dwarf varieties (like Prunus ‘Kanzan’) thrive in large containers (15+ gallons). Use well-draining soil and repot every 2–3 years. Note: Container trees may bloom slightly later than in-ground plants. Place them in full sun and water consistently—drought stress delays flowering.
Are cherry blossom trees messy? Do they drop petals or fruit?
Yes, but it’s part of the charm! Petals fall heavily for 1–2 weeks during peak bloom, creating a "snowstorm" effect. Some varieties (like Prunus ‘Somei-Yoshino’) produce tiny, inedible fruits that aren’t messy. Cleanup tip: Mulch beneath the tree to reduce petal buildup and deter pests.
Why aren’t my cherry blossoms opening this spring?
Common culprits include late frost (damages buds), poor pollination (bees help!), or nutrient deficiencies. Check for bud swell—if buds are brown or mushy, frost likely struck. Fertilize lightly in early spring with balanced 10-10-10 formula. If no buds form, the tree may need more sunlight (6+ hours daily).
What’s a great alternative if I can’t grow a traditional cherry blossom?
Try these low-maintenance, bloom-packed alternatives:
- Japanese flowering cherry (Prunus ‘Shirotae’) – White blooms, disease-resistant.
- Ornamental cherry (Prunus ‘Autumnalis’) – Blooms earlier and later in the season.
- Magnolia (Magnolia stellata) – Fragrant pink/white flowers, shade-tolerant.
- Crabapple (Malus spp.) – Compact, colorful blooms + edible fruit.
All thrive in similar zones (5–8) and offer stunning spring color!
Wrapping up and next steps
Watching a cherry blossom tree burst into life in spring is nothing short of magical—its delicate pink blooms transform any garden into a serene, dreamy escape.
Whether you're planting one for the first time or simply admiring their beauty, these trees bring joy, color, and a touch of nature’s artistry to your outdoor space. 🌸
Now that you’re inspired (and armed with tips!), why not take the next step? Visit a local nursery to pick out your own cherry blossom tree, or plan a springtime walk to soak in their splendor. Your garden—and future memories—will thank you!