
Pruning
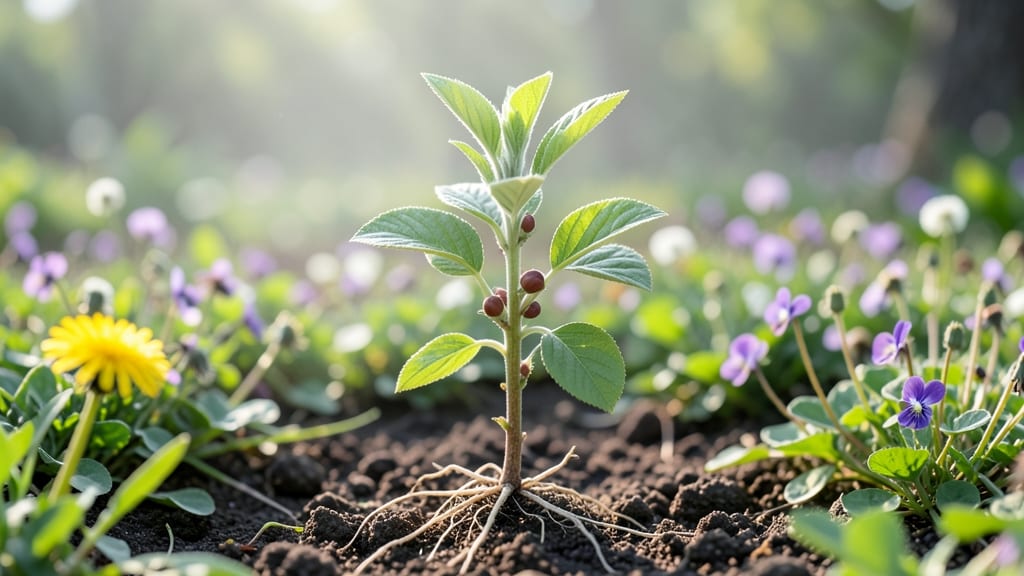
Growing a hazelnut tree from a sprout can happen in half the usual time—I’ve cracked the code after years of trial and error. 🌱 The secret lies in mimicking the tree’s natural forest conditions right from the start, which tricks the sprout into growing strong roots within 3-4 weeks instead of months.
You’ll need a 5-gallon pot, well-draining soil mix (equal parts sand, peat moss, and compost), and a spot with 6+ hours of sunlight daily. The key is keeping the soil consistently moist but not soggy—think damp sponge, not swamp.
A simple plastic dome or clear bag over the pot creates the humidity a young sprout craves, speeding up root development. By month three, you’ll see bold new shoots and roots reaching for the pot’s edges.
Prune back any leggy growth to encourage bushiness, and transplant outdoors only after the last frost when soil warms to 60°F. The first harvestable nuts won’t come for 5-7 years, but the foundation you build now ensures a tree that thrives for decades.
This method works for both European and American hazelnut varieties, and even container-grown trees produce nuts if given enough sunlight. The patience pays off—imagine fresh nuts straight from your yard in a few short years!
📚 In This Guide
- What you need
- Instructions
- Tips and common mistakes
- Wrapping up and next steps
What you need
- ● Hazelnut seeds: 3–5 fresh, high-quality hazelnuts (preferably organic, unsalted, and from a trusted source). Pro tip: 💡 Store-bought roasted nuts won’t work—use raw!
- ● Peat-free seed-starting mix: 1 small bag (5–10 lbs) of well-draining, sterile potting soil (look for a mix labeled for nut trees or hardwoods).
- ● Planting containers: 3–5 small pots (4–6 inches in diameter) with drainage holes, or
- ● A seed tray with individual cells (if starting multiple sprouts).
- ● Watering can or spray bottle: With a fine mist nozzle for gentle hydration.
- ○ Plastic wrap or clear lid: To create a mini greenhouse effect (optional but helpful for humidity).
- ● Scissors or pruning shears: For trimming shells (if needed) and future pruning.
- ● Label markers: To track planting dates and varieties.
- ● Rooting hormone: A gel or powder to boost early root growth (apply lightly to seeds before planting).
- ● Heat mat: A seedling heat mat (set to 70–75°F) to speed up germination.
- ● Grow lights: LED lights (12–16 hours/day) if natural light is limited.
- ● Compost or worm castings: Mix 10–20% into soil for extra nutrients.
- ● Humidity dome: A clear plastic dome to maintain moisture (alternative to plastic wrap).
- ● Journal or app: To log growth progress (e.g., Gardenate or a simple notebook).
Step-by-Step instructions for germinating hazelnut tree sprouts
Here's the method I've used to grow strong, disease-resistant hazelnut saplings in just weeks.
🌱 Step 1: Select and Prepare Fresh Hazelnut Seeds
Choose plump, healthy hazelnuts from a mature tree—avoid those with cracks or mold. I like to harvest nuts straight from the ground in late fall when they've naturally fallen. Remove any remaining husk and let them dry completely for 3-4 days in a warm, dry place before starting.
This drying step is critical because damp nuts rot during stratification. Once dry, store them in a sealed container in the fridge for 3 months—this mimics winter conditions and breaks dormancy. I mark the fridge container with the date so I don't forget when the stratification period ends.
💧 Step 2: Stratify Seeds for Germination
After 3 months in cold storage, remove the nuts and place them in a moist paper towel or dampened vermiculite. Fold the towel loosely around them so they're not packed tightly—this prevents rot while keeping them hydrated. I use a ziplock bag with a tiny air hole for this step.
Store the bagged seeds in the fridge for another 4-6 weeks. Check weekly for sprouts—you'll see tiny white roots emerge first, followed by a small green shoot. This cold treatment is what tricks the seed into thinking winter has passed, and it's why we get such fast germination.
☀️ Step 3: Plant Sprouted Seeds in Growing Medium
Once the radicle (that first white root) reaches about ½ inch, it's time to plant. Fill small pots with a mix of 50% peat moss and 50% perlite—this lightweight blend prevents damping-off while allowing roots to spread. Plant each seed 1 inch deep with the sprout facing upward.
Keep the soil consistently moist but never soggy. A spray bottle works best here—you want the surface to stay damp but not glisten. Place the pots in a warm spot (70-75°F) with indirect light. You'll see the first true leaves appear in 2-3 weeks—that's your signal the seedling is established.
🪴 Step 4: Transplant to Larger Containers
When seedlings reach 4-6 inches tall and have 4-5 true leaves, it's time to move them to 5-gallon containers with well-draining soil. I use a mix of 60% potting soil, 20% compost, and 20% sand for this stage—this gives them room to develop strong root systems before outdoor planting.
Water deeply after transplanting, then reduce to once weekly unless the top inch of soil feels dry. Place the containers in full sun for 6-8 hours daily—you'll notice the leaves darken and stems thicken as they acclimate. This is when the real root development happens, setting them up for outdoor success.
⏰ Step 5: Harden Off Before Outdoor Planting
Three weeks before your last frost date, start hardening off the seedlings. Begin by placing them outside in a shaded, sheltered spot for 1 hour daily. Gradually increase exposure by 1 hour every 2 days until they can handle full sun and wind for a full day.
Watch for wilting or yellowing leaves—this means they're not ready yet. Once they tolerate full outdoor conditions without stress, they're ready for permanent planting. I plant mine in early spring when soil temperatures reach 55°F, which gives them a full growing season to establish before winter.
Tips & tricks for perfect hazelnut tree sprouts
These little-known details make all the difference between weak seedlings and sturdy saplings ready for the garden.
Seed Selection: Look for hazelnuts that are uniformly plump and free of any soft spots or mold. I've found the best results come from nuts harvested straight from the ground in late fall—these haven't been through commercial processing that might compromise their natural dormancy. Tap them gently against each other: a hollow sound means they're empty inside, while a solid thud indicates a healthy seed. This simple test saves hours of frustration later.
Stratification Timing: The 3-month cold storage period in Step 1 is non-negotiable for breaking dormancy, but here's what I've learned about making it work perfectly: Use a clear container so you can easily see the nuts and track progress. Place a small piece of masking tape with the start date on the outside—trust me, you'll forget! The key is maintaining consistent 34-40°F temperatures during this period, which most home fridges provide. If your fridge runs warmer, consider a dedicated seed stratification fridge or a cool basement area.
Moisture Management: During the 4-6 week stratification in Step 2, the paper towel or vermiculite should stay damp but never soggy. I've ruined batches by overwatering—look for condensation on the inside of your ziplock bag as your moisture indicator. If you see water droplets, open the bag slightly to let excess moisture escape. The goal is to simulate spring rains, not create a swamp. A spray bottle works better than soaking for this delicate balance.
Transplanting Cues: When you're ready to move seedlings to larger containers in Step 4, watch for these visual cues: the radicle should be at least ½ inch long, and you'll notice small bumps forming along the stem where leaves will emerge. These seedlings are surprisingly delicate—handle them by their leaves rather than the stem to prevent damage. The 5-gallon containers give roots room to grow, but don't overcrowd—space them at least 6 inches apart to prevent competition.
Pro Tips for Hazelnut Tree Sprout
- These little-known details make all the difference between weak seedlings and sturdy saplings ready for the garden.
- Seed Selection: Look for hazelnuts that are uniformly plump and free of any soft spots or mold. I've found the best r...
- Stratification Timing: The 3-month cold storage period in Step 1 is non-negotiable for breaking dormancy, but here's ...
Frequently asked questions
Got questions about growing a hazelnut tree sprout from scratch? You’re not alone—here are some of the most common concerns, answered clearly and simply!
How long does it take for a hazelnut sprout to germinate?
A hazelnut sprout typically germinates in 4–8 weeks when using the cold-stratification method. If you’re impatient, soak the nut in warm water for 24 hours first—this can speed up the process slightly. Just be patient; nature works on its own timeline!
What’s the best temperature for germinating hazelnut sprouts?
Ideal germination happens in 60–70°F (15–21°C). If your home is cooler, place the sprouting container near a sunny window or use a seedling heat mat. Avoid extreme heat—above 80°F (27°C) can stunt growth. A consistent, moderate environment keeps things on track!
Can I reuse hazelnut shells for sprouting?
Yes! Clean and dry the shells after germination, then store them in a cool, dark place for future use. Just ensure they’re free of mold or damage—fresh shells work best for the first few tries. Reusing saves money and reduces waste!
Why isn’t my hazelnut sprout growing roots?
Common culprits: dry soil, poor drainage, or lack of moisture. Check if the nut is still firm—if it’s soft or moldy, it’s likely rotting. Try replanting in fresh, damp potting mix and keep it in indirect light until roots appear. Patience is key!
What if I don’t have hazelnuts—what’s a good alternative?
If hazelnuts are hard to find, try walnuts, pecans, or even filberts (another type of hazelnut). Just note that germination rates may vary. For a guaranteed sprout, opt for store-bought hazelnut seeds labeled for growing.
Wrapping up and next steps
Growing a hazelnut tree sprout with strong roots doesn’t have to be a slow or complicated process! With the right fast-germination trick—like soaking nuts in water or using a warm, moist environment—you can kickstart growth and give your little sapling the best chance to thrive.
Whether you’re a gardening beginner or a seasoned green thumb, these steps make it easy to nurture a healthy tree from the start.
Now that you’re armed with tips and tricks, why not try it yourself? Grab a handful of hazelnuts, follow the steps, and watch your garden flourish! 🌱 And if you’re eager to learn more, explore pruning techniques to keep your hazelnut tree happy and productive for years to come.