
Pruning
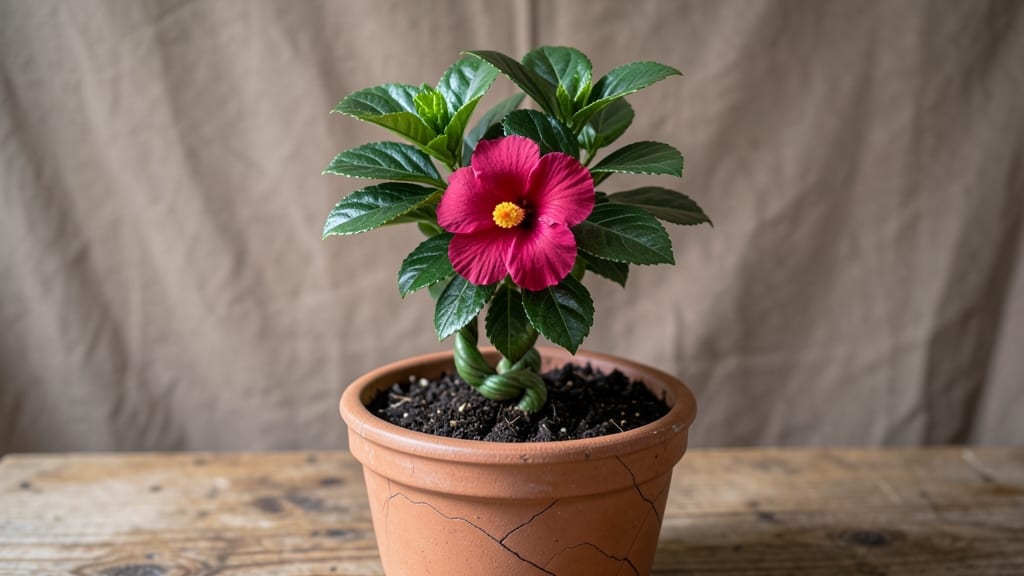
Your indoor hibiscus braided tree can thrive year-round with the right care. 🌿 I’ve had mine for three years, and the secret isn’t complicated—it’s about light, water, and a little patience with the braiding process. The result? A stunning, low-maintenance centerpiece that blooms reliably indoors.
Start with a healthy hibiscus plant (like a dwarf variety) and a sturdy support structure for braiding. You’ll need well-draining soil, a pot with drainage holes, and a spot near a south- or west-facing window for at least 6-8 hours of sunlight daily.
Overwatering is the biggest killer, so let the top inch of soil dry out before watering again—this keeps roots happy without soggy messes.
Once established, pruning becomes simple: trim leggy growth in spring to encourage bushiness, and shape as needed. The braiding itself takes just 10-15 minutes every few months—no sharp tools required. With consistent care, your tree will reward you with glossy leaves and vibrant blooms, even in winter.
Perfect for small spaces, apartments, or anyone who loves a touch of tropical drama without the outdoor hassle. Here’s how to keep yours lush and thriving indoors!
📚 In This Guide
- What you need
- Instructions
- Tips and common mistakes
- Wrapping up and next steps
What you need
- ● Hibiscus plant(s): 3-5 healthy, young hibiscus plants (1-2 feet tall) with flexible stems. Look for varieties like Hibiscus rosa-sinensis or Hibiscus syriacus for best results.
- ● Potting soil: 1 gallon of well-draining, peat-based potting mix (or a blend with perlite for aeration).
- ● Pot or container: A large, shallow pot (12-16 inches in diameter) with drainage holes. Ensure it’s at least 2 inches deeper than the plant’s root ball.
- ● Pruning shears: Sharp, sterilized shears (or small scissors) for trimming stems to desired lengths.
- ● Twine or plant ties: 10-15 feet of soft, biodegradable twine or plant tape (¼-inch width) to secure the braid.
- ○ Support structure (optional but helpful): A small wooden dowel or bamboo stake (½-inch diameter, 18-24 inches tall) to stabilize the center of the braid.
- ● Gloves: A pair of gardening gloves to protect your hands during pruning.
- ● Watering can: With a fine rose nozzle for gentle hydration.
- ● Fertilizer: Balanced liquid fertilizer (e.g., 10-10-10) to promote growth post-pruning.
- ○ Decorative elements (optional): Moss, pebbles, or decorative stones for aesthetic enhancement around the base.
Step-by-Step instructions for growing a hibiscus braided tree indoors
Here's how to cultivate a stunning, low-maintenance braided hibiscus that thrives year-round with just a few simple steps.
🌱 Step 1: Select and Prepare Your Braided Hibiscus Starter
Start with a healthy 3-4 foot tall hibiscus plant (like Tropicanna or Rosa Sinensis varieties) that has at least 4-5 sturdy stems. Choose branches that are about ¼ inch thick—thicker stems braid better and hold the structure longer. Trim any weak or leggy growth back to encourage stronger stems for your design.
I like to work with plants in 6-inch pots because they're manageable but still have room for root growth. Water the plant thoroughly 24 hours before braiding so the soil is moist but not soggy. This prevents stress during the process and helps the stems stay supple and flexible for weaving.
🪴 Step 2: Braid the Stems for Structure
Begin by selecting the three thickest, straightest stems and gently untangle them from any crossed or tangled growth. Hold one stem vertically in your left hand and the other two in your right. Cross the right-hand stems over the left stem in an X pattern, then bring the left stem over the top of the crossed right stems to create the first braid.
Continue weaving the stems in a tight but not overly constricted pattern, securing each loop with a small piece of plastic-coated wire (available at garden centers) every 6-8 inches. This prevents the braid from loosening over time. Real talk: It takes a few tries to get the tension right—too loose and it flops, too tight and you'll strangle the stems.
☀️ Step 3: Position for Optimal Light and Humidity
Place your braided hibiscus in a location with bright, indirect light for the first 2 weeks to help it recover from the braiding process. Direct sunlight can scorch new leaves, so a spot near an east-facing window or under a sheer curtain works best. After two weeks, gradually introduce it to 4-6 hours of morning sun to build resilience.
Hibiscus love humidity, so mist the leaves daily with room-temperature water or place the pot on a tray filled with pebbles and water (ensure the pot isn't sitting directly in water). You'll notice new growth emerging within 3-4 weeks—this is your cue that the plant is adapting well to its new structure.
💧 Step 4: Water and Fertilize for Year-Round Growth
Water your braided hibiscus when the top 1-2 inches of soil feel dry to the touch. Stick your finger in the soil—if it's damp past your first knuckle, wait another day. Overwatering is the fastest way to kill a hibiscus, so always check before adding more water. I use a self-watering pot in winter to prevent drying out, especially if your home has dry air from heating.
Feed your plant every 4-6 weeks during spring and summer with a balanced liquid fertilizer (10-10-10 or 20-20-20) diluted to half-strength. In fall and winter, reduce feeding to every 8-10 weeks or switch to a low-nitrogen formula to promote dormancy. You'll see vibrant blooms and lush foliage as a reward for consistent care.
✂️ Step 5: Prune and Maintain the Braided Structure
Prune your hibiscus after flowering (typically in late fall or early winter) to shape the braid and encourage new growth. Use clean, sharp pruning shears to trim back any stems that have outgrown the braid or are growing inward. Cut just above a leaf node or outward-facing bud to direct energy to the structure you want to maintain.
Every 12-18 months, carefully unwind the braid to check for any stems that need replacing. If a stem has become too thin or woody, gently remove it and weave in a new, flexible stem from the base of the plant. This keeps your braided design looking fresh and full. Here's the thing—hibiscus are forgiving, so don't stress over perfection. A little asymmetry adds character!
Tips & tricks for perfect hibiscus braided tree indoor
Creating a stunning braided hibiscus takes patience, but these small adjustments will help your plant thrive and maintain that elegant structure.
Stem Selection Matters: When choosing stems for braiding, look for ones that are slightly thicker than ¼ inch—about the width of a pencil. Thinner stems may not hold the braid's shape over time, while thicker ones can become too rigid. I've found that stems from the middle section of the plant (not the very top or bottom) offer the perfect balance of flexibility and strength for long-term braiding success.
The Braiding Technique: In Step 2, when you're creating the braid, work with the stems while they're still slightly damp from the 24-hour pre-watering. This makes them more pliable and easier to weave. Use your fingers to gently bend the stems into position rather than forcing them—hibiscus stems can snap if you're too aggressive. For the first few loops, practice without securing them with wire to get a feel for the tension you need.
Light Transition Strategy: The 2-week period of bright, indirect light is crucial for recovery. If your hibiscus starts showing signs of stress (yellowing leaves or drooping) during this time, move it to an even gentler light spot. After the initial 2 weeks, when you gradually introduce 4-6 hours of morning sun, do it incrementally—start with just 1-2 hours per day and increase by 30 minutes every few days to avoid shocking the plant.
Pro Tips for Hibiscus Braided Tree Indoor
- Creating a stunning braided hibiscus takes patience, but these small adjustments will help your plant thrive and main...
- Stem Selection Matters: When choosing stems for braiding, look for ones that are slightly thicker than ¼ inch—about t...
- The Braiding Technique: In Step 2, when you're creating the braid, work with the stems while they're still slightly d...
Frequently asked questions
Got questions about keeping your hibiscus braided tree thriving indoors? Here are some common ones—plus expert tips to keep those lush, braided branches looking their best year-round!
How often should I prune my indoor hibiscus braided tree?
Prune your braided hibiscus lightly every 3–4 months to maintain shape and encourage new growth. Focus on trimming leggy stems or overcrowded branches—avoid heavy cuts to preserve the braided structure. Pro tip: Use sharp, sterilized shears and prune just above a leaf node for cleaner regrowth.
Why are the leaves turning yellow or dropping?
Yellow leaves or leaf drop usually signal overwatering, underwatering, or poor drainage. Hibiscus trees hate soggy roots—let the top 1–2 inches of soil dry out between waterings. Check for pests (like spider mites) too! Need a fix? Adjust your watering routine and repot if the soil stays compacted.
Can I keep my hibiscus braided tree indoors all year?
With the right care, your braided hibiscus thrives indoors year-round. Place it near bright, indirect light (east or west-facing windows are ideal) and supplement with grow lights in winter. Just avoid drafts or sudden temperature drops—keep it in the 65–75°F range for happy growth.
What’s the best alternative if I can’t find a braided hibiscus?
Try these low-maintenance indoor alternatives with similar tropical vibes:
- Schefflera (Umbrella Plant): Hardy, braidable with training, and drought-tolerant.
- Ficus (Fiddle Leaf Fig): Lush leaves and adaptable to indoor light.
- Monstera Deliciosa: Dramatic foliage and easy to shape with pruning.
My braided branches are splitting—what went wrong?
Splitting usually happens from overly aggressive pruning or weak growth. To fix it:
- Gently rebraid loose stems with soft plant ties (avoid wire!).
- Fertilize with a balanced liquid feed (20-20-20) every 6 weeks to strengthen stems.
- Prune only the tips of new growth to encourage bushier, sturdier branches.
Wrapping up and next steps
Transforming your space with a hibiscus braided tree indoors isn’t just about aesthetics—it’s a rewarding journey of patience and care that yields stunning, year-round greenery with minimal effort. 🌿 Whether you’re a pruning pro or a beginner, this low-maintenance technique proves that lush beauty is always within reach.
Ready to elevate your indoor garden?
Your next step? Grab your tools, pick a sunny spot, and start braiding—your future tropical oasis awaits! 🌟 Tag us in your progress—we’d love to see your green thumb in action!