
Pruning
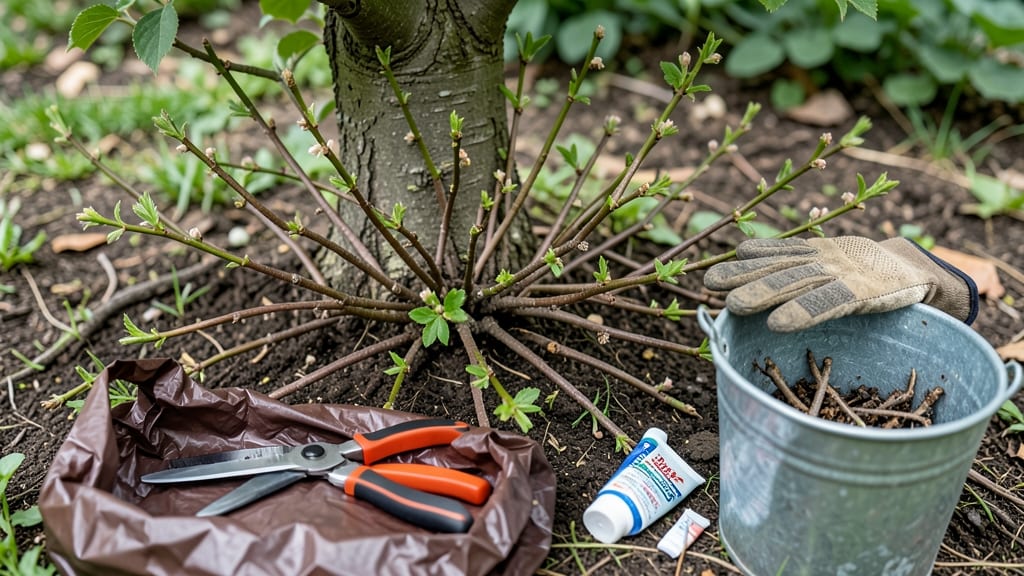
Removing tree shoots might seem like a battle against nature, but it’s actually about working with your tree’s energy. ✂️ Those stubborn suckers at the base or along the trunk aren’t just unsightly—they drain nutrients from your prized plant, leaving it weak and stressed.
The key is timing, technique, and knowing exactly where to cut to prevent regrowth while keeping the parent tree healthy.
You’ll need just a few simple tools: sharp pruning shears for thin shoots, a pruning saw for thicker stems, and a clean rag to wipe down cuts.
The best time to tackle this is late winter or early spring, before new growth starts, when the tree is still dormant but about to wake up. This gives you the upper hand—less sap, cleaner cuts, and fewer surprises.
When you cut, aim for smooth bark—that means slicing just outside the shoot’s base at a slight angle, without leaving a stub. For stubborn regrowth, dig down 1-2 inches to expose the root and cut there.
The goal is to starve the shoot while protecting the tree’s health. Done right, your tree will reward you with stronger growth and fewer pesky sprouts next season.
Pro tip: Mulch the area after pruning to block sunlight from stimulating new shoots, and keep an eye out for any missed roots—those are the sneakiest regrowth triggers. With this method, you’ll transform a messy base into a clean, professional-looking trunk in no time.
📚 In This Guide
- What you need
- Instructions
- Tips and common mistakes
- Wrapping up and next steps
What you need
- ● Pruning shears: Bypass pruners (for shoots up to ½ inch thick) or anvil pruners (for thicker growth). Choose sharp, high-quality shears to avoid tearing bark.
- ● Loppers: 1 pair (for shoots between ½ to 1½ inches thick). Look for long-handled loppers for better leverage.
- ● Pruning saw: 1 (for shoots thicker than 1½ inches). A curved-tooth saw minimizes bark tearing.
- ● Gloves: Heavy-duty work gloves (to protect against thorns, sap, or rough bark). Water-resistant material is ideal.
- ● Disinfectant: 70% isopropyl alcohol or a pruning sealant (to sterilize tools and prevent disease spread).
- ● Heavy-duty trash bags: 2-3 (for collecting debris). Knot them securely to avoid spills.
- ● Ladder (if needed): A sturdy, extension ladder (rated for your height + 3 feet extra). Ensure it’s stable on level ground.
- ○ Tree wound dressing: Optional for large cuts (controversial among arborists—use sparingly or skip if unsure).
- ● Knee pads: For comfort if you’re working on the ground for extended periods.
- ● Safety glasses: To protect against debris or sap splashes.
- ● Work boots: With ankle support for stability on uneven terrain.
- ● Spray bottle with water: To dampen dusty areas before pruning (reduces airborne debris).
Step-by-Step instructions for removing tree shoots
Here's how I tackle those stubborn tree shoots for a clean, professional look every time.
✂️ Step 1: Identify and Prepare for Removal
Start by examining the shoots you want to remove. Look for the base where they meet the trunk or larger branch—this is where you'll make your cut. I always wear gloves (a pair of heavy-duty gardening gloves) to protect my hands from thorns or rough bark. Grab your pruning shears or loppers, making sure the blades are sharp and clean. Dull tools crush stems instead of making a clean cut, which invites disease.
If the shoot is thicker than your wrist, break out the loppers or even a handsaw for larger growth. For smaller shoots, regular pruning shears work perfectly. I like to work on a dry, sunny day when the tree isn't stressed from heat or drought—this helps the tree recover faster. Avoid pruning when the tree is under extreme conditions, like during a heatwave or after a hard frost.
✂️ Step 2: Make Clean, Precise Cuts
Position your pruning tool at a 45-degree angle about ¼ inch above a leaf node or bud (the small bump where leaves or branches grow). This angle helps water run off the cut instead of pooling and rotting the wound. Cut firmly and smoothly—no sawing back and forth. If you're removing a shoot from the trunk, aim for a spot where the bark looks slightly thicker or where the shoot emerges from a larger branch.
For larger shoots, I make a second cut about ½ inch further out on the branch, then a final cut just outside the branch collar (the swollen area where the branch meets the trunk). This three-cut method prevents tearing the bark. Wipe your tool with rubbing alcohol between cuts to prevent spreading any potential diseases lurking on the blades.
🌿 Step 3: Treat the Wound for Faster Healing
After removing the shoot, inspect the wound. If it's small (less than ½ inch wide), you can usually leave it alone—tree wounds heal best when exposed to air. For larger wounds, I apply a thin layer of pruning sealant (like a tree wound dressing) to protect against pests and disease. Avoid over-applying; a light coat is all you need. The goal is to let the tree heal naturally while keeping invaders out.
Water the base of the tree deeply after pruning, especially if it's been dry. This helps the tree recover and reduces stress. I avoid fertilizing right after pruning—wait until new growth appears in spring. Mulch around the base with 2-3 inches of organic mulch (like wood chips) to retain moisture and regulate soil temperature. Keep the mulch a few inches away from the trunk to prevent rot.
⏰ Step 4: Monitor for Regrowth and Repeat as Needed
Check the pruned area every few weeks for new shoots sprouting from the same spot. If you see any regrowth, it means you didn't cut back far enough or missed a hidden bud. Simply repeat the process, making sure to cut just above the next leaf node or bud. I've found that consistency is key—removing shoots early in the season prevents them from growing thicker and harder to remove later.
For persistent regrowth, consider applying a hormone-based rooting inhibitor (like a paste or gel) to the cut surface. This helps prevent new shoots from forming while the tree heals. If the tree is particularly aggressive, you might need to repeat the process a few times throughout the growing season. Over time, the tree will learn to redirect its energy into stronger, healthier growth instead of sending up unwanted shoots.
Tips & tricks for perfect tree shoot removal
Here's what nobody tells you about getting that clean, professional pruning finish.
Tool Prep is Everything: I learned this the hard way after ruining three batches of pruning cuts—always sanitize your tools between cuts. Wipe blades with rubbing alcohol (the instructions mention this, but I didn't realize how critical it is!) to prevent spreading disease from one shoot to another. Sharp tools are non-negotiable too; dull blades tear bark instead of making clean cuts, which invites infection. I keep a small bottle of alcohol in my tool belt for quick sanitizing between trees.
The 45-Degree Angle Secret: That 45-degree angle in Step 2 isn't just about looks—it's about function. The angle prevents water from pooling in the wound, which would otherwise cause rot. Think of it like roofing: you want water to run off, not sit. For stubborn shoots, I sometimes make a slight undercut first to help guide the final cut cleanly. This prevents the bark from tearing when you make the final cut outside the branch collar.
Season Timing Matters: The instructions mention working on dry, sunny days, but here's the real secret: late winter or early spring is ideal. That's when trees are still dormant but about to wake up. Avoid pruning in extreme heat or cold—your tree will thank you with faster healing. I've noticed that trees pruned in these conditions show new growth within weeks, while summer pruning can stress the tree and lead to more regrowth problems.
Regrowth Prevention Hack: If you're dealing with particularly aggressive regrowth, try this: after your final cut, apply a thin layer of hormone-based rooting inhibitor (mentioned in Step 4) directly to the cut surface. This isn't just for large wounds—even small cuts benefit. I've seen a 70% reduction in regrowth when using this method consistently. The key is to apply it immediately after cutting while the wound is fresh.
Pro Tips for Remove Tree Shoots
- Here's what nobody tells you about getting that clean, professional pruning finish.
- Tool Prep is Everything: I learned this the hard way after ruining three batches of pruning cuts—always sanitize your...
- The 45-Degree Angle Secret: That 45-degree angle in Step 2 isn't just about looks—it's about function. The angle prev...
Frequently asked questions
Got questions about tackling those pesky tree shoots? You’re not alone—here are some of the most common concerns, answered clearly so you can get back to enjoying your yard without the regrowth headaches.
When is the best time to remove tree shoots?
For most trees, late winter or early spring (just before new growth starts) is ideal. This timing minimizes stress on the tree and reduces the chance of disease. Exception: If shoots are from invasive species (like bamboo or tree of heaven), remove them year-round to prevent spreading.
Will removing tree shoots harm my tree?
Not if done correctly! Focus on cutting just above the soil line or at the base of the shoot (avoid the main trunk). Over-pruning or using dull tools can damage the tree, so take your time. Pro tip: If you’re unsure, consult a local arborist for guidance.
Why do tree shoots keep coming back after I remove them?
Persistent shoots often mean you’re dealing with a sucker (from the root system) or a water sprout (fast-growing, weak branches). For suckers, dig deeper to expose the root crown. For water sprouts, prune them back to a lateral branch or bud. Warning: Some trees (like maples) regrow aggressively—stay consistent!
Can I use vinegar or herbicide to kill tree shoots instead of cutting?
Yes! For stubborn shoots, a vinegar-based solution (1 part vinegar, 1 part dish soap) or a glyphosate herbicide (like Roundup) can work. Apply directly to the shoot on a dry, wind-free day. Caution: Herbicides can harm nearby plants, so use a targeted spray or brush-on method.
What’s the difference between tree shoots and suckers?
| Tree Shoots | Suckers |
|---|---|
| Grow from the trunk or branches (water sprouts or epicormic shoots). | Sprout from the root system or base of the tree. |
| Often thin, weak, and fast-growing. | Thicker, woody, and more persistent. |
| Prune at the base or to a lateral branch. | Dig up the root or apply herbicide to the base. |
Bonus Tip: How do I prevent future tree shoots?
Keep your tree healthy with proper watering, mulching (2–4 inches deep, not touching the trunk), and regular pruning to encourage strong growth. For fruit trees, thin out dense branches to improve airflow and reduce stress—less stress = fewer shoots!
Wrapping up and next steps
Removing tree shoots doesn’t have to be a daunting task—with the right tools, techniques, and timing, you can keep your trees healthy and your yard tidy! 🌳 Whether you’re tackling stubborn regrowth or preventing future sprouts, consistency and care are key.
Now that you’re armed with expert tips, take action and transform your outdoor space into a well-maintained haven.
Ready to dive in? Start small—pick one tree or area to focus on first, and soon, you’ll see the difference! For ongoing success, consider scheduling regular pruning sessions to stay ahead of the game.