
Propagation
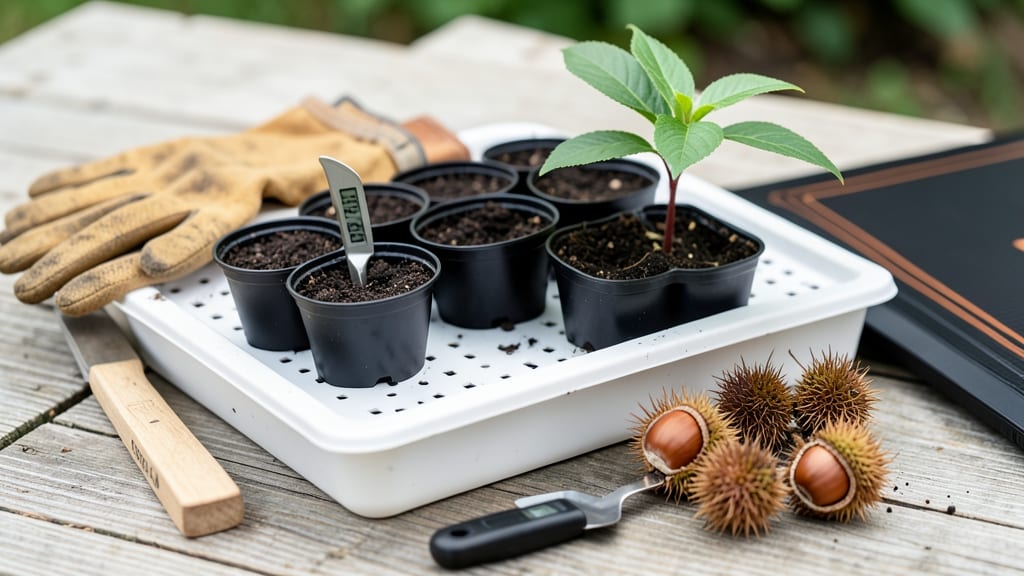
Starting a chestnut tree from seed requires 90 days of cold stratification—a process that mimics winter’s natural dormancy. 🌱 I’ve learned the hard way that skipping this step means waiting years (or never) for germination.
The key is patience: chestnut seeds need that cold period to break dormancy, and without it, they’ll sit stubbornly in the soil. You’ll need mature chestnuts (not store-bought—they’re often treated to prevent sprouting), a container with damp sand or peat moss, and a freezer.
The stratification process is simple: layer seeds in the mix, refrigerate, then plant in spring. Most seeds germinate within 4-8 weeks after planting, but some take longer—don’t give up if yours are slow. Once sprouted, your saplings will grow 2-4 inches their first year, with stronger roots than nursery-bought trees.
The payoff? A hardy tree that thrives for centuries, providing shade, wildlife habitat, and—eventually—those prized nuts. Just remember: chestnuts grow slow, but they’re worth the wait. This method works for American, European, and Chinese chestnuts, though germination rates vary by species.
If you’re impatient, you can speed up stratification with a commercial seed starter, but the freezer method is foolproof. Let’s get those seeds sprouting!
📚 In This Guide
- What you need
- Instructions
- Tips and common mistakes
- Wrapping up and next steps
What you need
- ● Chestnut seeds: 3–5 fresh, plump chestnuts (harvested in fall, ideally from a healthy tree). Pro tip: 💡 Avoid seeds with holes (weevil damage) or soft spots (rot).
- ● Stratification supplies: 1 small container (e.g., plastic bag, paper towel-lined tray, or mesh bag).
- ● 1 cup moist peat moss or sphagnum moss (or a mix of both). Spec: Keep moisture at ~50%—squeeze to test (should feel like a damp sponge).
- ● Cold storage: Access to a refrigerator (33–40°F / 0–4°C) for 3–4 months. Alternative: A cool basement or unheated garage if temps stay consistent.
- ● Planting pots: 3–4 small pots (4–6 inches wide) with drainage holes. Spec: Use well-draining soil mix (e.g., 50% potting soil + 50% perlite/sand).
- ○ Grow lights or sunny windowsill: A spot with 6+ hours of indirect light daily. Optional: A small LED grow light (~12–16 hours/day) for faster growth.
- ● Watering can or spray bottle: For gentle hydration (avoid soaking seeds/pots).
- ● Plant labels & marker: To track seed varieties and planting dates.
- ● Seed germination kit: Pre-moistened germination paper or a small propagator tray for easier stratification.
- ● Humidity dome: A clear plastic cover to retain moisture during early growth.
- ● Soil pH tester: Chestnut trees prefer slightly acidic soil (pH 5.0–6.5).
- ● Fertilizer: A balanced, slow-release fertilizer (e.g., 10-10-10) for transplanting saplings.
- ● Mulch: Wood chips or straw to protect young trees from temperature swings.
Step-by-Step guide to growing chestnut trees from seed
Here's my proven method for breaking dormancy and nurturing sturdy chestnut saplings from scratch.
🌱 Step 1: Harvest and Prepare Fresh Chestnut Seeds
Collect fully mature chestnuts in late fall when the husks open naturally. I look for plump, unblemished nuts with tight shells—these hold the best germination potential. Remove any seeds with cracks or signs of pest damage immediately, as they won't sprout. Store your selected nuts in a cool, dry place until you're ready to begin stratification.
Before stratification, I give the seeds a quick soak in lukewarm water for 24 hours. This softens the tough outer shell and kickstarts the internal processes. Don't skip this—dry seeds can take months longer to germinate. After soaking, drain them thoroughly and let them air-dry for a day while you prepare your stratification medium.
⏰ Step 2: Stratify Seeds for Dormancy Break
The key to success lies in proper stratification—mimicking winter conditions to break seed dormancy. Fill a container with a mix of moist sand and peat moss (equal parts) and place your chestnuts 2 inches deep. I use a clear plastic container so I can monitor moisture levels without disturbing the seeds.
Keep the mix consistently moist but never soggy—you want it to feel like a wrung-out sponge. Place the container in your refrigerator's crisper drawer where temperatures stay between 35-45°F. This cold treatment typically requires 90-120 days, though some seeds may need up to 180 days. Check periodically to ensure no mold develops—fuzzy growth means it's too damp.
🌿 Step 3: Plant Stratified Seeds in Growing Medium
After stratification, plant each seed 1 inch deep in individual 4-inch pots filled with a well-draining seed-starting mix. I like to add a handful of perlite to improve aeration—chestnut seedlings hate compacted roots. Water gently until moisture appears at the surface, then place the pots in a warm location (around 65°F) with indirect light.
Germination can take 4-8 weeks, so patience is key. You'll know it's working when you see the first true leaves pushing through the soil—these will be dark green and slightly glossy. During this period, keep the soil consistently moist but never waterlogged. A spray bottle works best to avoid disturbing the delicate seedlings.
☀️ Step 4: Provide Optimal Growing Conditions
Once seedlings emerge with their first true leaves, move them to a bright location with filtered sunlight (direct sun can scorch tender foliage). I use a grow light on a 12-hour cycle for the first few weeks to prevent leggy growth. You'll notice strong seedlings develop thick stems and dark green leaves—these are your indicators of healthy development.
When seedlings reach 4-6 inches tall (usually after 8-12 weeks), transplant them into 6-inch pots with fresh potting mix. This gives their roots room to expand without becoming root-bound. Fertilize lightly with a balanced 10-10-10 solution at half-strength—chestnut seedlings are sensitive to over-fertilization, which can burn their delicate roots.
🪴 Step 5: Acclimate and Transplant Outdoors
Before moving seedlings outside, begin hardening off by placing them in a sheltered, shaded spot for 2-3 hours daily, gradually increasing exposure over 2 weeks. You'll know they're ready when they can handle full sun for 4-6 hours without wilting. Chestnut trees thrive in full sun, so choose a location with at least 6 hours of direct light.
Plant your saplings in well-draining soil with a slightly acidic to neutral pH (6.0-7.0). Dig a hole twice as wide as the root ball but only as deep as the container. Water deeply after planting to settle the soil, then mulch around the base with 2-3 inches of organic mulch to retain moisture and suppress weeds. Keep the soil consistently moist for the first growing season, as young trees establish their root systems.
Tips & tricks for growing chestnut trees from seed
Real talk: Growing chestnut trees from seed isn't just about patience—it's about precision. These insights will help you avoid common pitfalls and maximize your success rate.
Seed Selection Matters: In Step 1, when harvesting chestnuts, prioritize seeds that are plump and firm with no cracks or soft spots. I've found that seeds with a slight tap that sounds hollow (like a quality nut should) have the highest germination rates. After collecting, store them in a breathable paper bag in a cool, dark place until you're ready to begin stratification. This prevents moisture buildup that could lead to mold before you even start the process.
Stratification Medium Secrets: The sand and peat moss mix in Step 2 is crucial, but here's what I've learned: Use coarse sand (not fine playground sand) to prevent compaction around the seeds. I also add a handful of perlite to the mix—this improves drainage while maintaining moisture. The key is to keep the medium damp like a wrung-out sponge; you should see moisture beads form when you squeeze it, but no water should drip out. This balance prevents both mold and dehydration during the 90-120 day cold treatment.
Germination Timing and Light: When you plant your stratified seeds in Step 3, place the 4-inch pots in a warm location (65°F) with indirect light. I've discovered that using a seedling heat mat set to 70°F can speed up germination by 1-2 weeks—just don't let it exceed 75°F or you risk overheating the delicate seeds. Once those first true leaves appear (which should happen within 4-8 weeks), resist the urge to move them to direct sunlight immediately. Their tender foliage can scorch, so filtered light is your best friend during this critical phase.
Transplanting Strategy: In Step 5, when transplanting outdoors, I recommend amending the planting hole with a mix of compost and native soil (50/50 ratio) to give your sapling a nutrient boost. The 2-3 inches of organic mulch should be spread in a 3-inch diameter circle around the base, keeping it 2 inches away from the trunk to prevent rot. This creates a perfect microclimate for moisture retention while protecting against weeds.
Pro Tips for Start A Chestnut Tree From Seed
- Real talk: Growing chestnut trees from seed isn't just about patience—it's about precision.
- Seed Selection Matters: In Step 1, when harvesting chestnuts, prioritize seeds that are plump and firm with no cracks or soft spots.
- Stratification Medium Secrets: The sand and peat moss mix in Step 2 is crucial, but here's what I've learned: Use coarse sand (not fine playground sand) to prevent compaction around the seeds.
Frequently asked questions
Got questions?
Growing chestnut trees from seed can feel like a gamble—especially when you’re waiting months for germination. Here are answers to the most common questions to help you avoid pitfalls and set your saplings up for success.
How long does chestnut seed stratification take?
Chestnut seeds need 3–6 months of cold, moist stratification (40–50°F) to break dormancy. Plant them in fall or store them in a damp mix of peat moss and sand in the fridge. Patience is key—rushing this step often leads to rot instead of sprouts!
When will my chestnut seeds sprout after stratification?
Once stratified, germination can take 2–4 weeks in warm (70–80°F) conditions. Keep the soil consistently moist but not soggy. If nothing emerges after 6 weeks, check for mold or overwatering—sometimes seeds need a little extra coaxing!
Can I grow a chestnut tree from store-bought chestnuts?
Yes, but with a caveat: Only fresh, local chestnuts (from trees, not processed ones) will sprout. Store-bought chestnuts are often treated to prevent sprouting. If you’re unsure, try the stratification test—if they don’t rot, they’re worth a shot!
Why are my chestnut seeds rotting during stratification?
Rot usually means too much moisture or poor airflow. Use a well-draining mix (like perlite + peat) and avoid sealing the container tightly. If mold appears, dump the batch and start fresh—healthy seeds should stay firm, not mushy!
How tall can my sapling grow in its first year?
Expect 1–3 feet of growth in ideal conditions (sun, water, and rich soil). Chestnut trees grow slowly—don’t panic if yours is tiny! With proper care, it’ll reward you with edible nuts in 10–15 years. Think of it as a long-term investment!
Wrapping up and next steps
Starting a chestnut tree from seed is a rewarding journey that blends patience with nature’s magic! By mastering stratification and nurturing your saplings with care, you’re not just growing a tree—you’re cultivating a legacy.
Whether you’re drawn to the sweet, nutty harvest or the rustic charm of a mature chestnut grove, your efforts will pay off in years to come.
Now that you’re armed with the secrets to success, why not take the next step? Explore how to transplant your young saplings or join a local gardening group to share your progress. Happy growing—your future chestnut tree is waiting! 🌱🌳