
Pruning
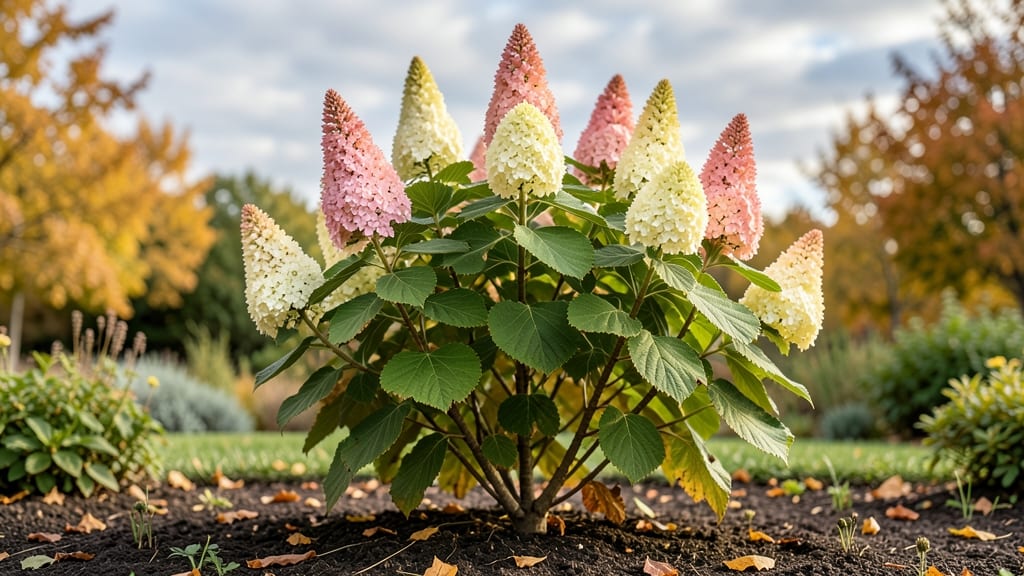
Fall pruning your hydrangea tree unlocks next year’s blooms before winter sets in. ✨ I’ve seen Hydrangea paniculata—the tree-form variety—go from sparse to spectacular after a single strategic cut, and it all starts with timing and technique.
The key? Pruning after blooms fade but before hard frost, when the plant’s energy shifts underground for winter.
You’ll need sharp bypass pruners, a ladder (for taller varieties), and a clear day to assess growth. Focus on removing dead wood first, then thinning out crowded branches to improve airflow. For paniculata, you can even cut back up to ⅓ of the plant—it thrives on bold pruning.
Just avoid heavy cuts on other types like Hydrangea macrophylla, which bloom on old wood.
The payoff? A stronger structure that supports heavier blooms next season, plus fewer pests hiding in dense foliage. After pruning, give the base a 2-3 inch layer of mulch to protect roots from freeze-thaw cycles.
By spring, you’ll see fresh green shoots where last year’s blooms once were—proof that fall prep works.
Works for both container-grown and in-ground paniculata varieties. Just skip this on other hydrangeas unless you know their blooming habits. Here’s how to do it right before the first frost hits your zone.
📚 In This Guide
- What you need
- Instructions
- Tips and common mistakes
- Wrapping up and next steps
What you need
- ● Pruning shears: Bypass pruners (for clean cuts on small branches) – 1 pair (look for ergonomic handles and sharp, stainless-steel blades for precision).
- ● Loppers: Bypass or anvil type (for thicker branches, up to 2-inch diameter) – 1 pair (pivoting or ratcheting models make tough cuts easier).
- ● Pruning saw: Curved-tooth or bypass saw (for branches 2+ inches thick) – 1 (lightweight aluminum or carbon steel for durability).
- ● Gloves: Heavy-duty gardening gloves (cut-resistant, 12-14 inches long) – 1 pair (nitrile-coated for grip and protection).
- ● Disinfectant: 70% isopropyl alcohol or diluted bleach solution (1 part bleach to 9 parts water) – small spray bottle (to sterilize tools between cuts and prevent disease).
- ● Rubbing alcohol or hand sanitizer: (for cleaning hands after pruning) – travel-sized bottle.
- ● Trash bags: Heavy-duty contractor bags (for collecting pruned branches) – 2-3 bags (30-gallon capacity).
- ● Extension pole: Telescoping pruning saw or loppers (for high branches) – 1 (adjustable 3-6 ft length).
- ● Ladder: Lightweight aluminum step ladder (if tree is 6+ feet tall) – 1 (with non-slip feet and wide base for stability).
- ● Sealing wax or pruning paste: (to protect large cuts from pests/disease) – small jar.
- ● Notebook & pen: (to mark cuts or track growth) – 1.
- ● Safety glasses: (to protect eyes from debris) – 1 pair.
- ● Weather check: Prune on a dry, overcast day (avoid rain or extreme heat).
- ● Tree assessment: Identify dead, diseased, or crossing branches before starting.
- ● Safety first: Ensure the area around the tree is clear of obstacles and pets/kids are at a safe distance.
Step-by-Step guide to pruning your hydrangea tree for fall blooms
Fall is the perfect time to shape your hydrangea tree—here's how to encourage next year's flowers while keeping it healthy.
✂️ Step 1: Identify Dead and Weak Growth
Start by examining your hydrangea tree for branches that are brown, brittle, or completely devoid of leaves. These are dead and should be removed immediately—they drain energy from healthy growth. I always use sharp pruning shears to make clean cuts just outside the branch collar, where the branch meets the trunk. This prevents tearing and promotes faster healing.
Next, look for weak or crossing branches—those that rub against each other or grow inward toward the center. These create wounds and compete for sunlight. Mark these with a small piece of tape if you're unsure which to remove first. You'll know you're on the right track when you see only outward-facing branches remaining.
✂️ Step 2: Thin Out Overcrowded Areas
Hydrangea trees bloom best when air circulates freely. Focus on thinning out the center of the tree first, removing about 20-30% of the total branches. Start with the oldest wood—these are usually the thickest stems—and work your way outward. Each cut should remove an entire branch back to its origin at the trunk or a larger branch.
Here's the thing—hydrangeas bloom on both old and new wood depending on the variety. For most tree forms, you'll want to avoid heavy pruning of last year's flower stems (they're the thick, woody branches with dried blooms). Instead, focus on shaping the overall structure. You'll see immediate improvement in sunlight penetration and air flow after just a few cuts.
✂️ Step 3: Shape the Tree's Natural Form
Now it's time to refine the tree's shape. Step back and visualize an open vase or rounded form—hydrangeas respond beautifully to this classic structure. Start by removing any branches that grow straight upward or downward; these create awkward angles and reduce flowering potential. Aim for a balanced silhouette where branches spread outward at 45-60 degree angles.
For each branch you keep, make your final cut just above an outward-facing bud. This encourages new growth to continue in the direction you want. I like to work in layers, starting with the top branches and moving downward. This way, I can see the overall shape taking form as I go. Remember, hydrangeas are forgiving—you can always make adjustments next year.
🌿 Step 4: Clean Up and Prepare for Winter
After pruning, collect all the debris and dispose of it properly—never leave cuttings on the ground where they can harbor pests or diseases. I like to sterilize my pruning tools with rubbing alcohol between cuts to prevent spreading any potential pathogens. This is especially important if you have multiple hydrangeas in your garden.
Give your tree a final inspection for any remaining dead spots or signs of disease like blackened leaves or powdery mildew. If you find any, make additional cuts to remove affected areas completely. Finish by applying a 2-3 inch layer of mulch around the base (but not touching the trunk) to protect roots during winter. This helps maintain even soil moisture and temperature as we move into colder months.
Tips & tricks for perfect hydrangea tree pruning in fall
Fall pruning transforms your hydrangea tree into a blooming powerhouse—here's how to avoid common pitfalls and maximize next year's beauty.
Tool Preparation: Before you begin, sharpen your pruning shears and sterilize them with rubbing alcohol. Dull blades tear branches instead of making clean cuts, which can damage the tree and invite disease. I also recommend having a small piece of tape on hand—it's perfect for marking branches you're unsure about before making cuts. This simple step prevents unnecessary removals and helps maintain the tree's natural structure.
Branch Angle Awareness: When shaping in Step 3, pay special attention to the 45-60 degree angle guideline. Branches growing straight up or down create awkward silhouettes and reduce flowering potential. Think of it like sculpting—you want to create a balanced, open vase shape that allows sunlight to reach all parts of the tree. If you're unsure about an angle, take a photo first to visualize the final shape before making cuts.
Seasonal Timing Insight: Fall is ideal because it allows the tree to heal before winter dormancy. However, avoid pruning after the first hard frost—new cuts need time to harden off. I've found that late October to early November works best in most climates. If you're in a warmer region, you might extend this window slightly, but always prioritize giving the tree time to recover before winter's chill sets in.
Mulching Technique: That 2-3 inch layer of mulch in Step 4 isn't just about winter protection—it's also about maintaining proper soil moisture. Apply mulch in a donut shape, keeping it 2-3 inches away from the trunk to prevent rot. I like to use shredded bark mulch because it breaks down slowly and improves soil structure over time. This small detail makes a big difference in root health during winter.
Pro Tips for Hydrangea Tree In Fall
- Fall pruning transforms your hydrangea tree into a blooming powerhouse—here's how to avoid common pitfalls and maximize next year's beauty.
- Tool Preparation: Before you begin, sharpen your pruning shears and sterilize them with rubbing alcohol.
- Branch Angle Awareness: When shaping in Step 3, pay special attention to the 45-60 degree angle guideline.
Frequently asked questions
Got questions about keeping your hydrangea tree stunning in fall—or year-round? You’re not alone! Here are the most common concerns and quick answers to help you prune with confidence.
When is the exact best time to prune a hydrangea tree in fall?
Prune your hydrangea tree after it blooms in summer (late August to early September) for Oakleaf or Panicle varieties. For Bigleaf hydrangeas, wait until late winter (February–March) to avoid cutting off next year’s buds. Always prune before the first hard frost for best results.
How much can I trim off without harming the tree?
Remove 1/3 of the oldest stems each year to encourage new growth, but never cut more than 25–30% of the canopy at once. Focus on dead, diseased, or crossing branches first. Thin out crowded areas to improve airflow—this prevents fungal issues and keeps blooms lush!
Will pruning in fall affect next year’s flowers?
It depends on the type! Panicle and Smooth hydrangeas bloom on new wood, so fall pruning won’t hurt next year’s flowers. Bigleaf hydrangeas bloom on old wood, so prune after they bloom (summer/fall) to avoid cutting off buds. Oakleaf hydrangeas are forgiving—prune lightly in fall for shape without fear.
What if my hydrangea tree isn’t blooming after pruning?
Check these fixes:
- Wrong timing: Bigleaf hydrangeas need winter dormancy to set buds—prune too early, and you’ll miss next year’s blooms.
- Over-pruning: Cutting back too much (over 30%) can shock the tree. Stick to 1/3 of old stems max.
- Poor soil/nutrients: Test soil pH (hydrangeas love acidic soil, pH 5.5–6.2). Add hydrangea-specific fertilizer in early spring.
- Pests/disease: Yellow leaves or wilted blooms? Check for aphids, powdery mildew, or borers—treat with neem oil or fungicide if needed.
Are there smaller hydrangea tree alternatives for small yards?
Consider these compact options:
Variety
Height at Maturity
Fall Color
‘Little Lime’ Oakleaf Hydrangea
4–6 feet
Burnt orange, deep red
‘Limelight’ Panicle Hydrangea
5–8 feet
Golden-yellow
‘Endless Summer’ Bigleaf Hydrangea
3–5 feet
Pink/purple (varies by soil pH)
All three are low-maintenance and thrive in containers if space is tight!
Wrapping up and next steps
Fall is the perfect time to give your hydrangea tree the care it needs to shine year-round! By mastering strategic pruning, you’re not just tidying up—you’re setting the stage for vibrant blooms and a healthier plant. Remember, patience and precision pay off, so don’t rush the process.
Ready to transform your garden? Grab your pruners and head outside—your hydrangea tree will thank you with stunning fall color and next year’s blossoms! 🌿✨