
Propagation
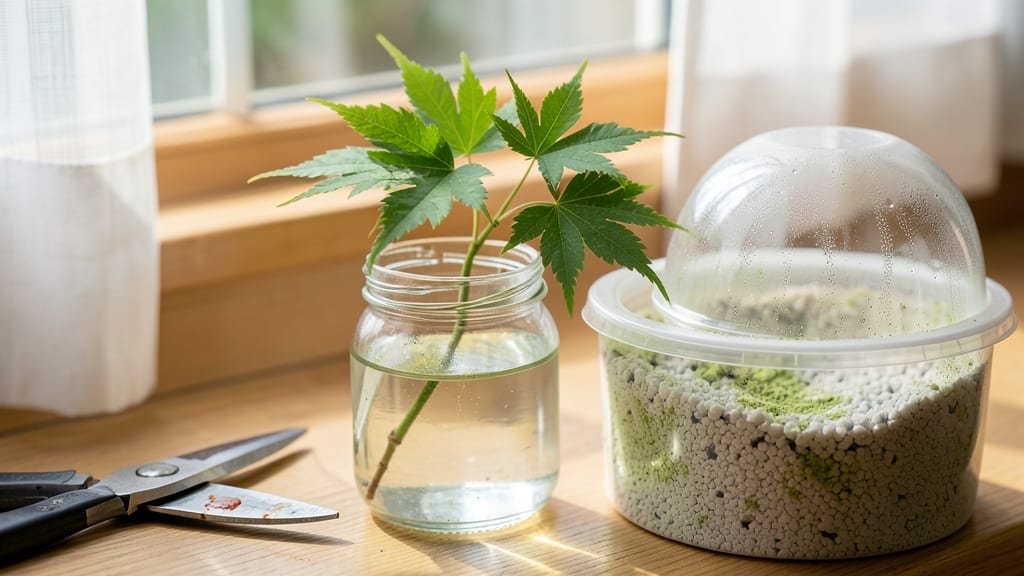
The secret to Japanese maple tree propagation from seed lies in cold-stratified sprouts—those delicate, lace-like seedlings that promise decades of stunning foliage if given the right start. 🌱 I've struggled with this process for years, battling inconsistent germination until I cracked the timing and soil mix that finally made those tiny seeds break dormancy reliably.
The key? Mimicking winter’s chill before the warmth of spring triggers growth.
You'll need fresh seeds (or the freshest possible), a mix of peat and perlite for moisture control, and patience—this isn’t a quick process.
The cold stratification period alone takes 60-90 days, but the payoff is worth it: delicate lace-leaf or vibrant red foliage that matures into a tree you’ll cherish for decades. Most people give up too soon, but with the right approach, germination rates improve dramatically.
Once those first green shoots appear, you’ll transition to bright, indirect light and gentle watering. The seedlings grow slowly at first, but with proper care, they’ll develop strong roots and the iconic Japanese maple shape.
Expect your first transplantable saplings in about 18 months—every stage requires attention to light, humidity, and soil moisture.
This method works best for smaller varieties like Bloodgood or Emperor I—just avoid trying it with large, mature specimens. The real magic happens when you see those first leaves unfurl after winter’s dormancy break. Here’s how to make it work for your climate and space.
📚 In This Guide
- What you need
- Instructions
- Tips and common mistakes
- Wrapping up and next steps
What you need
- ● Japanese maple cuttings: Semi-hardwood or hardwood cuttings (4–6 inches long, pencil-thick) from healthy, disease-free trees. Tip: Collect in late fall or winter for cold stratification.
- ● Rooting hormone: A high-quality powder or gel (e.g., Rootone or Clonex) to boost root development.
- ● Well-draining potting mix: A blend of perlite, vermiculite, and peat moss (or coconut coir) in a 1:1:1 ratio.
- ● Small pots or trays: 4–6 inch pots or a seedling tray with drainage holes (one per cutting).
- ○ Plastic bags or clear domes: To create a humid microenvironment (optional but helpful).
- ● Spray bottle: For gentle misting to maintain moisture.
- ● Pruning shears or sharp knife: Sterilized to make clean cuts.
- ● Refrigerator or cold frame: Set to 35–40°F (2–4°C) for 8–12 weeks.
- ● Moistened paper towels or peat moss: To wrap cuttings for stratification.
- ○ Plastic zip-top bags: With small holes for airflow (optional, to contain moisture).
- ● Heat mat: For faster rooting in warmer months.
- ● Grow lights: If propagating indoors with limited natural light.
- ● Fungicide: (e.g., Mycorrhizal inoculant) to prevent rot.
- ● Labeling tags: To track varieties and propagation dates.
Step-by-Step instructions for Japanese maple tree propagation
Cold-stratified cuttings ensure strong root development before spring planting—here's how to do it right.
🌱 Step 1: Select and Prepare Healthy Cuttings
Choose semi-hardwood cuttings from late summer to early fall, when new growth has matured but hasn't fully hardened. Look for 4-6 inch stems with 3-4 leaf nodes and a pencil-thickness diameter—thicker stems root poorly while thinner ones lack energy. Use clean, sharp pruners to make a 45-degree angle cut just below a node, avoiding any signs of disease or damage.
Remove all but the top 2-3 leaves to reduce moisture loss and prevent fungal growth. Wrap the cuttings in a damp paper towel and place them in a sealed plastic bag for 24 hours to hydrate slightly. This pre-treatment mimics natural moisture levels and improves rooting success.
💧 Step 2: Stratify Cuttings for Winter Dormancy
Fill a 1-gallon container with a mix of 50% perlite and 50% peat moss—this combination drains well while retaining enough moisture. Dip the base of each cutting in rooting hormone (optional but recommended for Japanese maples) and insert them 2 inches deep into the mix, spacing them 3 inches apart. Water lightly until the medium feels evenly damp but not soggy.
Place the container in a refrigerator (not freezer) where temperatures stay between 35-40°F for 8-12 weeks. This cold stratification mimics winter conditions, breaking dormancy and encouraging root development before spring. Check monthly—if the mix dries out, mist lightly with water to maintain consistent moisture.
⏰ Step 3: Transition to Warmth and Light
After 8-12 weeks, remove the container from cold storage and place it under bright, indirect light (a north-facing window or grow light). Increase humidity by covering the container with a clear plastic dome or bag, securing it loosely to allow airflow. Maintain 70-75°F temperatures and keep the mix evenly moist—never waterlogged.
Root development typically takes 4-6 weeks after removing stratification. You'll see new growth at the top and, if you gently tug a cutting, slight resistance indicates roots forming. Avoid direct sunlight during this phase—Japanese maples are shade-acclimated and can scorch easily.
🪴 Step 4: Pot Up and Acclimate New Plants
Once roots fill the container or reach 2-3 inches long, transplant each cutting into its own 3-inch pot filled with a well-draining potting mix. Handle gently to avoid damaging tender roots—Japanese maples are sensitive to root disturbance. Water thoroughly after potting and place in partial shade for 1-2 weeks to reduce transplant shock.
Gradually introduce morning sun over 2-3 weeks, then transition to dappled shade full-time. Fertilize lightly with a balanced 10-10-10 solution at half strength after 4-6 weeks of new growth. Avoid heavy feeding—young maples are prone to leaf burn from excess nutrients.
Tips & tricks for perfect Japanese maple tree propagation
Between us, these little details make all the difference when you're nurturing delicate Japanese maple cuttings. Here's what nobody tells you—
Selection is Everything: In Step 1, focus on stems that have a slight bend—this indicates they're semi-hardwood, the perfect stage for propagation. I learned this the hard way after struggling with both fully mature and overly soft cuttings. Also, avoid stems with any signs of mildew or insect damage, even if they look otherwise healthy. The 24-hour hydration step is critical: don't skip it! This mimics natural moisture levels and helps prevent shock when you plant them.
Stratification Secrets: For Step 2, I recommend using a clear plastic container for your 50% perlite/50% peat moss mix—it lets you monitor moisture levels without opening the lid. The 8-12 week cold stratification period at 35-40°F is non-negotiable for Japanese maples. If your refrigerator's crisper drawer runs cooler than 35°F, move the container to a slightly warmer spot—consistent temperatures are more important than hitting the exact range. And here's a pro move: label your container with the date you started stratification to track your progress accurately.
Light Transition Strategy: When you move your cuttings to warmth in Step 3, start with just 2-3 hours of bright indirect light per day during the first week. Gradually increase exposure to prevent leaf scorch. I've seen beginners rush this step and end up with sunburned foliage—trust me on this. The 70-75°F temperature range is ideal, but if your home runs cooler, consider using a small space heater with a thermostat to maintain consistent warmth. And watch for condensation inside your humidity dome—if you see water droplets, it's time to remove it briefly to allow airflow.
Transplanting with Care: In Step 4, when checking for root development, gently tug the cutting—if you feel even slight resistance, roots are forming. For the first 1-2 weeks after transplanting, I water my cuttings using the "bottom watering" method: place the pot in a shallow tray of water for 10-15 minutes until moisture appears at the surface. This prevents disturbing the delicate roots while ensuring proper hydration. And remember, Japanese maples are particular about their soil—never use garden soil directly from your yard, as it lacks the proper drainage and nutrients these trees need.
Pro Tips for Japanese Maple Tree Propagation
- Between us, these little details make all the difference when you're nurturing delicate Japanese maple cuttings. Here...
- Selection is Everything: In Step 1, focus on stems that have a slight bend—this indicates they're semi-hardwood, the ...
- Stratification Secrets: For Step 2, I recommend using a clear plastic container for your 50% perlite/50% peat moss mi...
Frequently asked questions
Got questions about propagating your Japanese maple tree?
You’re not alone! Here are some of the most common queries—plus clear answers to help you succeed.
When is the best time to propagate Japanese maple trees?
The ideal time is late winter or early spring (before buds swell), when the tree is still dormant. Cold-stratification (chilling seeds for 60–90 days) mimics natural conditions, improving germination rates. For cuttings, take semi-hardwood in late summer or early fall for best rooting success.
How long should I cold-stratify Japanese maple seeds?
Japanese maple seeds need 60–90 days of cold stratification (33–40°F) to break dormancy. Use a refrigerator with moist peat moss or a damp paper towel, then plant outdoors in early spring. Pro tip: Label containers to track timing!
Can I propagate a Japanese maple from a cutting instead of seeds?
Yes! Semi-hardwood cuttings (4–6 inches long) work best. Dip in rooting hormone, plant in perlite/sand mix, and keep humidity high with a plastic bag. Roots form in 4–8 weeks. Warning: Some cultivars (like Bloodgood) root poorly—check compatibility first!
Why aren’t my Japanese maple seeds germinating?
Common culprits: insufficient stratification, old seeds (viability drops after 1–2 years), or improper moisture. Try scarifying seeds (lightly nicking the shell) or soaking in warm water overnight. If still stuck, test seed viability with a simple float test—sinkers are viable!
How long does it take for a propagated Japanese maple to mature?
Seedlings grow slowly—expect 5–10 years for a 6-foot tree! Cuttings mature faster (3–5 years) but may not retain the parent’s exact traits. Patience pays off: Japanese maples reward slow growers with stunning foliage and longevity (up to 300+ years in ideal conditions!).
Wrapping up and next steps
Propagating a Japanese maple tree from cold-stratified sprouts is a rewarding journey that connects you to nature’s patience and beauty. 🌿 With the right tools, timing, and care, you can nurture these delicate sprouts into stunning, long-lived trees.
Whether you’re a seasoned gardener or a curious beginner, every small step—from selecting healthy seeds to monitoring humidity—brings you closer to success.
Now that you’re armed with knowledge, take the next step: gather your supplies, pick a sunny spot, and start your propagation project! Share your progress with fellow plant lovers, and soon, you’ll be admiring the vibrant foliage of your very own Japanese maple. Happy growing! 🌱✨