
Pruning
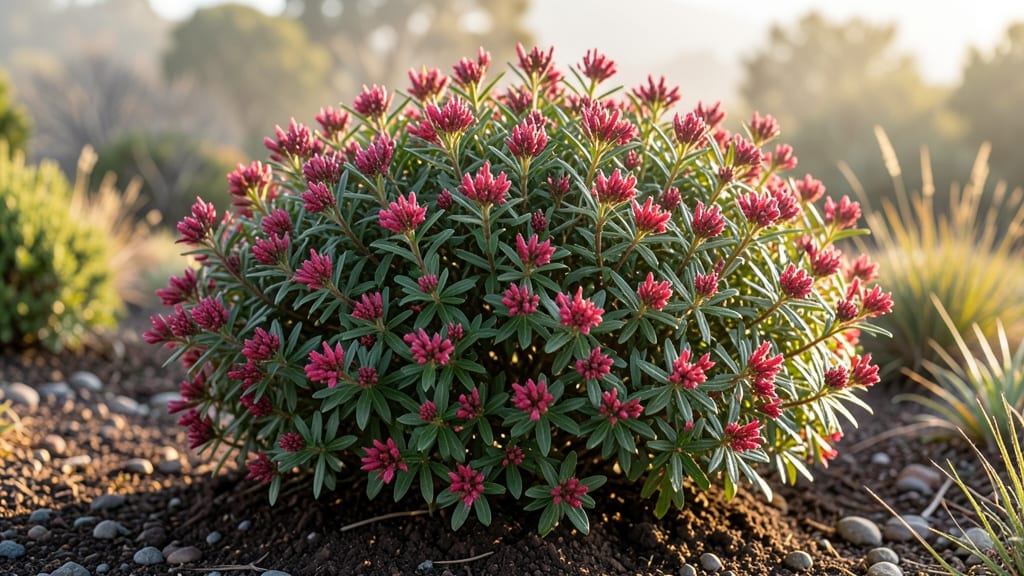
Your New Zealand tea tree 'Ruby Glow' won’t just survive winter—it’ll glow brighter than ever. ✨ This compact shrub thrives on strategic pruning to keep its deep ruby foliage vibrant year-round, and the secret is timing and technique.
I’ve pruned mine for five years, and the difference between a well-shaped plant and a leggy mess comes down to just a few key cuts.
The real magic happens when you prune right after flowering in early spring. This encourages fresh, compact growth and prevents those long, sparse branches that ruin the tight, rounded shape.
Use clean, sharp shears to make cuts just above a leaf node—never tear the stems—and you’ll see new growth emerge within weeks. For container plants, a light trim every 6-8 weeks keeps them dense and manageable.
What you’ll end up with is a shrub so lush it looks like it’s been professionally landscaped. The foliage stays a rich, jewel-toned red even in winter, and the compact size makes it perfect for small gardens, containers, or as a striking hedge.
The best part? It’s drought-tolerant once established, so once you get the pruning rhythm down, maintenance is effortless.
Works equally well in full sun or partial shade, though the color deepens with more sunlight. For frost-prone areas, a light mulch layer protects the roots without smothering the plant. Here’s how to keep yours thriving all season long—no green thumb required.
📚 In This Guide
- What you need
- Instructions
- Tips and common mistakes
- Wrapping up and next steps
What you need
- ● Pruning shears: Sharp, bypass shears (for clean cuts) – 1 pair (size 7-8" for small branches, 10" for larger ones).
- ● Hand pruners: For thin stems (size 5-6") – 1 pair.
- ● Loppers: For thicker branches (up to 2" diameter) – 1 pair.
- ● Disinfectant (70% isopropyl alcohol or pruning sealant): To sterilize tools between cuts – small bottle.
- ○ Gloves: Heavy-duty, cut-resistant (optional but highly recommended for thorny branches) – 1 pair.
- ● Pruning saw: Only if dealing with thick, woody growth (rare for 'Ruby Glow') – 1.
- ● Trash bag or bucket: For clippings – 1-2.
- ● Horticultural oil or neem oil: To treat cuts and prevent disease (apply after pruning).
- ● Marking spray (paint): For labeling sections if doing structured pruning.
- ● Step stool or ladder: For reaching higher branches (safety first—use stable equipment!).
- ● Notebook & pen: To jot down pruning notes for future reference.
Step-by-Step instructions for pruning your Ruby Glow new zealand tea tree
Here's how to keep your Ruby Glow New Zealand tea tree looking lush and vibrant all year long.
✂️ Step 1: Time Your Pruning for Peak Growth
Prune your Ruby Glow in early spring just as new growth begins—you'll see fresh buds swelling at the stem tips. This timing ensures you're cutting back before the plant puts energy into flowering or seeding, so it focuses on leaf production instead. Avoid pruning in fall or winter when the plant is dormant; you'll only encourage weak, leggy growth.
If you missed spring, you can do a light shaping prune in early summer, but avoid heavy cuts after mid-July. Your plant will thank you with bright, healthy foliage rather than struggling to recover before winter. Watch for the first flush of new leaves—those are your cue to start shaping.
🌿 Step 2: Shape for Airflow and Sunlight
Use clean, sharp pruning shears to remove any dead, diseased, or crossing branches first—these are your priorities. Cut just above a leaf node or outward-facing bud to encourage growth in the direction you want. I like to step back every few cuts to visualize the shape; the goal is an open, airy plant that lets sunlight reach all the leaves.
Focus on removing about one-third of the oldest growth from the outer edges. This prevents the center from becoming bare while keeping the plant compact. You'll notice the new growth emerging from the inner branches—this is where your vibrant ruby foliage will shine brightest.
☀️ Step 3: Encourage Bushier Growth with Strategic Cuts
Make your cuts at a 45-degree angle about ¼ inch above a leaf node or bud. This angle helps water run off and prevents rot. For thicker stems, use loppers instead of shears to avoid crushing the wood. I always cut back to just outside a set of leaves or a strong lateral branch—this ensures the plant has energy reserves to grow new shoots.
Pay special attention to any leggy growth reaching outward. Cutting these back by half will force the plant to put energy into filling out the center. You'll see new side shoots emerge within 2-3 weeks, and those are where your most vibrant foliage will appear. Avoid cutting into old wood—it won't regrow leaves.
💧 Step 4: Post-Pruning Care for Recovery
Water your Ruby Glow deeply right after pruning to help it recover. The roots need moisture to support all that new growth you've encouraged. I like to add a balanced liquid fertilizer (like 10-10-10) to the water—this gives the plant a quick nutrient boost while it adjusts. Avoid heavy fertilizing right after pruning, though; let the plant focus on regrowth first.
Keep your plant in bright, indirect light for the first week after pruning. Too much direct sun can stress the fresh cuts. You'll notice new growth appearing within 3-4 weeks—this is your sign that the pruning worked. If you see any yellowing leaves, it's just the plant adjusting; don't remove them unless they're brown and crispy.
⏰ Step 5: Maintain Year-Round with Light Trims
Throughout the growing season, do light maintenance pruning every 4-6 weeks to keep your Ruby Glow looking its best. Remove any spent flowers or leggy growth immediately—this prevents the plant from wasting energy. I like to pinch back the tips of new growth to encourage bushier habits; just use your fingers to squeeze off the top inch of growth.
In fall, do a final light prune to remove any dead or yellowing leaves. This keeps the plant tidy and prepares it for winter. Your Ruby Glow will reward you with vibrant foliage all year if you stay consistent with these light touch-ups. The key is to prune just enough to shape without overdoing it—your plant will thank you with lush, glowing leaves.
Tips & tricks for perfect Ruby Glow tea tree pruning
Here's what I learned the hard way after struggling with my own Ruby Glow's recovery—these tricks will keep your plant thriving.
Timing is Everything: The early spring timing in Step 1 is non-negotiable for best results. I once pruned mine in late winter when it was still dormant, and it took months to recover. Look for those tiny buds swelling at the stem tips—that's your perfect cue. If you miss spring, stick to early summer but avoid heavy cuts after mid-July, or you'll risk stunted growth before winter.
Cutting Technique Matters: When making those strategic cuts in Step 3, remember the 45-degree angle is crucial—it prevents water from pooling at the cut site, which can lead to rot. I used to make straight cuts and noticed more browning at the base. Also, always cut just outside a leaf node or strong lateral branch; this ensures the plant has energy reserves to grow new shoots from the right places.
Recovery Care Makes All the Difference: After pruning, the deep watering in Step 4 is essential, but don't overdo it—soggy soil can be just as harmful as drought. I found adding a balanced fertilizer like 10-10-10 to the water gives a gentle boost without overwhelming the plant. Keep that bright, indirect light for the first week, and you'll see new growth appearing within 3-4 weeks like clockwork.
Maintenance is Key: Those light trims every 4-6 weeks in Step 5 might seem minor, but they prevent the plant from becoming leggy. I used to go months between prunes, and my Ruby Glow would develop bare spots. The pinch-and-squeeze method for new growth works wonders—it encourages bushier habits without requiring sharp tools. Think of it as giving your plant a little haircut to keep it looking its best.
Pro Tips for New Zealand Tea Tree Ruby Glow
- Here's what I learned the hard way after struggling with my own Ruby Glow's recovery—these tricks will keep your plant thriving.
- Timing is Everything: The early spring timing in Step 1 is non-negotiable for best results.
- Cutting Technique Matters: When making those strategic cuts in Step 3, remember the 45-degree angle is crucial—it prevents water from pooling at the cut site, which can lead to rot.
Frequently asked questions
When is the best time to prune my Ruby Glow Tea Tree?
The ideal time to prune is late winter to early spring (August–September in NZ), just before new growth begins. This timing encourages healthy, vibrant foliage for the growing season. Avoid pruning in extreme heat or cold—mild weather ensures minimal stress on the plant. Pro tip: If you missed the window, a light trim in late autumn (May) still works!
How much can I trim without harming the plant?
You can safely remove up to 1/3 of the plant’s total growth per year without causing damage. For Ruby Glow, focus on shaping rather than heavy cuts—aim to open up the center for airflow and light penetration. Avoid over-pruning (more than 25% in one go), as this can stress the tree and reduce its ruby-red hue.
Why isn’t my Tea Tree’s foliage as vibrant after pruning?
Dull or faded foliage often signals nutrient deficiency, over-pruning, or poor light. Ensure your Ruby Glow gets at least 6 hours of sunlight daily and fertilize with a balanced, slow-release fertilizer (like 10-10-10) in spring and autumn. If the color still fades, check for pests (like scale insects) or root-bound conditions.
Can I propagate my Ruby Glow Tea Tree from cuttings?
Take 4–6 inch semi-hardwood cuttings in late spring or summer, dip them in rooting hormone, and plant in a mix of perlite and peat. Keep the soil moist (not soggy) and place in bright, indirect light. Roots should form in 4–8 weeks. Pro tip: Use a plastic bag to create a humid microclimate!
How do I protect my Tea Tree in winter?
Ruby Glow is hardy but benefits from light protection in harsh winters. If temps drop below 10°F (-12°C), wrap the tree in burlap or use a frost cloth. Avoid heavy mulch around the base—2–3 inches of organic mulch is enough. Prune damaged branches in early spring to encourage new growth.
What’s a good alternative if my Ruby Glow isn’t thriving?
If your Ruby Glow struggles with your climate, consider these low-maintenance, vibrant alternatives:
- Leptospermum ‘Red Damask’ – Similar ruby hues, slightly more drought-tolerant.
- Westringia ‘Red Rocket’ – Compact, evergreen, and thrives in coastal areas.
- Coprosma ‘Purple Haze’ – Dark foliage with year-round color.
Wrapping up and next steps
Mastering the art of pruning your New Zealand Tea Tree (Leptospermum scoparium) for that coveted Ruby Glow foliage is totally within reach—you’ve got this! 🌿 With the right tools, timing, and techniques, you’ll keep your plant lush, vibrant, and full of life year-round.
Remember, consistency is key, and a little patience goes a long way.
Ready to take the next step? Grab your pruners and schedule that first trim—your Tea Tree’s dazzling future starts with you! Need a refresher? Bookmark this guide and revisit it before your next session. Happy pruning! ✂️💖