
How To
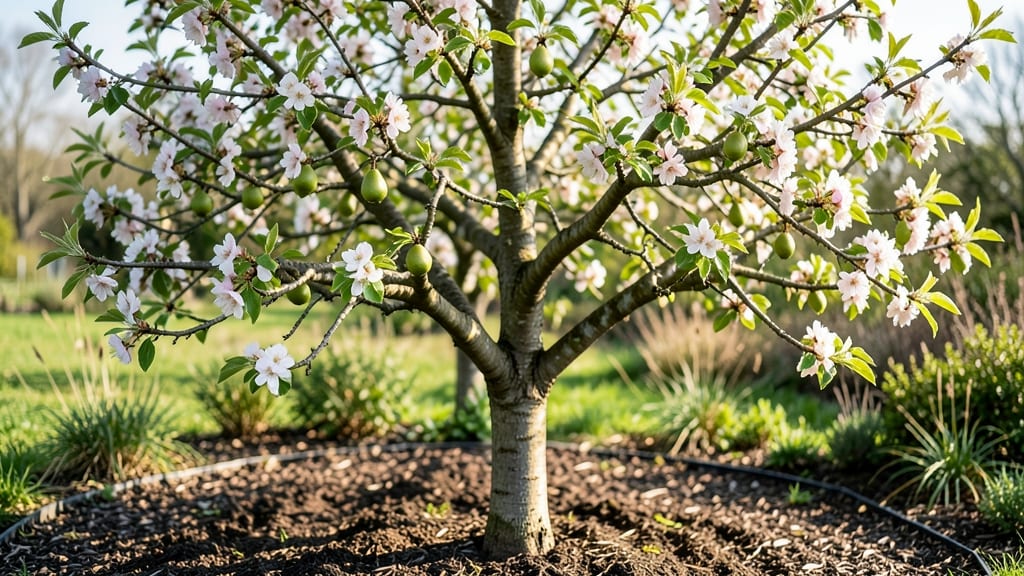
Transforming a pear tree 🍐 blossom into fruit isn’t just about patience—it’s about understanding the hidden triggers that turn petals into pears.
Picture this: your tree bursts with delicate white blooms in spring, but by summer, you’re left with empty branches. That’s not bad luck—it’s often a missed pollination step. Without the right conditions, those blossoms simply drop away, leaving you wondering what went wrong.
Here’s the good news: with the right timing, a few simple care tweaks, and an eye for detail, you can double—or even triple—your harvest.
I’ll walk you through the science behind pollination, the key moments that make or break fruit set, and the common mistakes that sneak up on even experienced gardeners.
By the end, you’ll know exactly how to give your pear tree the best shot at a fruitful season, from the first bloom to the first ripe pear ready for picking.
How pear tree blossoms develop into fruit: the science of pollination
Every spring, your pear tree (Pyrus spp.) transforms into a spectacular display of blossoms, but not all those flowers will become fruit. The journey from pear tree blossom to fruit hinges on a delicate biological process called pollination.
Without it, those blooms will drop off, leaving you with empty branches. Understanding this process helps you create the ideal conditions for a bountiful harvest.
The magic begins when pear tree flowers open in early spring, revealing their reproductive parts. Each flower contains both male and female organs, but many pear varieties require cross-pollination—meaning pollen from one tree must fertilize another.
This is where bees, wind, and even gardeners play a crucial role in turning blossoms into fruit.
Did you know? Some pear varieties, like 'Bartlett' or 'Anjou', are self-pollinating, but they produce far more fruit when planted near compatible varieties. Even self-pollinating trees benefit from bee activity, which increases fruit set and quality.
Let's break down the pollination process in pear trees, from flower formation to fruit development, so you can troubleshoot issues and maximize your harvest.
🌱
| Stage | Process | Key Factors | Timeframe |
|---|---|---|---|
| Blossom Formation | Flowers emerge in clusters, revealing male and female parts. | Sunlight, temperature, tree health | Late winter to early spring |
| Pollination | Pollen transfers from male to female parts via bees, wind, or manual aid. | Bee activity, wind, compatible varieties | 3-7 days after bloom |
| Fertilization | Pollen reaches ovules, triggering fruit development. | Pollen viability, temperature stability | 7-14 days post-pollination |
| Fruit Set | Small fruits form; some blossoms drop if pollination fails. | Nutrient availability, weather conditions | 2-4 weeks after bloom |
| Fruit Development | Fruits grow and mature; thinning may be needed. | Water, sunlight, thinning timing | 6-8 weeks post-set |
| Harvest Readiness | Pears ripen; stems detach easily. | Color change, softness, scent | Late summer to fall |
After pear tree blossoms open, they remain receptive to pollen for about 3-7 days. During this window, bees are the most effective pollinators, but wind can also carry pollen between trees.
If your tree lacks nearby pollinators, you may need to hand-pollinate using a small brush to transfer pollen from one flower to another.
Once pollination occurs, the flower’s ovules develop into tiny fruits. However, not all fertilized flowers will stay on the tree—some naturally drop off to redirect the tree’s energy toward fewer, larger pears. This process is called fruit thinning, and it’s essential for producing high-quality fruit.
If you notice excessive blossom drop within the first two weeks, it could signal poor pollination, nutrient deficiencies, or environmental stress. Check for signs like small, undeveloped fruits or drooping blossoms, which often indicate failed pollination or insufficient nutrients like nitrogen or boron.
Healthy fruit development begins when you see tiny pearlets forming on the branches. These should grow steadily over 6-8 weeks, turning from green to their mature color.
If fruits remain small or fail to swell, it may be time to thin the fruit to ensure the remaining pears reach full size.
One common misconception is that more blossoms mean more fruit. In reality, overcrowded fruit leads to smaller, lower-quality pears. Pruning and thinning are key to maximizing fruit quality and size. Aim to leave 4-6 inches between developing fruits to encourage optimal growth
5 Key pollination triggers to maximize your pear tree harvest
If your pear tree blossoms appear stunning but fail to produce fruit, you're not alone—this happens when pollination triggers aren't met. The good news? With the right approach, you can double your harvest by understanding and implementing these 5 key pollination triggers.
From planting timing to manual assistance, each step plays a critical role in turning those delicate white and pink blossoms into juicy pears.
Pollination success hinges on three main factors: timing, environmental conditions, and active intervention. Pear trees rely on bees, wind, or even cross-pollination between varieties to set fruit. When these elements align, your tree will reward you with a bountiful harvest.
Let's explore the practical steps you can take right now to optimize pollination and ensure your blossoms develop into fruit.
Align blossoming with peak pollinator activity by planting bare-root trees in early spring (after last frost) or container trees in late winter.
Plant bee-friendly flowers like lavender, thyme, or clover near your tree to attract pollinators during blossom season.
On rainy or windless days, use a soft paintbrush to transfer pollen between blossoms if bees are scarce.
Ensure warm, sunny days (60°F+) during blossoming—cool or wet weather can delay pollination.
Use neem oil or bee-attracting sprays (like garlic-based solutions) to boost pollinator activity without harming them.
Timing your pear tree planting is the first critical step. Most varieties blossom in late spring, so planting bare-root trees in early spring (after the last frost) ensures they're established and ready to pollinate when bees are most active.
If you’re planting container-grown trees, do it in late winter to give roots time to adapt before blossoming season. This alignment between root establishment and flowering sets the stage for successful pollination.
Companion planting is a game-changer for pear tree pollination. Bees and other pollinators are drawn to lavender, thyme, clover, and marigolds, which you can plant in a 3-foot radius around your tree.
These flowers provide early-season nectar and create a pollinator-friendly environment. Avoid using pesticides during blossoming season, as they can kill beneficial insects and disrupt pollination entirely. Even organic sprays should be used sparingly.
When weather conditions like cool temperatures or heavy rain limit pollinator activity, manual intervention becomes essential. On calm, dry days, use a soft paintbrush to gently transfer pollen from one blossom to another.
Focus on open flowers (those with exposed stamens) and repeat the process every 2-3 days during peak blossoming. This method mimics natural pollination and can significantly increase fruit set, especially for self-pollinating varieties like Bartlett or Anjou.
Weather plays a decisive role in pear tree pollination. Ideal conditions include warm, sunny days (60°F+) with light winds to help pollen disperse. If your area experiences prolonged rain or cold snaps during blossoming, consider setting up a small greenhouse or row cover to protect flowers until conditions improve.
Additionally, mulching around the tree base helps regulate soil temperature, creating a more stable environment for pollinators.
Finally, organic sprays can supercharge pollinator activity without harming the environment. A neem oil spray (diluted to 1 tsp per gallon of water) applied 2 weeks before blossoming can attract bees while deterring pests.
Alternatively, a garlic-based spray (1 chopped garlic bulb per gallon of water) not only repels pests but also enhances pollinator presence. Always apply sprays in the early morning to avoid harming bees that are actively foraging.