
Trees
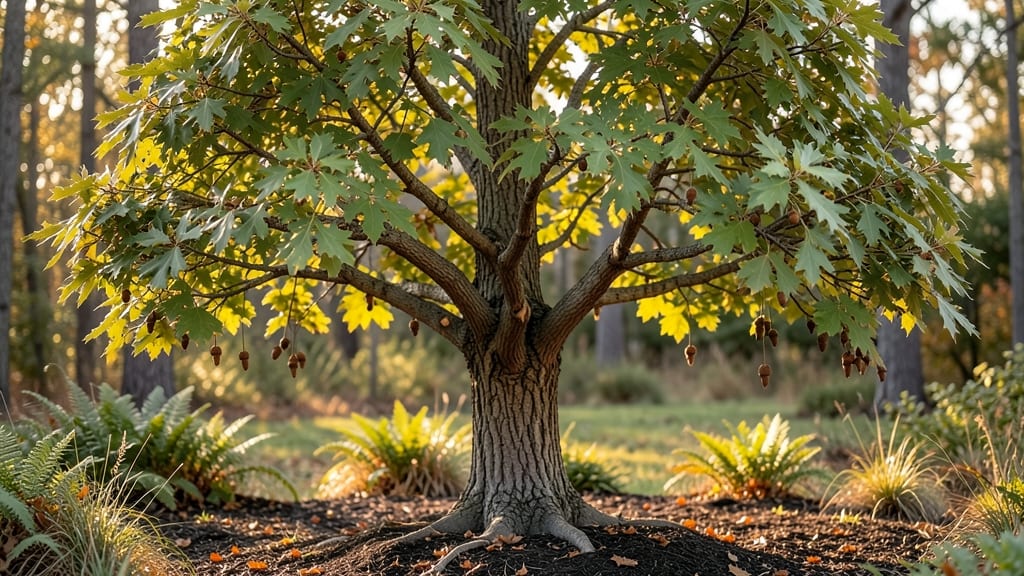
Growing pin oak tree acorns into sturdy seedlings is like unlocking a secret to future shade—if you crack the cold-stratification code. ✨ My first attempt failed because I skipped the chilling step, but after three tries, I finally got reliable sprouts that now tower over my backyard.
The key isn’t just planting; it’s mimicking nature’s timing to break dormancy and coax those tiny roots to life.
You’ll need fresh acorns (harvested in fall), a moist paper towel or peat moss, a sealed bag, and patience—this process takes 3-4 months before you even plant them. The cold stratification trick works because pin oaks need winter’s chill to trigger germination.
Skip it, and you’ll wait years (or never see) those first green shoots poking through the soil.
By spring, you’ll have strong seedlings ready for transplanting, their leaves unfurling under bright light. The payoff? A future tree that outshines store-bought saplings—hardy, drought-resistant, and perfect for urban landscapes. Just watch for acorn weevils (tiny pests) and keep soil evenly moist during those first critical weeks.
Works best in zones 5-9, but adapt the timing if you’re in warmer areas—just adjust the cold stratification period. Whether you’re restoring a forest or adding curb appeal, these seedlings grow into majestic oaks with minimal fuss once they establish. Let’s get those acorns sprouting!
📚 In This Guide
- What you need
- Instructions
- Tips and common mistakes
- Wrapping up and next steps
What you need
- ● Mature pin oak acorns: 10–20 fresh, plump acorns (harvested in fall, not dried or shriveled).
- ● Cold-stratification setup: 1–2 breathable containers (e.g., paper towels or moistened peat moss, 1–2 cups per container).
- ● 1 ziplock bag or airtight container (for moisture retention).
- ● 1 refrigerator (set to 35–40°F / 2–4°C) or cold frame.
- ● Planting supplies: 1–2 seedling pots (4–6 inches deep, with drainage holes).
- ● Well-draining potting mix (e.g., 50% peat moss, 30% perlite, 20% sand).
- ● 1 spray bottle (for gentle watering).
- ● Outdoor space: A sunny spot (6+ hours of light daily) or grow lights for indoor seedlings.
- ● Acorn storage: A labeled jar or envelope for saving extra acorns.
- ● Fertilizer: Balanced 10-10-10 or slow-release granules (1 tsp per pot).
- ● Humidity dome or plastic wrap (to retain moisture during germination).
- ● pH testing kit (to check soil pH, ideal range: 5.0–6.5).
- ● Transplanting tools: Small trowel, gloves, and mulch (for outdoor planting).
Step-by-step guide to growing pin oak tree acorns
Cold-stratifying acorns unlocks their potential—here's how to turn those fall finds into sturdy saplings.
🌱 Step 1: Collect and Prepare Fresh Acorns
Harvest acorns in late fall when they've fallen naturally—they'll have higher viability than those still on the tree. Look for plump, intact acorns with no cracks or holes (pests like weevils ruin germination). Rinse them gently in lukewarm water to remove debris, then let them air-dry completely for 24 hours on a paper towel.
I always sort them by size—larger acorns (about ¾ inch long) germinate most reliably. Store them in a paper bag (not plastic) in the fridge for 3-4 months to complete cold stratification. This mimics winter's natural chilling period, breaking dormancy. Don't skip this—skipping stratification means waiting years for germination, if it happens at all.
💧 Step 2: Soak and Plant for Germination
After cold stratification, soak the acorns in warm water for 12-24 hours to soften the outer shell. You'll see tiny cracks forming—that's your signal they're ready. Plant them ½ inch deep in a moist, well-draining mix (equal parts peat moss and sand works well). I use small pots (3-4 inches wide) for each acorn since they don't like crowding.
Keep the soil evenly moist (not soggy) by misting lightly every 2-3 days. Place the pots in a shady spot indoors—65-75°F is ideal. Germination can take 4-12 weeks, so patience is key. You'll know it's working when a small white root pushes through the soil first, followed by the sprout.
☀️ Step 3: Provide Light and Gradual Outdoor Transition
Once the sprout reaches 2-3 inches tall, move it to a bright, indirect light spot (like a north-facing window). Pin oaks need full sun eventually, but young seedlings burn easily. After 4-6 weeks of strong growth, it's time to harden off—place the pot outside in partial shade for 2-3 hours daily, gradually increasing exposure over 10-14 days.
You'll notice the leaves darken and thicken as they adapt. Transplant outdoors in early spring after the last frost, choosing a sunny, well-drained spot with 6+ feet of space for mature growth. Water deeply after planting to settle the soil around roots—this prevents air pockets that stunt growth.
✂️ Step 4: Maintain Young Saplings for Strong Growth
Pin oaks grow slowly at first, so focus on consistent care. Water deeply once a week (or when the top 2 inches of soil feel dry)—young trees hate soggy roots but also suffer from drought stress. Mulch around the base with 2-3 inches of organic mulch (like wood chips) to retain moisture and regulate soil temperature.
Prune only to remove dead or crossing branches in late winter. Avoid heavy pruning—pin oaks develop their distinctive lobed leaves and asymmetrical shape naturally. In 3-5 years, you'll see the first acorns forming, but full maturity (and reliable acorn production) takes 15-20 years. The wait is worth it for that iconic oak shade and wildlife benefits.
Tips & tricks for perfect pin oak tree acorn sprouts
Turn those fall acorns into thriving saplings with these pro tips that save time and boost success rates.
Selection Tip: The 24-hour drying period after harvesting is your first quality control step. Spread acorns on a clean paper towel in a single layer—this prevents mold from trapped moisture. I use a mesh screen or baking rack to ensure airflow on all sides. If you're in a humid climate, extend drying to 36 hours to prevent rot during stratification.
Cold Stratification Strategy: That 3-4 month fridge storage period might feel long, but consistency matters more than exact timing. I place acorns in a sealed paper bag with a damp paper towel to maintain humidity (not soggy). Check them monthly—if any smell musty or develop mold, remove them immediately. The goal is to mimic winter's natural chilling, and your fridge's steady 35-40°F does the job perfectly.
Germination Watch: The 12-24 hour soak is your signal to plant, but don't rush. When tiny cracks appear in the shell, that's your cue—those cracks mean the seed's ready to break through. I plant mine immediately after soaking, using a toothpick to make a small hole if the shell resists. The ½-inch depth is crucial—too shallow and they dry out, too deep and they struggle to push through.
Pro Tips for Pin Oak Tree Acorns
- Turn those fall acorns into thriving saplings with these pro tips that save time and boost success rates.
- Selection Tip: The 24-hour drying period after harvesting is your first quality control step. Spread acorns on a clea...
- Cold Stratification Strategy: That 3-4 month fridge storage period might feel long, but consistency matters more than...
Frequently asked questions
Got questions about growing pin oak tree acorns? You’re not alone! Here are answers to the most common queries to help you succeed with your cold-stratified sprouts.
How long does cold stratification need to last for pin oak acorns?
Pin oak acorns typically require 90–120 days of cold stratification in moist peat or a refrigerator (34–40°F). Consistency is key—avoid freezing or thawing cycles, which can damage the embryo. For best results, start stratification in late fall and plant outdoors in early spring after the last frost.
When is the best time to plant stratified pin oak acorns outdoors?
Plant your cold-stratified acorns as soon as the soil warms to 60°F+ in spring (usually March–April in most regions). Choose a sunny, well-draining spot with slightly acidic soil (pH 5.0–6.5). Avoid planting too early—cool soil can slow germination, while waiting too long may reduce viability.
What if my pin oak acorns aren’t sprouting after stratification?
Don’t panic! Try these fixes:
- Check moisture: Acorns must stay damp (not soggy) during stratification.
- Test viability: Cut open a few—if the kernel is brown or moldy, they’re likely dead.
- Extend stratification: Some acorns need up to 150 days; try another 30 days in the fridge.
- Soak before planting: Soak dry acorns in water for 24 hours to rehydrate.
Can I grow pin oak trees from acorns indoors first, then transplant?
Yes! Start acorns in small pots with sterile potting mix and keep them in a warm, bright spot (70–75°F) until sprouts emerge (2–4 weeks). Once seedlings are 2–3 inches tall, harden them off outdoors for a week before transplanting. This method gives you more control over early growth and reduces transplant shock.
Are pin oak acorns safe for wildlife if I leave some uneaten?
Pin oak acorns are a nutritious food source for squirrels, deer, and birds. If you’re not harvesting all acorns, consider leaving some for local wildlife—just ensure you’re not over-harvesting from a single tree to avoid stressing it. Pro tip: Collect acorns from the ground in fall before critters cache them!
Wrapping up and next steps
Growing pin oak tree acorns into thriving saplings is all about patience, preparation, and a little science! By mastering cold stratification and providing the right conditions, you’ll unlock the secret to reliable sprouts that will one day shade your garden with beauty.
Whether you’re a seasoned gardener or a curious beginner, these steps will set you up for success—so roll up your sleeves and get ready to nurture the next generation of pin oaks! 🌱
Ready to take the next step? Start with a small batch of acorns this fall, experiment with your stratification method, and observe what works best in your climate. Before you know it, you’ll be transplanting sturdy young trees into your landscape—and that’s a reward worth growing for! 🌳✨