
Planting
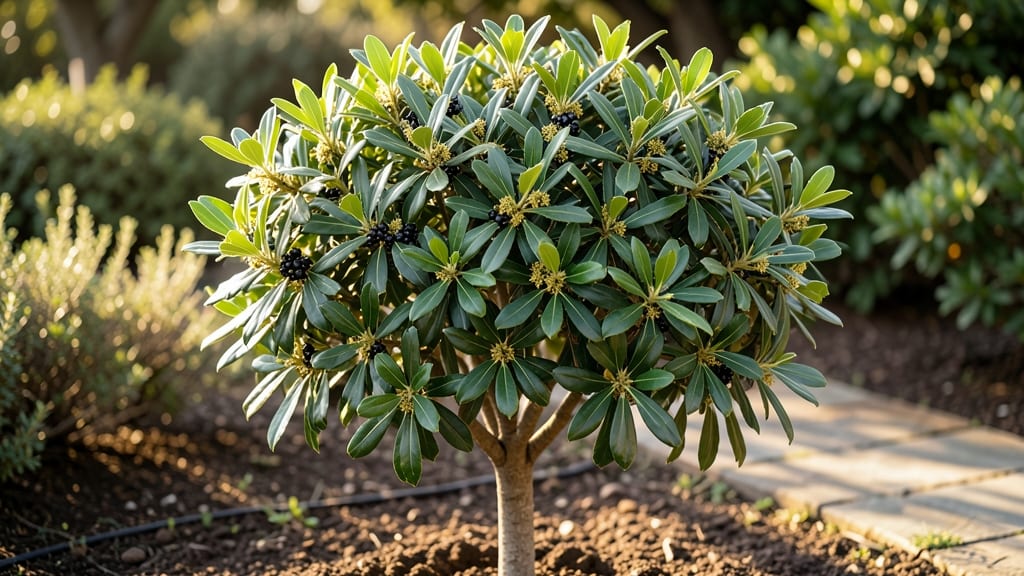
Planting a bay tree means year-round fragrance that turns your kitchen or garden into a Mediterranean escape. 🌿 I’ve grown mine for years, and it thrives with almost no fuss—just sunlight, well-draining soil, and occasional pruning to keep it shaped.
The glossy leaves smell like fresh herbs, and the tree itself becomes a statement piece whether indoors or out. The key is mimicking its natural Mediterranean habitat: bright, indirect light and soil that drains fast but stays slightly moist.
Most people overwater, thinking more is better, but bay trees hate soggy roots. A south-facing window or a sheltered spot in your yard works perfectly, and it’s surprisingly adaptable once established. By winter, your tree will still look vibrant, releasing that familiar herbal scent when brushed. The best part?
You can harvest leaves anytime for cooking, and the tree keeps growing for decades with minimal effort. Just avoid heavy pruning in late fall—it stresses the plant before winter. Whether you start from seed or a cutting, the process is straightforward.
I’ll walk you through both methods, plus how to troubleshoot common issues like yellowing leaves or pests. Let’s get your bay tree growing!
📚 In This Guide
- What you need
- Instructions
- Tips and common mistakes
- Wrapping up and next steps
What you need
- ● Bay tree plant: 1 healthy bay tree sapling (preferably Laurus nobilis, the true bay laurel)
- ○ Optional: Start from seeds (soak overnight for faster germination)
- ● Container (if indoor): 1 large pot (12–18 inches in diameter) with drainage holes
- ● Material: Terracotta or ceramic (preferred for breathability)
- ● Soil: 3–5 gallons of well-draining potting mix (or garden soil + perlite/sand for outdoor planting)
- ● pH preference: Slightly acidic to neutral (6.0–7.0)
- ● Fertilizer: Balanced, slow-release fertilizer (10-10-10 or organic options like compost)
- ● Quantity: 1–2 tablespoons mixed into soil at planting
- ● Tools: 1 trowel or small shovel
- ● 1 pair of pruning shears (sterilized with rubbing alcohol)
- ● 1 watering can or hose with a gentle spray nozzle
- ● Mulch: 1–2 inches of organic mulch (e.g., shredded bark) to retain moisture
- ● Support: A small stake or trellis (if growing outdoors in windy areas)
- ● Humidity tray: For indoor plants (pebbles + water under the pot)
- ● Plant food: Liquid fertilizer (e.g., fish emulsion) for monthly feeding
- ● Gloves: To protect hands during pruning or soil handling
Step-by-Step instructions for growing a thriving bay tree plant
Here’s how to grow a fragrant bay tree that keeps giving—with minimal fuss.
🌱 Step 1: Select and Prepare Your Bay Tree Plant
Start with a healthy 2-3 year old bay tree from a nursery, preferably one grown from a cutting rather than a seedling. These mature faster and retain the signature fragrance. Choose a container that’s at least 12-14 inches wide and deep—bay trees have deep roots and need room to spread. If planting outdoors, pick a spot with 6+ hours of sunlight daily and well-draining soil.
Fill the container or hole with a mix of 50% potting soil and 50% compost to give roots a nutrient boost. Avoid garden soil—it compacts easily and suffocates roots. Tap the container gently to settle the mix, then water it thoroughly until moisture runs out the drainage holes. This ensures the soil is evenly moist before planting.
☀️ Step 2: Plant and Position for Optimal Growth
Remove the bay tree from its nursery pot and gently loosen the roots if they’re circling. Place it in the prepared hole or container, ensuring the root ball sits 1 inch below the rim of the container or ground level. Fill the remaining space with soil, pressing lightly around the base to eliminate air pockets. Water again to help the soil settle and encourage root contact.
Position your bay tree where it gets morning sun and afternoon shade if you’re in a hot climate. Too much direct afternoon sun can scorch the leaves, especially in summer. If growing indoors, place it near a south- or west-facing window. You’ll know it’s happy when new leaves emerge with a glossy, deep green hue.
💧 Step 3: Water and Maintain Consistent Moisture
Bay trees prefer moderate moisture—water when the top 1-2 inches of soil feel dry to the touch. Overwatering is the biggest mistake; it causes root rot and yellowing leaves. In containers, water every 5-7 days in warm weather, adjusting for indoor humidity levels. Outdoors, mulch around the base with 2-3 inches of organic mulch to retain moisture and regulate soil temperature.
Here’s the thing—bay trees are drought-tolerant once established, but they hate soggy soil. If the leaves start curling or dropping, you’re either underwatering or overwatering. Stick your finger in the soil to check before watering. A light misting of the leaves occasionally helps maintain that signature fragrance, but avoid soaking them.
✂️ Step 4: Prune Lightly to Encourage Bushiness
Bay trees need minimal pruning, but a little shaping keeps them lush and fragrant. Prune in late winter or early spring before new growth begins. Use clean, sharp pruners to trim back any leggy branches or overgrowth. Cut just above a leaf node or bud to encourage new growth. Avoid heavy pruning—bay trees respond best to gentle shaping.
If you’re growing your bay tree indoors, prune to maintain its size and shape. You can also propagate new plants from cuttings taken during pruning. Dip the cut end in rooting hormone and place it in a small pot with moist potting mix. Keep it in bright, indirect light until roots form—usually in 4-6 weeks. This is how I’ve expanded my collection over the years!
🌿 Step 5: Fertilize and Protect for Year-Round Growth
Feed your bay tree with a balanced, slow-release fertilizer in early spring and again in mid-summer. I use a 10-10-10 or 20-20-20 formula diluted to half-strength to avoid burning the roots. Fertilizing encourages lush foliage and keeps the fragrance strong. If you notice yellowing leaves, it might be a sign of over-fertilizing—cut back and flush the soil with water.
Watch for pests like spider mites or aphids, which love the sap of bay trees. Wipe leaves with a damp cloth occasionally to remove dust and deter pests. If you spot any, treat with neem oil or insecticidal soap. With proper care, your bay tree will reward you with fragrant leaves year-round—perfect for cooking or simply enjoying the scent.
Tips & tricks for perfect bay tree plant care
A few simple tricks will help your bay tree thrive with minimal fuss—no green thumb required.
Root Room Matters: In Step 1, don't skimp on container size. Those deep roots need space to spread—think of it like giving your tree a cozy apartment, not a shoebox. I've seen bay trees in undersized pots struggle for years, while the same variety in proper 12-14 inch containers grows twice as fast. The key is that 1 inch below the rim placement—this prevents water pooling and root suffocation.
Sunlight Strategy: When positioning your bay tree in Step 2, remember this: morning sun is your friend, but afternoon sun can be brutal. If you notice leaves curling or turning yellow, it's probably getting too much direct afternoon heat. Move it to a spot with partial shade during peak sun hours, especially in summer. For indoor growers, a south-facing window with afternoon shade works perfectly.
Watering Wisdom: The 5-7 day watering schedule in Step 3 is perfect for most climates, but here's what nobody tells you—your bay tree's thirst changes with seasons. In winter, you might stretch that to 10-14 days, while summer heat could mean weekly watering. Always check those top 1-2 inches of soil first. Pro tip: Use your finger to test moisture—it's more accurate than guessing.
Pruning Payoff: That late winter/early spring pruning window in Step 4 is your chance to shape your tree while encouraging new growth. I like to make my cuts just above a leaf node—this creates a natural growth point. And here's a secret: those pruned branches can become new plants! Just dip in rooting hormone and pot up. It's like getting free bay trees while you prune!
Pro Tips for Bay Tree Plant
- A few simple tricks will help your bay tree thrive with minimal fuss—no green thumb required.
- Root Room Matters: In Step 1, don't skimp on container size. Those deep roots need space to spread—think of it like g...
- Sunlight Strategy: When positioning your bay tree in Step 2, remember this: morning sun is your friend, but afternoon...
Frequently asked questions
Got questions about growing and caring for your bay tree plant?
You’re not alone! Here are some of the most common concerns—plus quick, practical answers to keep your fragrant evergreen thriving year-round.
How fast does a bay tree grow, and how big can it get?
A bay tree grows at a moderate pace, adding about 12 inches per year under ideal conditions. Left unpruned, it can reach 15–20 feet tall (or wider if grown as a shrub). For indoor plants, expect slower growth (6–12 inches/year) due to limited light. Pro tip: Prune regularly to control size and encourage bushier growth!
Can bay trees survive winter outdoors, or do they need protection?
Bay trees are hardy to USDA zones 8–11, meaning they tolerate mild winters. However, in colder zones (<32°F), they’ll need winter protection—like wrapping the trunk with burlap or moving potted plants indoors. Young trees or container-grown specimens are most vulnerable. Pro tip: Mulch the base with straw or leaves for extra insulation!
What’s the best way to propagate a bay tree at home?
Propagation is easy! Take 4–6 inch cuttings from healthy, non-flowering stems in spring/summer. Remove lower leaves, dip in rooting hormone (optional), and plant in moist potting mix. Keep humidity high (use a plastic bag!) and place in bright, indirect light. Roots should form in 4–8 weeks. Pro tip: Water lightly to avoid rot—overwatering is the #1 killer!
Why are my bay tree leaves turning yellow or dropping?
Yellow leaves usually signal overwatering or poor drainage. Let the top inch of soil dry out between waterings, and ensure the pot has drainage holes. Other culprits? Pests (spider mites, aphids) or nutrient deficiency. Check undersides of leaves for pests and fertilize lightly in spring/summer. Pro tip: Wipe leaves with neem oil to deter pests naturally!
Can I use bay leaves from my plant for cooking, or do I need to buy them?
Fresh bay leaves from your plant are more flavorful than dried store-bought ones. Simply harvest leaves before they flower (young leaves are tenderest), wash gently, and use whole or chopped in soups, stews, and marinades. Pro tip: Remove leaves after cooking—they’re not edible!
Wrapping up and next steps
Growing a bay tree plant is a rewarding way to enjoy year-round fragrance and low-maintenance beauty in your garden or home. 🌿 With its aromatic leaves, culinary uses, and minimal pruning needs, it’s the perfect addition for both beginners and seasoned gardeners.
Whether you’re harvesting leaves for cooking or simply admiring its lush greenery, your bay tree will thrive with just a little care—and the payoff is delightful!
Ready to get started? Pick your favorite variety, gather your supplies, and plant your bay tree today! For extra tips, check out our FAQ section or explore more planting guides to keep your green thumb growing.