
Planting
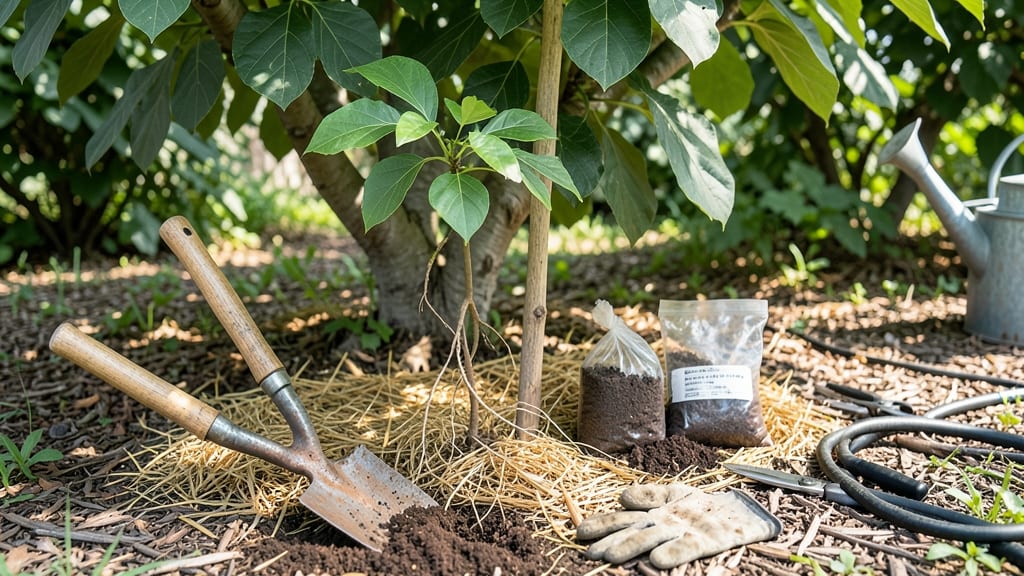
A pawpaw tree planting guide gives you a taste of the tropics right in your temperate backyard. 🌱 The secret to success starts with the right location—these trees thrive in partial shade and moist, well-drained soil, making them perfect for understory planting or along woodland edges.
I planted mine in a spot where morning sun warms the soil but afternoon shade keeps roots cool, and within two years, I had my first small fruit. You'll need a few simple supplies: a shovel, compost, and patience.
Pawpaw seeds need stratification—a cold period to break dormancy—so if you're starting from seed, plant them in fall or soak them in water for 3 days before spring planting.
For saplings, dig a hole twice as wide as the root ball but no deeper, then mix in compost to give those roots a nutrient boost. Once planted, keep the soil consistently moist but not soggy—think of it like a well-watered forest floor.
Mulch around the base to retain moisture and suppress weeds, and watch for new growth in spring. The first few years focus on establishing strong roots; fruit won’t appear until the tree is 4-6 years old, but the journey is worth it.
Common mistakes? Overwatering or planting in full sun. Pawpaws hate dry roots and scorching heat, so choose wisely. In cooler climates (zones 5-9), they’re surprisingly hardy—just give them protection from late frosts.
With the right care, you’ll be harvesting custard-like fruit by midsummer, and your neighbors will wonder how you grew something so exotic.
📚 In This Guide
- What you need
- Instructions
- Tips and common mistakes
- Wrapping up and next steps
What you need
- ● Pawpaw seeds: 3–5 viable seeds (harvested from fresh, ripe fruit or purchased from a reputable supplier). Pro tip: Soak seeds in warm water for 24 hours to speed up germination!
- ○ Growing containers (optional for starting indoors): 2–3 small pots (4–6 inches deep) with drainage holes, or a seed tray with individual cells.
- ● Well-draining potting mix: 1–2 bags of a high-quality, peat-based or coconut coir mix (avoid heavy clay soil).
- ● Outdoor planting site: A location with partial shade to full sun, 6+ feet of space for mature growth, and well-draining, slightly acidic soil (pH 5.8–6.5).
- ● Mulch: 2–3 inches of organic mulch (e.g., wood chips or straw) to retain moisture and regulate soil temperature.
- ● Watering can or hose: With a gentle spray nozzle for seedlings.
- ● Garden gloves: To protect your hands while handling soil and seeds.
- ● Seedling heat mat: To maintain soil warmth (70–80°F) for faster germination.
- ● Grow lights: If starting indoors before the last frost (12–16 hours of light daily).
- ● Soil pH test kit: To ensure your planting site meets the ideal acidity level.
- ● Transplanting tools: A small shovel or trowel for moving seedlings outdoors.
- ● Fertilizer (low-nitrogen, balanced): Such as 10-10-10 or compost tea, applied sparingly after planting.
- ● Tree supports (stakes or cages): For young trees in windy areas (install after planting).
Step-by-step instructions for planting pawpaw trees from seed
Here's how I turn tiny pawpaw seeds into thriving trees that produce fruit in just a few years.
🌱 Step 1: Collect and Stratify Seeds Properly
Harvest pawpaw seeds from ripe fruit in late summer or early fall. Remove the seeds from the pulp and clean them thoroughly. The key to successful germination is cold stratification—mimicking winter's natural process. Place the seeds in a sealed plastic bag with slightly damp sand or peat moss, then refrigerate for 90-120 days at 35-40°F. I like to label the bag with the date and variety if known.
Check the seeds monthly to ensure they remain moist but not soggy. If you forget to refrigerate, don't panic—some seeds will still germinate, though results may be slower. The stratification period prepares the seed to break dormancy when spring arrives, setting the stage for strong root development.
🌱 Step 2: Prepare the Planting Site
Pawpaws thrive in moist, well-drained soil with partial shade to full sun. Choose a location with 4-6 hours of sunlight daily and protection from harsh afternoon winds. The ideal spot mimics their native understory habitat—think dappled light under larger trees or along forest edges. Dig a hole twice as wide as the seedling's root ball but no deeper.
Amend the soil with a mix of compost and peat moss if your native soil is heavy clay or sandy. Pawpaws dislike soggy roots but need consistent moisture, so avoid low-lying areas where water pools. A slight mound in the hole helps with drainage while keeping the seedling's roots in a moist environment.
🌿 Step 3: Plant and Water the Seedlings
Once the stratification period ends, plant the seeds ½ inch deep in the prepared hole. Space multiple seedlings 15-20 feet apart to allow for mature tree size and proper airflow. Pawpaws grow slowly at first, so patience is key—you won’t see significant height growth until the second or third year. Water the soil thoroughly after planting to settle it around the seeds.
Keep the soil consistently moist but not waterlogged for the first 2-3 months. You’ll know moisture is right when the top inch of soil feels damp to the touch. Mulch around the base with 2-3 inches of organic mulch to retain moisture and regulate soil temperature. Avoid piling mulch against the stem—leave a 2-inch gap to prevent rot.
☀️ Step 4: Provide Care for the First Growing Season
Young pawpaw seedlings need protection from extreme weather. In their first year, focus on keeping the soil moist and providing partial shade if temperatures exceed 85°F. A simple shade cloth or dappled sunlight from nearby trees works well. Pawpaws are cold-hardy once established, but young trees benefit from winter mulch to insulate roots during freezing temperatures.
Fertilize lightly in early spring with a balanced 10-10-10 fertilizer to encourage root and leaf growth. Too much fertilizer can burn tender roots, so follow the package instructions for young trees. You’ll notice new leaves emerging in 4-6 weeks—this is your sign that the seedling is thriving and ready for gradual exposure to more sunlight.
⏰ Step 5: Monitor Growth and Prepare for Fruit Production
Pawpaw trees typically take 5-7 years to bear fruit, but you’ll see steady growth each year if conditions are right. By year three, your tree should reach 4-6 feet tall with a sturdy trunk. Prune any dead or crossing branches in late winter to improve airflow and fruit production. Pawpaws are self-pollinating, but planting multiple trees increases your chances of a bountiful harvest.
Watch for signs of pests like pawpaw bud moths or fungal diseases in humid climates. A quick spray of neem oil or copper fungicide can prevent issues before they start. Once fruit appears, it’s ready to harvest when it turns a deep yellow-green and yields slightly to gentle pressure—usually in late summer or early fall.
Tips & tricks for perfect pawpaw tree planting
Real talk: Growing pawpaws from seed isn't just about planting—it's about patience and precision. Here's what nobody tells you about getting those seeds to sprout and thrive.
Stratification Success: The 90-120 day cold treatment is non-negotiable for breaking dormancy. I've tried planting fresh seeds without stratification, and while some do germinate, they take twice as long and often produce weaker seedlings. Keep a small notebook next to your fridge to track moisture levels—damp (not wet) is key. If condensation forms inside the bag, open it for 10 minutes to air out.
Soil Science: Pawpaws hate soggy feet but need consistent moisture. That's why I always create a slight mound in the planting hole—it keeps roots elevated during heavy rains while still allowing moisture to reach down. For heavy clay soils, mix in compost and peat moss until the soil feels like a well-wrung sponge. You'll know you've got it right when water drains within 20 minutes after watering.
First-Year Protection: Those 4-6 hours of sunlight are crucial, but young seedlings can't handle the midday sun when temperatures hit 85°F. I use a simple shade cloth (50% block) during peak hours in summer, then gradually remove it as the tree matures. The goal is to harden off seedlings slowly—think of it like sunbathing after winter hibernation.
Patience Pays Off: Don't be discouraged if your tree only grows a few inches in its first year. Pawpaws are slow starters, and by year three you should see 4-6 feet of growth if conditions are right. I mark each year's growth with a paint dot on the trunk—it's amazing how much you'll learn about your tree's progress just by looking back at those marks.
Pro Tips for Pawpaw Tree Planting Guide
- Real talk: Growing pawpaws from seed isn't just about planting—it's about patience and precision. Here's what nobody ...
- Stratification Success: The 90-120 day cold treatment is non-negotiable for breaking dormancy. I've tried planting fr...
- Soil Science: Pawpaws hate soggy feet but need consistent moisture. That's why I always create a slight mound in the ...
Frequently asked questions
Got questions about growing pawpaws? You’re not alone—this tropical-tasting native fruit has a few quirks! Here are answers to the most common pawpaw planting puzzles to set you up for success.
How long does it take for a pawpaw tree to bear fruit?
A pawpaw tree planted from seed can take 5–10 years to produce fruit, while grafted trees may fruit in 3–5 years. Patience is key—these trees grow slowly but reward you with delicious fruit once established!
Can pawpaw trees survive in cold climates?
Yes! Pawpaws thrive in USDA Zones 5–9, tolerating temperatures down to -20°F with proper care. Choose cold-hardy varieties like ‘Sunflower’ or ‘Pennsylvania Golden’ for northern gardens. Mulch heavily in winter for extra protection.
How do I tell if my pawpaw seed is viable?
Fresh pawpaw seeds (dark brown, plump) have the highest germination rate. Test viability by soaking seeds in water for 24 hours—sinkers are likely viable, while floaters may not sprout. Store seeds in damp peat moss in the fridge until planting.
Do pawpaw trees need cross-pollination to produce fruit?
Yes! Pawpaws require two different trees for cross-pollination by bees or wind. Plant at least two trees 50–100 feet apart to ensure fruit set. If space is limited, consider a single grafted tree with multiple cultivars.
What’s the best way to troubleshoot pawpaw tree problems?
Common issues include:
- Yellow leaves → Often due to powdery mildew or nutrient deficiency. Prune for airflow and fertilize with compost.
- No fruit → Check for pollinators, proper spacing, or young age. Grafted trees may fruit faster.
- Pests (e.g., zebra swallowtail caterpillars) → Handpick larvae or use neem oil if infestations are severe.
Wrapping up and next steps
Planting a pawpaw tree is a rewarding journey that combines patience, care, and a touch of tropical magic—right in your backyard! 🌱 From selecting the perfect seeds or saplings to nurturing them through the seasons, every step brings you closer to harvesting those delicious, custard-like fruits.
With the right location, soil, and a little love, your pawpaw tree will thrive and flourish.
Now that you’re armed with all the know-how, take the next step—whether it’s breaking ground this spring or marking your calendar for fall planting. Happy growing! 🌟