
Pruning
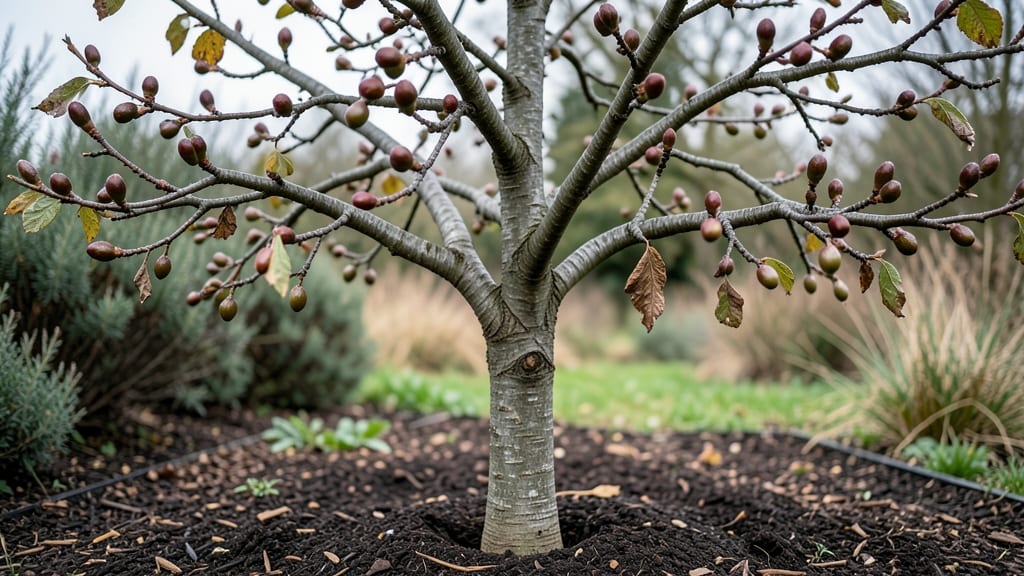
Those tiny pear tree buds hold the secret to next summer’s harvest—prune them right now, while they’re still dormant. 🌱 I’ve learned the hard way that winter pruning isn’t just about shaping the tree; it’s about waking up buds to produce stronger branches and heavier fruit.
One wrong cut can mean fewer blooms in spring, while the right approach transforms your tree into a fruit-bearing powerhouse.
The key is timing: prune during dormant season (late winter to early spring) when the tree isn’t actively growing. Look for plump, reddish-brown buds—these are healthy and ready for action.
Diseased buds (shriveled, black, or oozing) need removal to prevent rot from spreading. A sharp pair of pruners and a clean workspace are all you need to get started.
By focusing on bud placement—cutting just above a bud at a 45-degree angle—you’ll encourage new growth in the right direction. Within weeks, you’ll see fresh green shoots pushing through, signaling your tree is on track for a bountiful harvest.
The best part? Proper pruning now means less cleanup later and more pears on your table.
Works for both European and Asian pear varieties, and adapts to container-grown trees too. Whether you’re a first-time pruner or refining your technique, these steps will give your tree the strong start it deserves. Let’s get those buds ready for spring—your future fruit depends on it.
📚 In This Guide
- What you need
- Instructions
- Tips and common mistakes
- Wrapping up and next steps
What you need
- ● Pruning shears: Sharp, bypass-type shears (for cuts up to ½ inch thick). Must be clean and sanitized to prevent disease spread. Quantity: 1 pair.
- ● Loppers: For thicker branches (½ to 1½ inches). Look for ratcheting or anvil-style (avoid dull edges). Quantity: 1 pair.
- ● Pruning saw: Bow or folding saw for branches over 1½ inches. Quantity: 1.
- ● Disinfectant: 70% isopropyl alcohol or a 10% bleach solution (1 part bleach to 9 parts water). Quantity: Small spray bottle or rag.
- ● Gloves: Heavy-duty, cut-resistant (e.g., leather or reinforced fabric). Quantity: 1 pair.
- ● Safety glasses: To protect against debris. Quantity: 1 pair.
- ● Tarp or drop cloth: To collect fallen branches and debris. Size: Large enough to cover the work area.
- ○ Permanent marker: For labeling cuts (optional but helpful). Quantity: 1.
- ● Pruning sealant: Tree wound paint (controversial—only use if your tree is prone to disease or pests). Quantity: Small bottle.
- ● Step ladder or stool: For reaching higher branches safely. Height: Adjustable, 6–10 feet.
- ● Work gloves with grip: For extra comfort during long sessions.
- ● Notebook or app: To sketch your tree’s structure or track cuts (e.g., iNaturalist or Gardenate).
- ● Rake: For clearing debris after pruning. Size: Medium (24–36 inches).
- ● Timing: Prune during the dormant season (late winter/early spring, before buds swell). Check your USDA Hardiness Zone for exact timing!
- ● Weather: Choose a dry, calm day (no rain forecasted for 24 hours).
- ● Tree health: Avoid pruning if your tree is stressed, diseased, or infested—consult a local arborist first.
- ● Safety: Ensure the area around the tree is clear of pets, kids, and bystanders.
How to prune pear tree buds for healthier spring growth
Dormant season is the perfect time to shape your pear tree—here’s how to do it right.
🌿 Step 1: Inspect the Tree for Damaged or Diseased Branches
Start by examining the entire tree for any branches that are dead, broken, or showing signs of disease like cankers, discoloration, or oozing sap. I like to run my hands along the bark while looking for anything that stands out—this helps me spot issues I might miss from a distance. Focus on branches that are thinner than a pencil or those growing inward toward the center of the tree.
Use sharp pruning shears to make a clean cut just outside the branch collar, the swollen area where the branch meets the trunk. Avoid cutting into the trunk itself—this can introduce infections. If you find a branch that’s completely dead, cut it back to a healthy bud or lateral branch. You’ll know it’s the right spot when you see fresh, green tissue just beneath the cut.
✂️ Step 2: Thin Out Crowded Branches for Better Airflow
Next, focus on thinning out the canopy to improve airflow and sunlight penetration. Look for branches that cross or rub against each other—they’ll eventually create wounds that invite pests and disease. I usually start at the top of the tree and work my way down, removing about 20-30% of the smaller branches in each section.
When thinning, aim to keep the strongest, healthiest branches that are evenly spaced. Cut branches back to their point of origin or to a lateral bud that’s facing outward. This encourages the tree to grow in a more open shape, which reduces the risk of fungal issues and makes future pruning easier. If you’re unsure which branch to keep, I’ve found that the one with the most vigorous buds usually wins.
☀️ Step 3: Shape the Tree for Optimal Light Exposure
Now it’s time to shape the tree to ensure it gets plenty of sunlight. Pears thrive in full sun, so you’ll want to create an open center that allows light to reach the inner branches. Start by removing any branches that grow straight upward—these are called "waterspouts" and compete with the main structure for energy.
For the remaining branches, aim to create a natural, balanced shape. Cut back any branches that are growing too close to the ground or those that are too long and leggy. A good rule of thumb is to leave the strongest, most outward-facing buds. You’ll see the tree’s natural form emerge as you make these cuts—trust your eye and avoid over-pruning in one area. The goal is to leave a framework that looks like it belongs there.
⏰ Step 4: Clean Up and Apply Protective Measures
Once you’ve finished pruning, it’s time to clean up. Sterilize your pruning tools with rubbing alcohol to prevent spreading disease between cuts. Remove all the debris from the ground beneath the tree—this helps reduce the risk of fungal spores overwintering and infecting fresh cuts.
Finally, apply a thin layer of dormant oil or pruning sealant to larger cuts (over ½ inch in diameter) to protect them from pests and disease. For smaller cuts, the tree’s natural healing process will take care of it. Water the base of the tree deeply to help it recover from the pruning stress. You’ll notice new growth emerging from the buds in early spring, signaling that your efforts paid off.
Tips & tricks for pruning pear tree buds
Here's what nobody tells you about shaping your pear tree the right way—these tricks will make all the difference for next year's fruit.
Branch Identification: When inspecting branches in Step 1, look for the "thumbprint" test—press your thumb into the bark. If it springs back, the branch is healthy; if it stays indented, it's dead. Also check for "witches' brooms" (dense clusters of small branches), which often signal pest issues like pear psylla. Remove these completely to prevent infestation.
The 20-30% Rule: In Step 2, that 20-30% thinning target isn't arbitrary—it's the sweet spot for maintaining your tree's vigor without shocking it. For young trees (under 5 years), stay closer to 20%; mature trees can handle up to 30%. Remember to remove branches from the inside outward to create that open center, which prevents fungal diseases like silver leaf fungus that thrive in dense canopies.
Bud Selection Strategy: During Step 3, when choosing which buds to keep, prioritize those facing outward and slightly upward—they'll grow into branches that form the tree's natural vase shape. Avoid buds facing inward or downward, as these will create crowded growth. Pro tip: The buds closest to the trunk are usually the strongest, so give them preference when making your cuts.
Cleanup Protocol: After pruning, don't just rake up the debris—bag it and remove it from your property immediately. Those fallen branches and leaves can harbor fungal spores and pests that will reinfect your tree. I also recommend burning any diseased wood rather than composting it, as pathogens can survive in compost piles.
Pro Tips for Pear Tree Buds
- Here's what nobody tells you about shaping your pear tree the right way—these tricks will make all the difference for...
- Branch Identification: When inspecting branches in Step 1, look for the "thumbprint" test—press your thumb into the b...
- The 20-30% Rule: In Step 2, that 20-30% thinning target isn't arbitrary—it's the sweet spot for maintaining your tree...
Frequently asked questions
Got questions about pear tree buds and dormant-season pruning? You’re not alone! Here are some of the most common queries—plus straightforward answers to help you prune with confidence.
When is the best time to prune pear tree buds for spring growth?
The ideal window is late winter to early spring, just as buds swell but before new growth starts (typically February–March in most climates). Pruning too early risks frost damage, while waiting too long may stress the tree. Check your local frost dates for precision!
Should I remove all buds from my pear tree, or just some?
Never remove all buds—this kills the tree! Instead, prune to open the canopy, remove dead/diseased wood, and thin out competing buds (aim for 3–5 buds per spur). Focus on outward-facing buds to encourage airflow and fruit production.
My pear tree buds are black and mushy—what’s wrong?
Black, mushy buds often signal bacterial blight or silver leaf disease. Prune only in dry weather, sterilize tools with 70% rubbing alcohol, and remove infected branches below the bud. Disinfect cuts and avoid overhead watering to prevent spread.
Can I prune pear tree buds in fall instead of winter?
Fall pruning is risky—it can encourage late-season growth that’s vulnerable to frost. If you must prune in fall, do so 6–8 weeks before frost and limit cuts to structural shaping only. Winter pruning (dormant season) is always safer for pears.
How often should I prune my pear tree for optimal bud health?
Young trees (under 5 years) need annual pruning to establish shape. Mature trees (5+ years) benefit from light pruning every 2–3 years, focusing on dead wood, water sprouts, and crossing branches. Never prune more than 25% of the canopy in one year to avoid stress.
Wrapping up and next steps
Pruning your pear tree buds during dormancy is a game-changer for vibrant spring blooms and bountiful harvests! By following the right techniques—like timing, tool care, and strategic cuts—you’ll set your tree up for healthier growth, better air circulation, and fewer pests.
Remember, patience and precision pay off in the long run, so don’t rush the process.
Ready to transform your pear tree? Grab your tools, check the weather forecast, and schedule your pruning session this winter. Your future fruit will thank you! 🌱✂️